Introduction
In this tutorial we will show you how to trigger an Overlay into a menu item of your Divi site. In other tutorials we have showed you How to trigger an Overlay into a specific text, How to trigger an overlay in a button module and How to trigger and overlay into a section, row or any module.
Step 1: Go to Divi Overlays Posts
1. Go to WordPress dashboard
2. Open Divi Overlays CPT (Custom Post Type)
Step 2: Get Unique Overlays Menu ID
1. Copy the Unique Overlays Menu ID
This can be found in “Divi Overlays” Posts
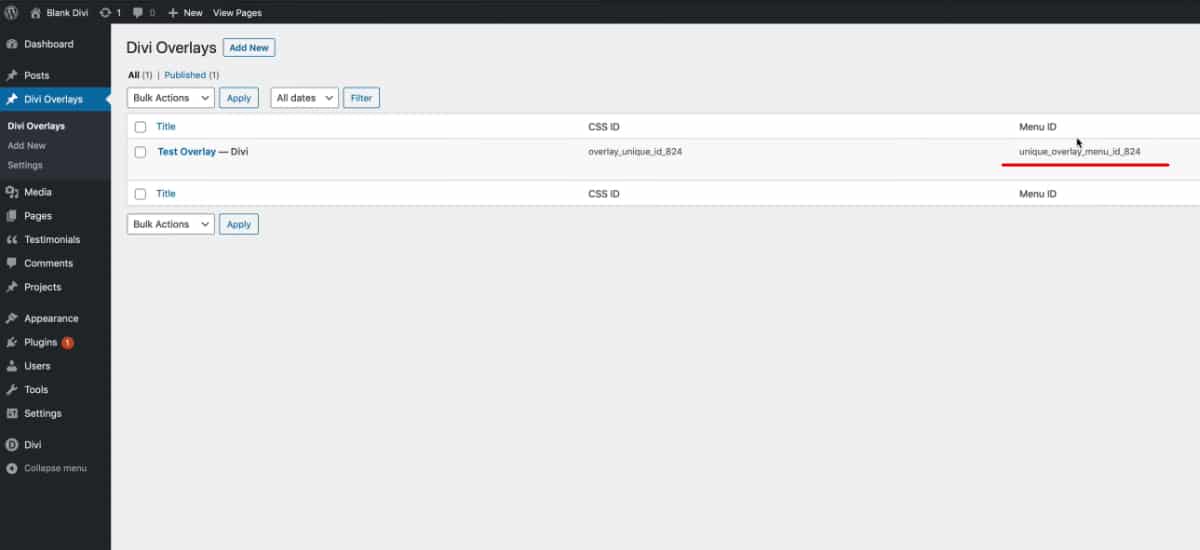
Or you can find it into each Divi Overlays post in Manual Triggers > Unique Overlays ID:
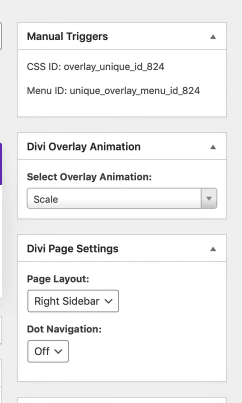
Step 3: Triggering Overlay into a Menu Item
Now it’s time to trigger the overlay into a menu item.
Go to Appearance > Menus
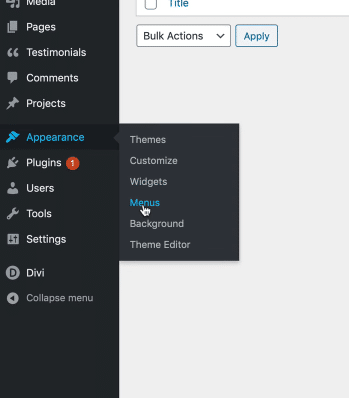
To trigger an overlay into a menu item, is necessary to have enabled Link Relationship (XFN) in the Screen options. If you don’t have it enable, please follow the next steps
1. In the menu dashboard go to Screen Options
2. Enable Link Relationship (XFN)
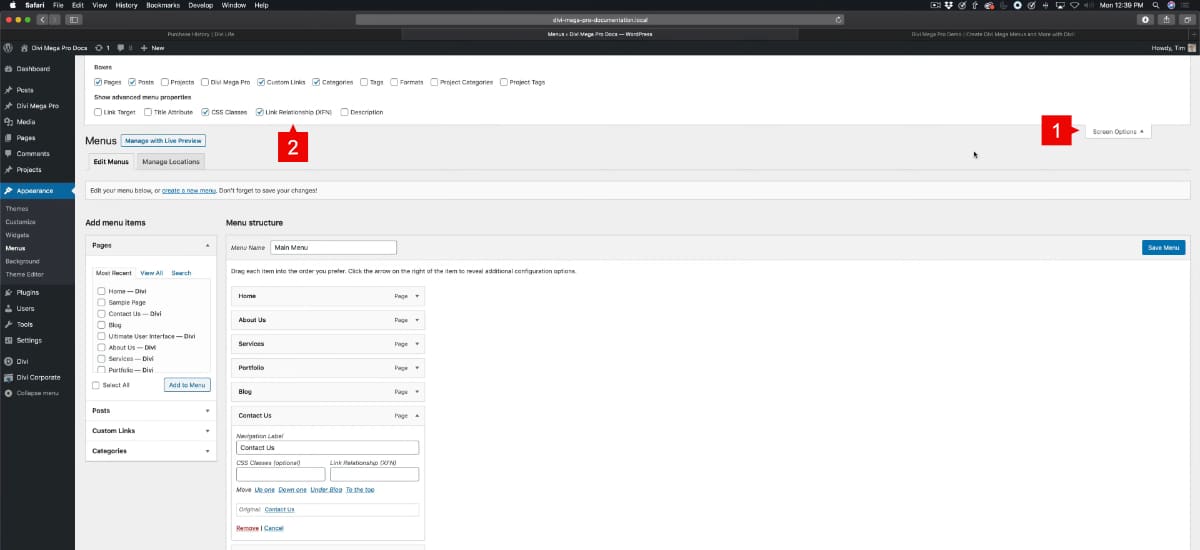
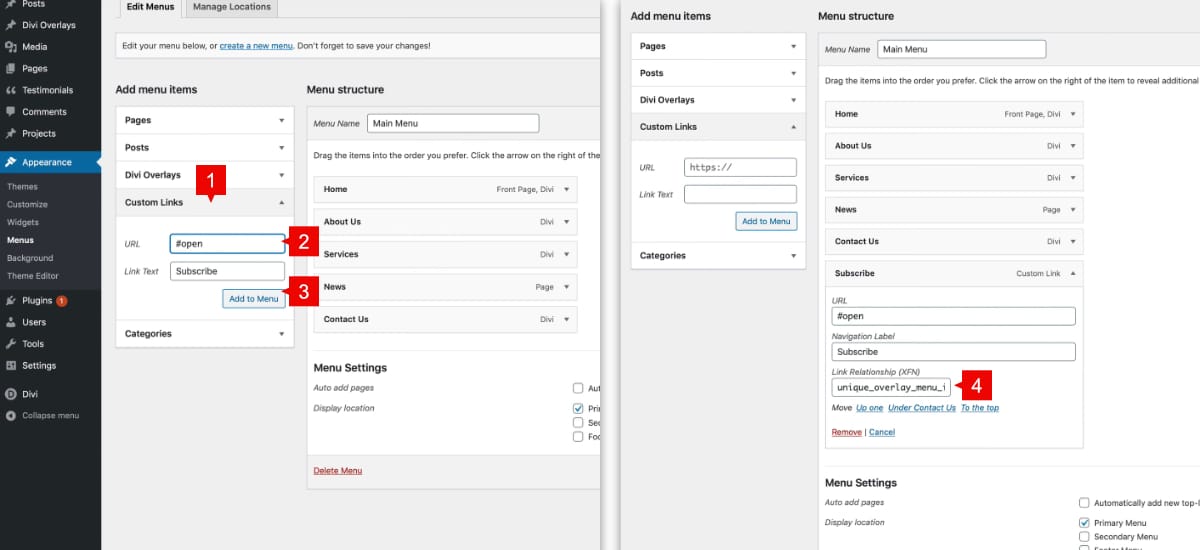
When you want to add an overlay for a menu item, this menu item should be a custom link.
1. Custom Links
2. Fill the content
- URL: #open
- Link Text: The text of your menu item
3. Add to menu
4. Once added the new menu item, go to the Link Relationship (XFN) field and paste the Unique Overlay Menu ID
Save changes and test your new menu item 😊
