How to Create a WooCommerce Mini Cart with Divi Mega Pro
Home » Docs » Divi Mega Pro » How to Create a WooCommerce Mini Cart with Divi Mega Pro
Introduction
With Divi Mega Pro, you can add a dropdown WooCommerce shopping cart to your menu as a mega menu. This is also known as a mini cart, shopping cart mega menu, or menu cart.
Here’s an example of a WooCommerce mini cart:
We could place the WooCommerce shopping cart shortcode inside of a Divi Mega Pro, however the shopping cart shortcode is designed to be placed on pages, and is too large for a small mega menu mini cart. So instead, we’ll be using the WooCommerce shopping cart widget which is the perfect size for a mini cart! Thanks to Divi, we can place any WordPress widget inside of Divi Mega Pro very easily. Follow the steps below to see how!
Step 1: Adding a new Widget for Cart
1. Go to Appearance > Widgets
2. Create a new Custom Widget Area. After Click “Create” button, you may need to refresh the page. 3. From the list of Widgets, Add the “Cart” Widget to the Custom Widget Area
Step 2: Go to Divi Mega Pro Posts
1. Go to WordPress dashboard
2. Open Divi Mega Pro CPT (Custom Post Type) 3. Go to your Divi Mega Pro post or create a new one
Step 3: Creating the Mini Cart Mega Menu in Divi Mega Pro
1. Add a new normal section and a row with 1 column.
2. Add a “Sidebar module” and select the Widget that you created before. 3. Set the width of the Mega Menu to 25%. If you don’t know how to set a custom width to the mega menu, you can follow this tutorial.
4. Trigger the Divi Mega Pro post into a Menu Item. If you don’t know how to trigger a Divi Mega Pro mega menu, you can follow this tutorial.
Additional settings
Since we use the Divi Modules, some settings will be needed. These settings could be done in the Module settings and via CSS. So:
Changin the width of the content in the Widget area This part is important.
Here you need to add some CSS to your desing in order to show the content in fullwidth. Without this snippet, it will show something like this:
So let’s fix it with a small CSS snippet!
1. Go to your Divi Mega Pro post.
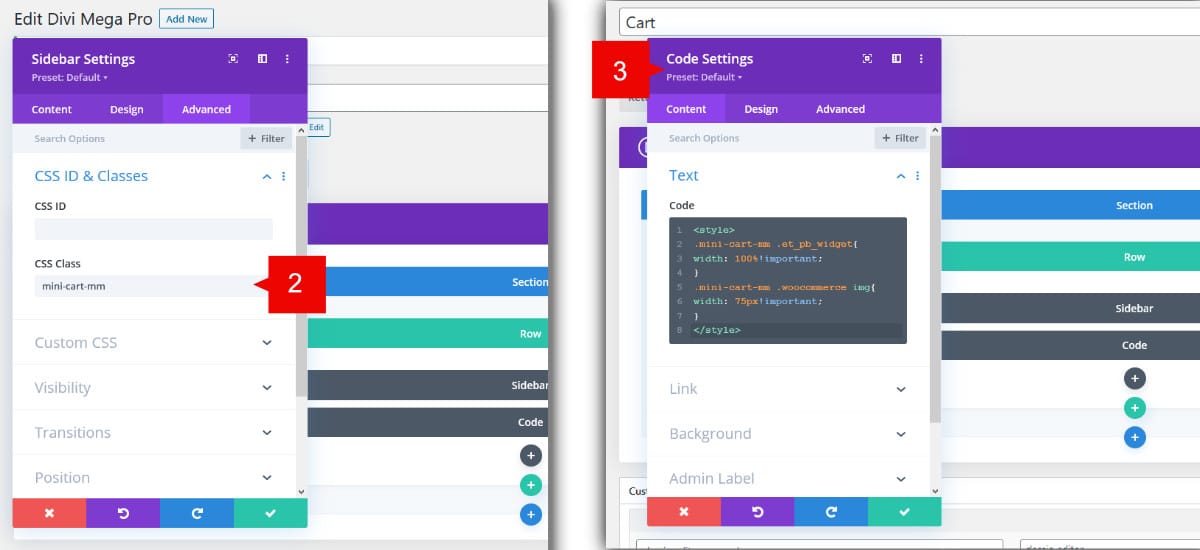
2. Go to the “Sidebar module” settings > Advanced tab > CSS ID & Classes > Add the CSS Class: mini-cart-mm 3. Add “Code Module” and paste this snippet: