Introduction
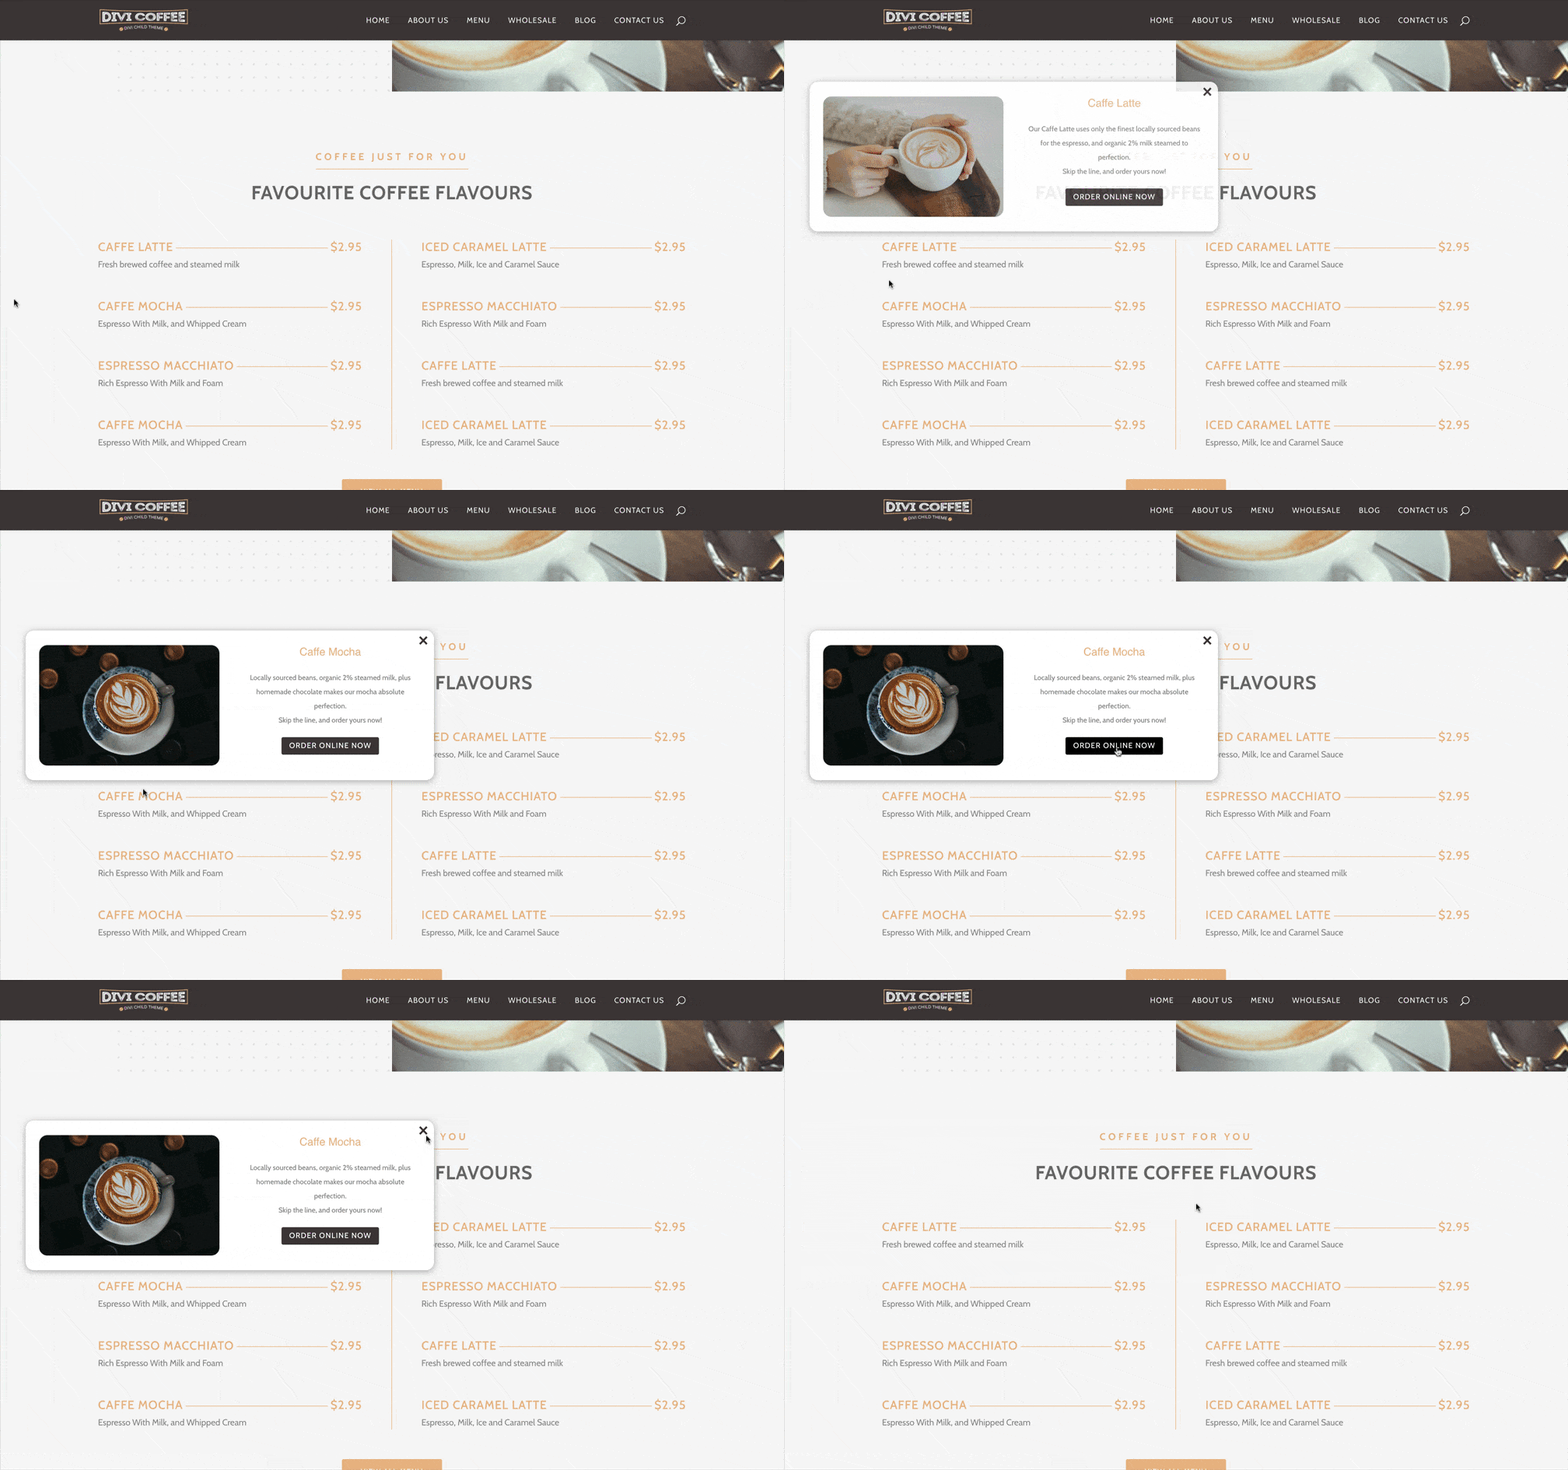
In this tutorial we will show you how to create Mega Tooltips, the awesome function of Divi Mega Pro to show content on hover in your Divi Modules.
Using the Divi Builder to create the content you want to show. Basically, this works as a Mega Menu, but using the sections, rows and modules of Divi.
Step 1: Adding a new Divi Mega Pro post
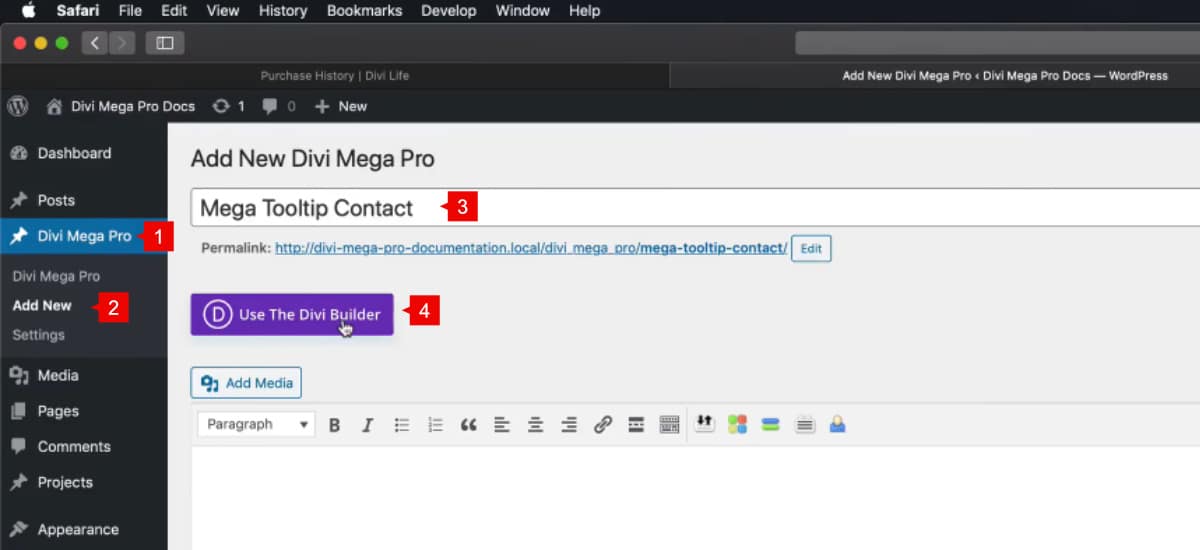
1. Go to Divi Mega Pro
2. Add new
3. Set a Title to the new post
4. Enable Divi Builder
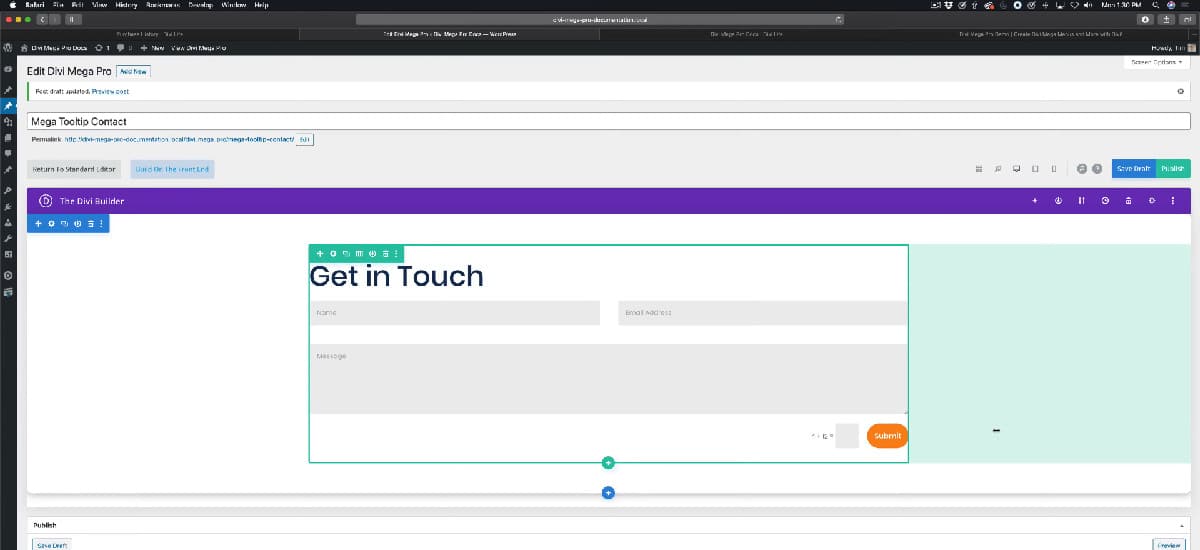
Now using the Divi Builder create your design as you want to show in your Tooltip.
But this is pretty giant for a tooltip, Add a Custom Width so the content showed on the tooltip will show correctly on our front end.
Add an Arrow for your tooltip is a great UX practice for your tooltips.
If you set the Exit Type on Click, we recommend Add a Close button.
For this tutorial, the mega tooltip have a Width of 700px with a custom Arrow and set the close type on hover.
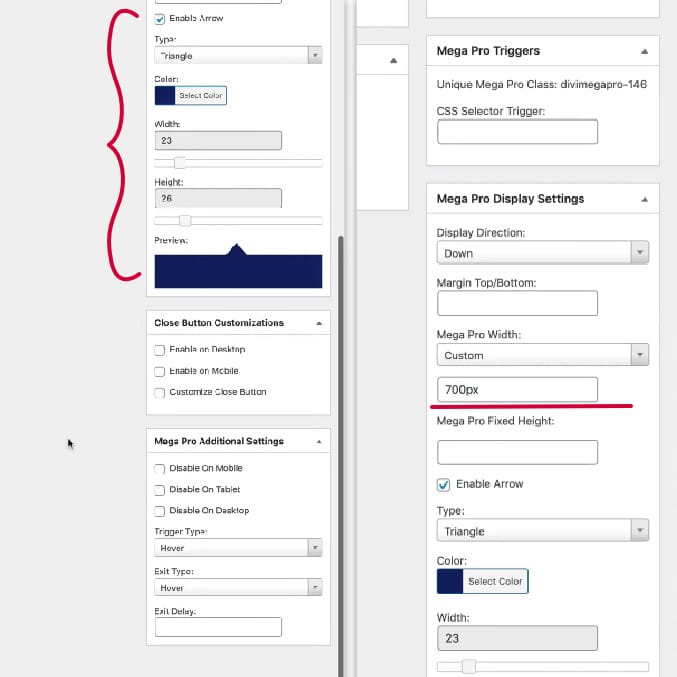
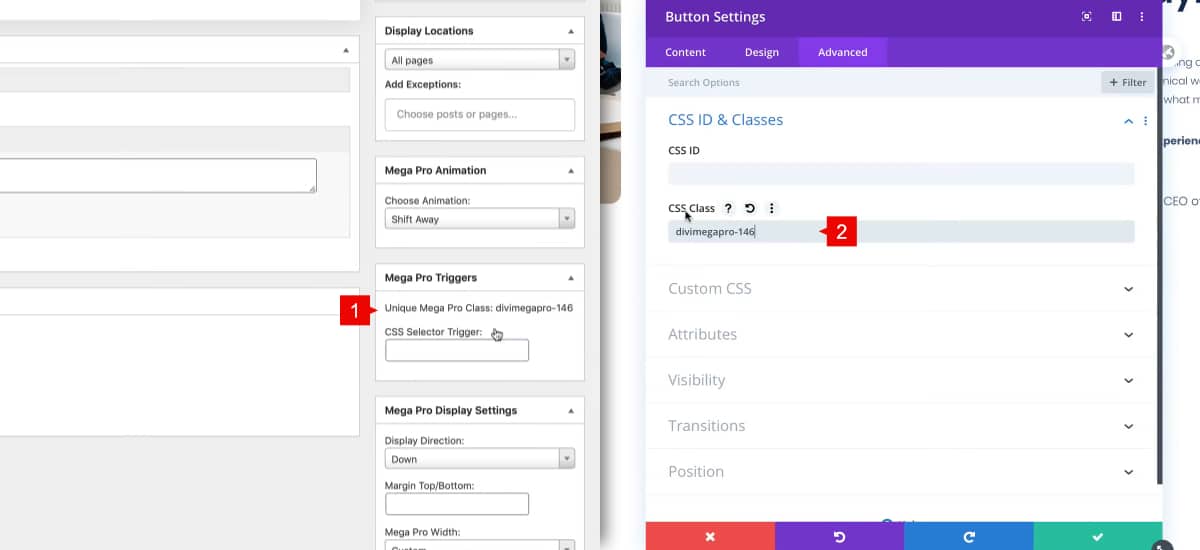
Publish your Divi Mega Pro post and copy your Unique Mega Pro Class.
Step 2: Trigger your Mega Tooltip
Once your Divi Mega Pro post is published, you can trigger it into any section, row or module into your Divi website.
1. Copy your Unique Mega Pro Class
2. Go to your Divi Module where you want to trigger your Tooltip and open settings > Advanced tab > CSS ID & Classes > CSS Class > Paste your Unique Mega Pro Class
3. Add an anchor link in the URL field. I.E.
#open
Save Changes and exit from the Divi Builder to see changes on front end.
Once saved, the Tooltip is ready to show on the front end.
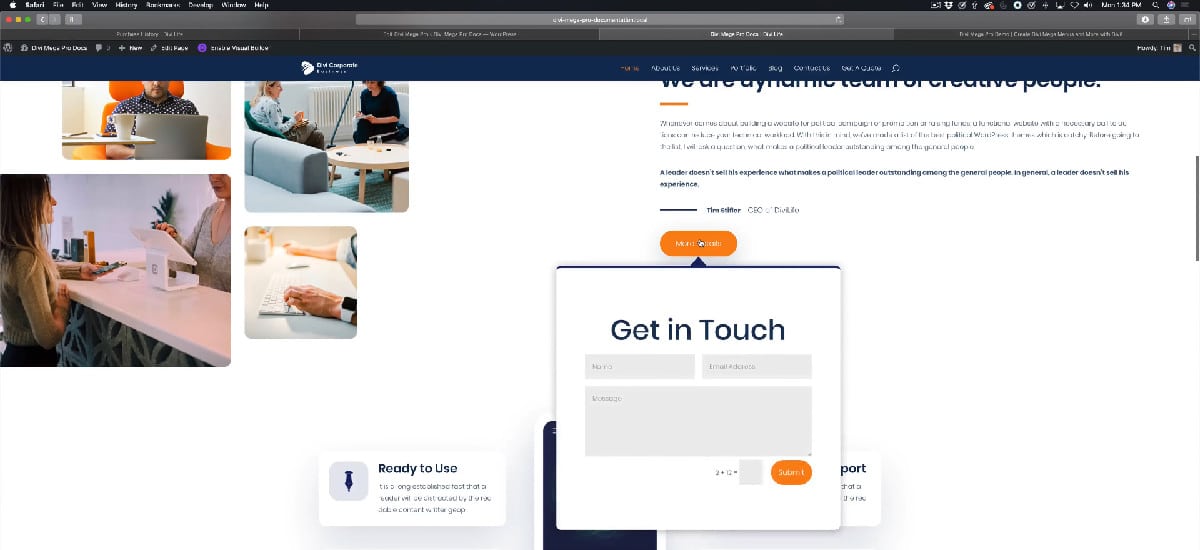
Following these steps, you will be able to create all the Mega tooltips you want with Divi Mega Pro. Off course, it’s totally responsive and works fine on mobile and tablet.
