
How to Add a Google Map to Divi Without Using the Divi Map Module or Google API
In this tutorial, I’m going to show you how to add a Google Map to Divi without using the Divi Map Module AND without needing a Google API!
Using the Divi Map module used to be extremely easy and didn’t require any extra steps outside of Divi.
However, that all changed when Google decided to start charging for use of their map API. Now there’s a lot of extra steps that need to be done in order to use Divi’s map module, or any other plugin or tool that uses Google’s map API.
But luckily there’s an easier way to quickly and easily add Google Maps to Divi WITHOUT having to go through all the extra steps of creating the API.
In most cases, the easy method will be sufficient. However, there are some instances, when you will want to go through the extra work of setting up the Google API.
Let’s quickly go through some of the situations when you will actually NEED to use the Divi Map module and the Google Maps API.
The Divi Map Module vs Google Map Embed in Code Module
When You Need to Use the Divi Map Module
- You want to add multiple markers/pins to the map
- You want to customize the text when a user clicks on the marker/pin
- You want to customize the controls such as mouse wheel zoom and draggable on mobile
- You want to customize the design including the look and feel of the map
When You Can Use a Google Map Embed in the Code Module
- You want to add a simple map to your page quickly and without the hassle!
As you can from the above, there’s definitely more options and customization ability with the Map module, but if you don’t need those options then the easy method I’m about to show you will more than do the trick!
How to Quickly and Easily Embed a Google Map using the Divi Code Module (easiest and quickest)
Using the Divi code module, we can embed a Google Map. This allows us to circumvent the need to set up the Google API (which is a huge hassle).
Step 1: Google Maps & Customizing the Embed
Go to maps.Google.com and search for the location you’d like to show in the map. This is pretty self-explanatory, but if you want to show just a city then type the city. But if you want to show a specific location then search for the specific location you’d like to show.
In my example, I’m going to type in Torchy’s Tacos, which is one of my favorite Taco spots in Austin, TX, where I lived for several years.
Once you have your location selected, you can click on the Share Button.

Then, click on the “Embed a Map” tab to see the map embed options.
From here you can customize how it will display on your site once it’s embedded. The options are limited, but you can:
-Change the Zoom by clicking the plus and minus button in the bottom right corner
-Change the position of the map by clicking and dragging it with your mouse
-Change to Satellite view by clicking the image in the bottom left corner
Once you have it fine-tuned, click on the “Copy HTML” button in the upper right corner.

Now let’s head over to Divi!
Step Two: Adding Your Google Map Embed Code to a Divi Code Module
Open up your page/post where you’d like to add the Google Map, and add a new Divi Code Module.
Tip: If you want your Map Module to be full width, then add a Full width section and the full width code module.
Now you can paste the copied HTML code from Google Maps into the code module, but don’t save the module just yet!

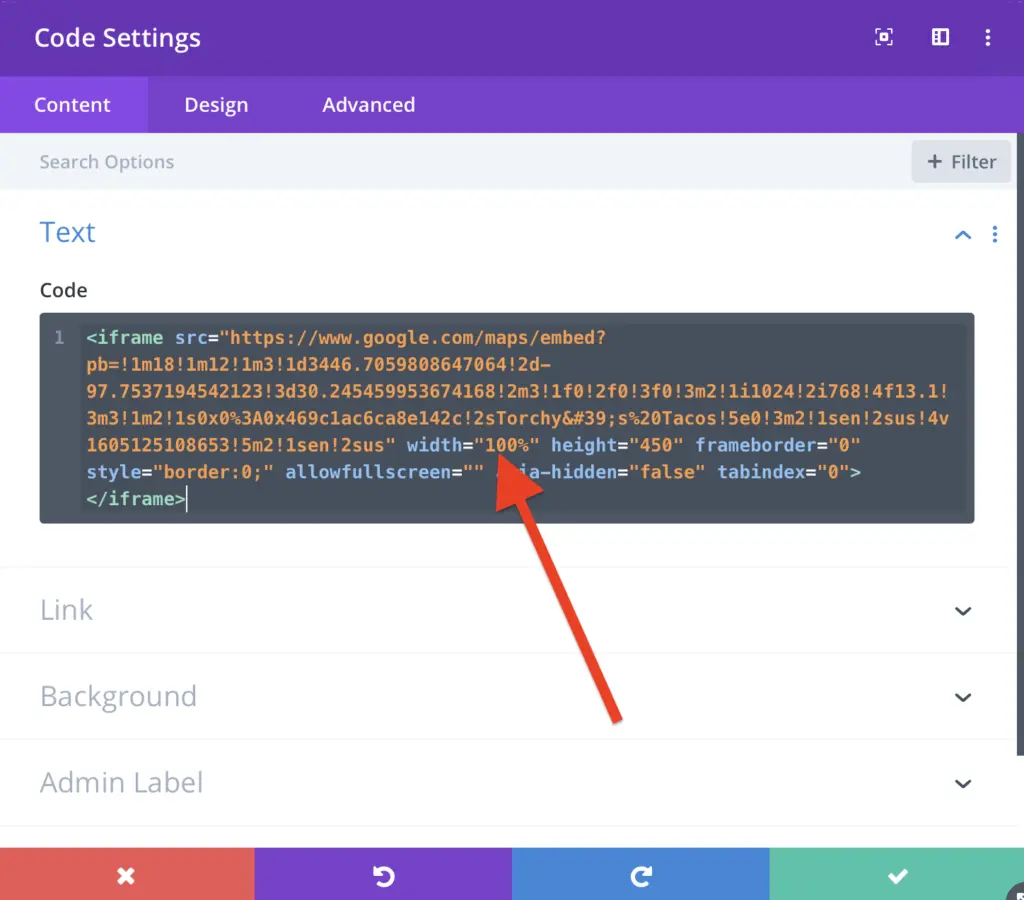
Before hitting save, we need to customize the width of the map. By default it sets it to 600 which is way too small for most cases.
Find the width=“600” text from within the embed code (you may need to drag your code module modal larger in order to see it better).
Then, change it to your desired width as shown in the screenshot below. For our purposes, we’re going to make it 100% so that it fills the entire section, but you can of course make the width whatever you’d like in percentage or pixels.
If you do want it full width, you’ll likely need to change the row settings to be full width with Row settings > Design > Sizing (change width and max-width to 100%). Or you can use a full width section and full width code module as mentioned above.
Now click save, you’re done!
Here’s what the map looks like. It’s set to 100% width in the embed, which will make it fill the width of the container. In our case, our row has a max-width of 1080px which is why it doesn’t go full width.
Great tip Tim.
Thanks, Britt! Glad you liked it 🙂
Replay, Nürnberg, Germany
Great info, will use it tonight! Thanks!
Awesome, glad it was helpful 🙂
Just in time!!
Many thanks by your great help!!
You’re welcome! Glad it came at the right time 🙂
Replay, Heinsberg Germany
Very interesting, thanks.
Glad you enjoyed it 🙂
I just didn’t think of this! Agree the API is pain in the proverbial
Definitely 🙂
thanks for this great tip 🙂
You’re welcome 🙂
Great Info. thank you
You’re welcome!