Introduction
When it comes to Automatic Triggers, you may not want your Divi Overlays popup to trigger on all pages. For this reason, Divi Overlays has the Display Locations Feature to allow you to choose what pages you’d like the popup to trigger on.
In this tutorial, we will show you have to set specific pages to display the popup as well as how to add exceptions. By default Divi Overlays is set to “All Pages”.
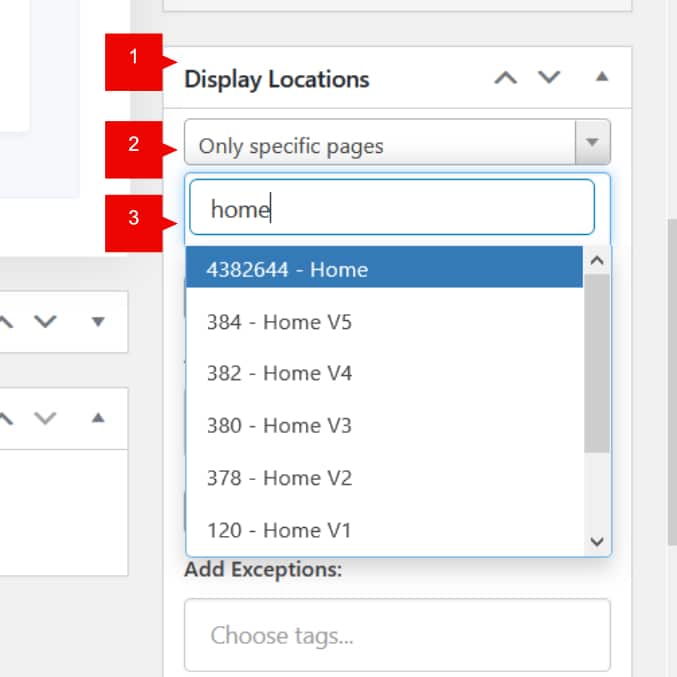
Display Divi Overlays to specific pages: This options will give you the ability to display the popup on Specific pages, such as as Landing pages, Homepage, a specific post, etc.
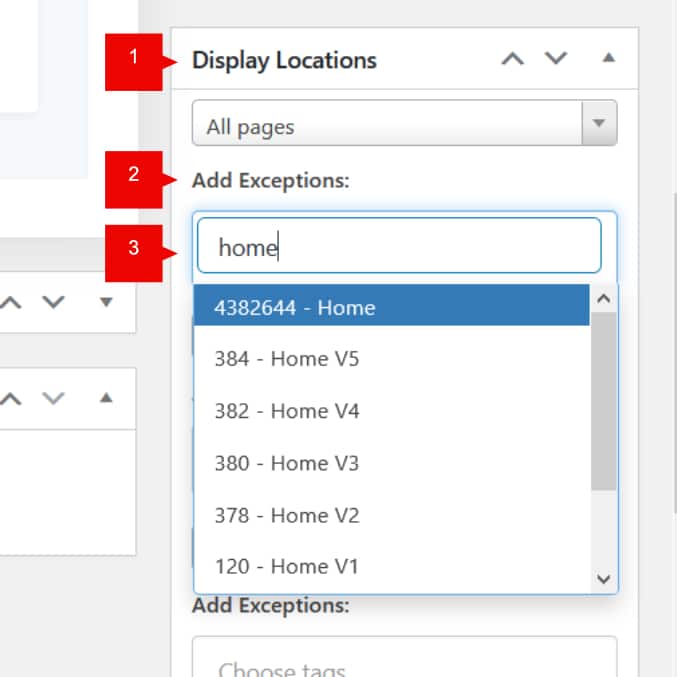
Exceptions: This option will give you the ability to exclude specific pages (when you have it set to ‘All Pages’, so the popup will not trigger on those pages.
Step 1: Go to Divi Overlays Posts
1. Go to WordPress dashboard
2. Open Divi Overlays CPT (Custom Post Type)
3. Go to your Divi Overlays post
Step 2a: Display Location on specific pages
1. Go to Display Locations
2. Select “Only specifc pages” from the list
3. Type the name of the page you want to display the popup, and select your desired page from the autocompleted list

Save changes and your Divi Overlay will only trigger on the specific page or pages you have selected.
Step 2b: Exceptions
Sometimes you want the popup on all pages except one or two, or three.. For that, Divi Overlays can exclude specific pages from triggering the popup.
1. Go to Display Locations > Add Exceptions
2. Type the name of the page you want to exclude and select it from the autocompleted list.

Save changes.
Divi Overlays shouldn’t trigger in that/those specific page.
