Introduction
The Scheduling feature in Divi Overlays gives you the ability to schedule when your Divi Overlays will trigger on your site. This feature only works for automatic triggers, because click triggers will always allow the popup to trigger.
This feature has two types of scheduling:
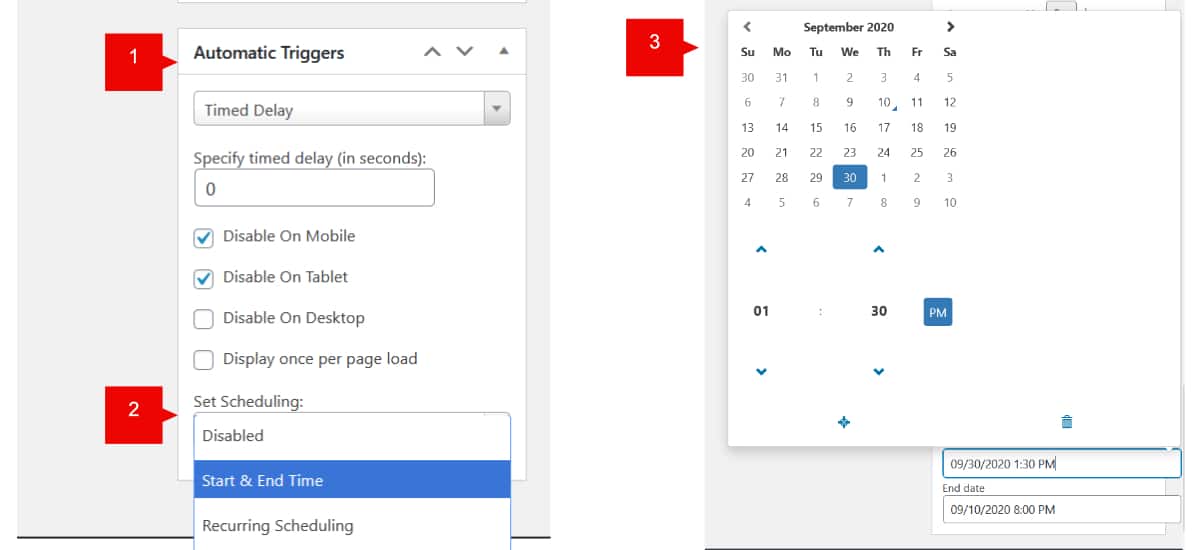
1. Start & End Time: here you can set a date and time to start showing a popup, and then a date and time to stop showing a popup.
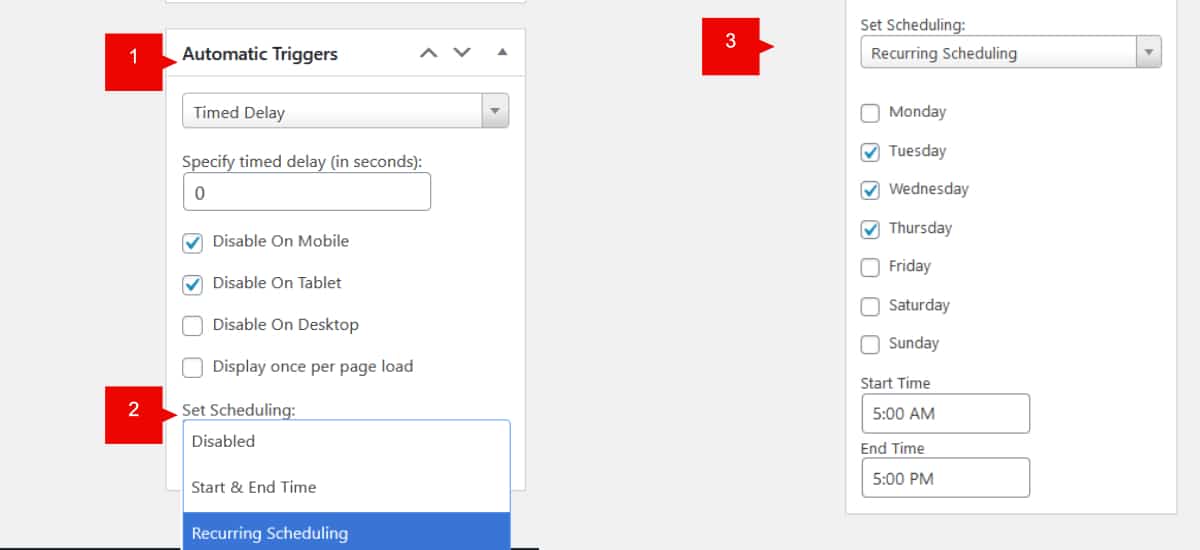
2. Recurring Scheduling: here you can set which days of the week show the popup and a start/end hour.
Step 1: Go to Divi Overlays Posts
1. Go to WordPress dashboard
2. Open Divi Overlays CPT (Custom Post Type)
3. Go to your Divi Overlays post
Step 2a: Setting Start & End Time
Make sure you’re using an automatic trigger (Timed delay, exit intent, scroll percentage)
1. Go to Automatic Triggers
2. Go to Set Scheluding and select “Start & End Time”
3. Set a date and hour to start and end fields

Step 2b: Setting Recurring Scheduling
Make sure you’re using an automatic trigger (Timed delay, exit intent, scroll percentage)
1. Go to Automatic Triggers
2. Go to Set Scheduling and select “Recurring Scheduling”
3. Select the days you want to trigger the overlay and select an hour to start/end.

