With Divi Image Hover Pro you can create awesome hover effects in images with texts.
Step 1: Install the Divi Image Hover Pro plugin
1. Go to WordPress dashboard
2. Plugins > Add New > Upload a plugin 3. Activate Plugin
Step 2: Setting Divi Image Hover Pro
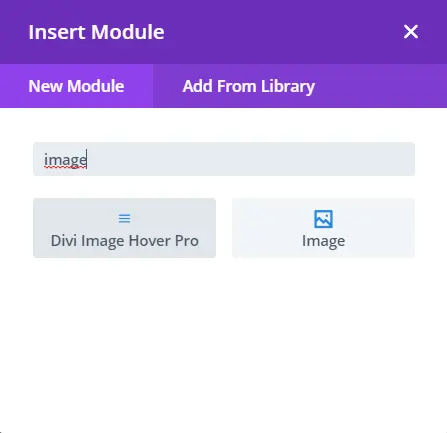
1. Add a new Divi Image Hover Pro Module
In the plugin settings, you can find all the necessary options to add texts and images to your module. Here are the parts of each section.
Divi Image Hover Pro Content settings
1) Hover Effect
Here you can select the hover animation. We have a bunch of animations that you can use in the module 😊
And you can see in the Visual Builder the effect. Choose one.
2) Tittle & Description
Here you can add the title and description that you want in your module. The Title & Description will appear on hover.
3) Images
Here you can add the image that you want. Only upload a select image.
4) Link
If you want to open a link or an anchor link, you can set it here.
5) Background
Here you can set the background color when you hover the module. You can set a solid color or a color with transparency, and this will be the background of your text 😊
6) Admin Label
Here you can set a label for this module. It is just an admin tool to organize your modules 😊
Divi Image Hover Pro Design settings
1) Title Text
Here you can style the title text. It uses Divi settings, so just change fonts, sizes, colors, etc.
2) Description Text
Here you can style the description text. It uses Divi settings, so just change fonts, sizes, colors, etc.
3) Image Sizes
Here you can change the width and max-width of the module. Also, Divi Image Hover Pro have the responsive options, so you can set a specific width for each device.
Additional Notes for Advanced settings
Since Divi Image Hover Pro uses the Divi builder settings, it needs some adjustments that can be added via custom CSS. Here you go the selectors, so you can add custom CSS.
[class*=" imagehover-"]         = this class is for the image.
[class*=" imagehover-reveal-"] figcaption, [class^=imagehover-reveal-] figcaption        = This class is for the Title & Description div
Align vertically center the Title and Description
If you want to align center the text elements vertically, you can do it will a line of Custom CSS that should be added in a code module or in the Custom CSS box in Divi Theme Options. This snippet is a global option, which means that will be applied for all Divi Image Hover Pro modules
/*Center vertically text within the div - Divi Image Hover Pro*/
[class*=" imagehover-reveal-"] figcaption, #image-hover-one [class^=imagehover-reveal-] figcaption {
display: flex;
justify-content: center;
align-items: center;
flex-direction: column;
}
And what if you want it in only one Divi Image Hover Pro module? That needs a little additional setting. Go to the Divi Image Hover Pro module > Advanced settings > CSS ID Field > Add an ID. I.e.
image-hover-one
Then, in the snippet just add the ID. I.e.
/*Center vertically text within the div - Divi Image Hover Pro*/
#image-hover-one [class*=" imagehover-reveal-"] figcaption, #image-hover-one [class^=imagehover-reveal-] figcaption {
display: flex;
justify-content: center;
align-items: center;
flex-direction: column;
}
Align the image when the width is changed
When you change the width of the module, by default it will be aligned to the left, so if you want to move the module to the middle or right, it will need a line of CSS in the modules.
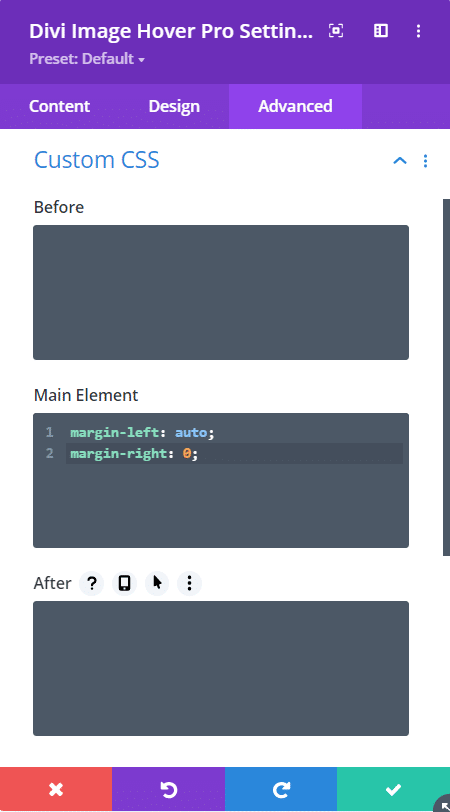
Go to the Divi Image Hover Pro settings > Advanced tab > Custom CSS > Main Element
Algin to the Middle:
margin:auto;
Align to the Right:
margin-left: auto;
margin-right: 0;
Rounded border in the image
This is a little snippet if you want rounded borders in the image you added. The global CSS is:
Just paste the code in Divi Theme options > Custom CSS box
And what if you want it in only one Divi Image Hover Pro module? That needs a little additional setting. Go to the Divi Image Hover Pro module > Advanced settings > CSS ID Field > Add an ID. I.e.
image-hover-one