Note: Version 1.0 of Divi Password Protected can trigger a fatal error upon activation due to a recent update of Divi. We have corrected this in version 1.1. If you’re experiencing this issue, please update to version 1.1 and it should solve the problem. If you still have issues, please open a support ticket with our team and w will be happy to assist.
Introduction
With Divi Password Protected you can protect any section, row or module with a password and style it.
Step 1: Download and install
The Divi Password Protected plugin is only available for All Access Pass Member, so to download it go to Divi Life Customer Portal > All Access Pass Downloads
1. Go to WordPress dashboard > Plugins > Add new
2. Upload plugin
3. Choose file > Select divi-password-protected.zip
Step 2: Protect any section, row or module with a password
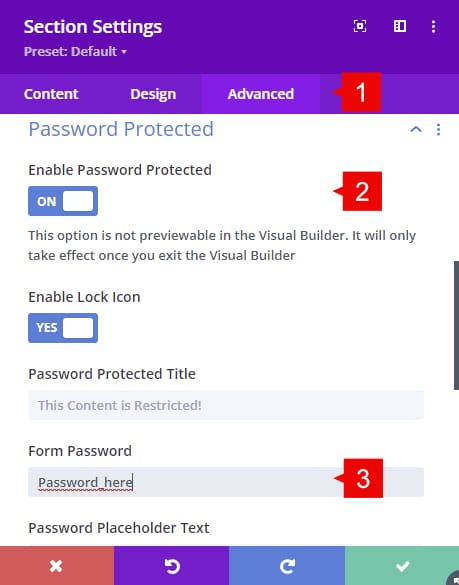
1. Go to any section, row or module settings > advanced tab > Password Protected
2. Set a password

Step 3: Customize your password-protected message
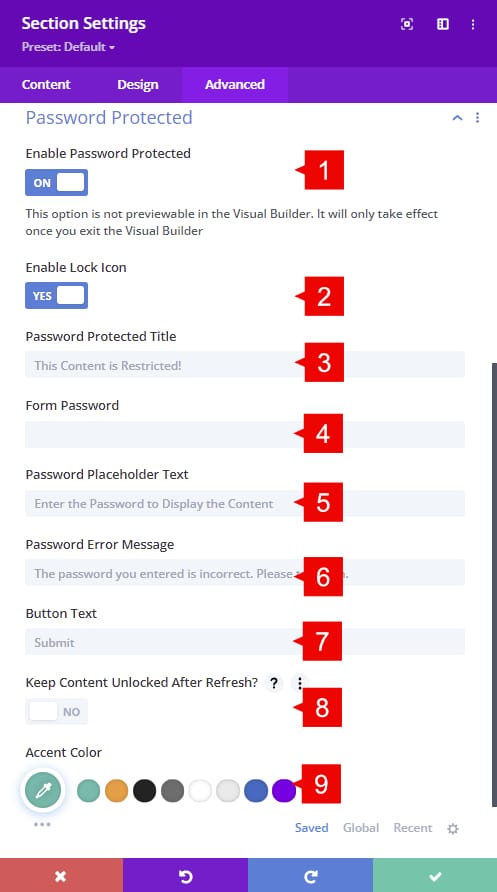
1. Enable Password Protected: By enabling this option, you’d be able to add a password to the section, row or module and customize it.
2. Enable Lock Icon: By enabling this option, a “Lock icon” will be shown on front end.
3. Password Protected Title: Change the text of the protected content.
4. Form Password: Here you can add the password that unlocks the protected content.
5. Password Placeholder Text: Change the text of the placeholder of the password field on the front-end.
6. Password Error Message: Change the text of the error message.
7. Button Text: Change the text of the submit button.
8. Keep Locked content after refresh: Enable it if you want to keep content unlocked after refresh.
9. Accent color: The color of the text and icon on front end.

And this is how it looks any section, row or module protected on the front-end.

CSS selectors for each part of the password form.
Password Row:
.divilife-password-protect>.et_pb_row
Title:
.divilife-password-protect h4
Password Field:
.divilife-password-protect .divilife-password
Submit Button:
.divilife-password-protect button
