Introduction
The Divi Login Customizer is the easiest way to create a custom login page for your Divi site. Design your custom login page with the Divi Builder, select it and create the re-direct for the logout.
Step 1: Download and install
The Divi Login Customizer plugin is only available for All Access Pass Member, so to download it go to Divi Life Customer Portal > All Access Pass Downloads
1. Go to WordPress dashboard > Plugins > Add new
2. Upload plugin
3. Choose file > Select divi-login-customizer.zip
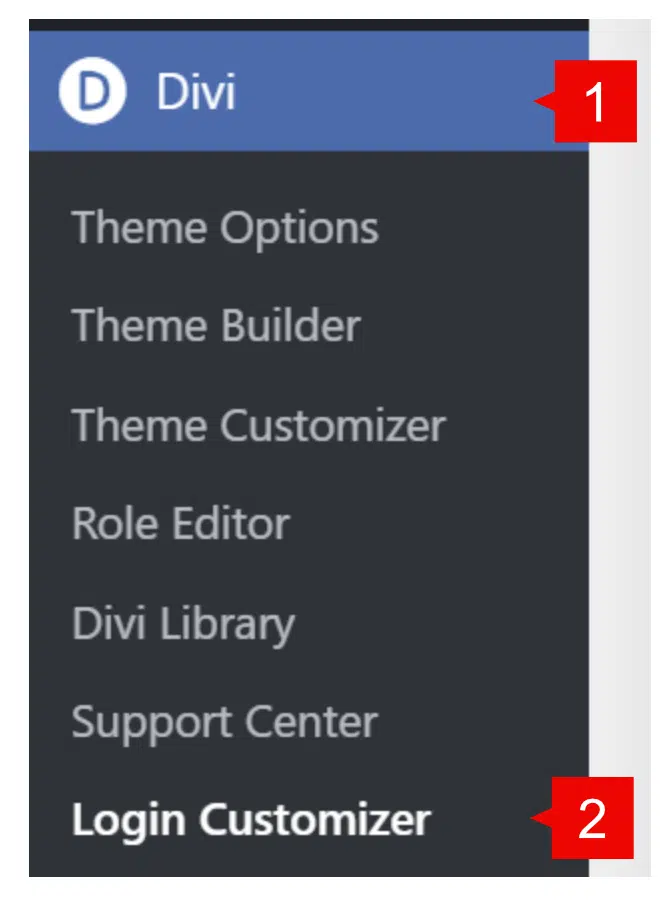
Step 2: How to access to Divi Login Customizer
1. Go to WordPress dashboard > Divi
2. Login Customizer
1. To Add a new Divi Cart Module, just add a new module and filter for “Divi Cart Module”
Step 3: Creating the new custom login page
Divi Login Customizer comes with some gorgeous premade layouts that you can Download from the Divi Login Customizer settings. Once downloaded, you need to unzip the file to get a JSON file to import into the Divi Library.
1. Go to Divi > Divi Library
2. Import & export > Select the JSON file to import
3. Import

1. Create a New WordPress Page on Your Site, & import your desired template into the Divi Builder or build it from scratch, then click Publish.
2. Copy & Paste the URL of Your New Login Page to the “Login Page URL” field. (Divi > Login Customizer > Login Page URL field)
3. Save Changes

After you save changes, when the users try to login to your site, via wp-admin, wp-login or login.php; it will redirect to your custom login page.