If you’re using the default Divi header, you can change your logo on scroll using Divi Logo Swap.
But if you want to change the logo on scroll, then it will be necessary a few lines of CSS or JS.
How to change logo on scroll using the Scrolling Effects and CSS
When you use the scrolling effects, a new option is enabled in your Divi sections, rows and modules. This new option is visible in some parts of your layout.
First, create your menu layout. On this tutorial, we created a simple menu. It doesn’t have any particular function or custom CSS. It is a section, a row with one column and a menu module. In the menu module, it is important to add your logo (menu module > Logo)

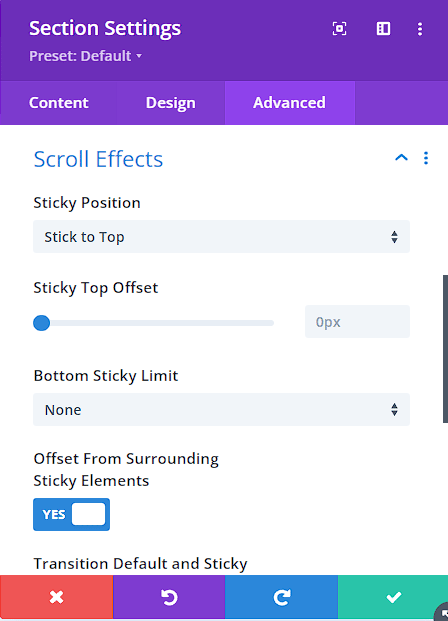
Once created the layout, let’s enable the scrolling effects in the Section. By enabling the scrolling effects, you can change some additional settings, as the background, colors, sizing, etc. This also will add a new class to the section. This class is only visible in the inspector.
The new class added is “has_et_pb_sticky“. So we’ll take adventage of this to change the logo on scroll.
To enable the Scrolling effects, go to your section settings > Advanced tab > Scrolling Effects > Set “Stick to top”

So let’s add the code necessary to change the logo on scroll.
.has_et_pb_sticky .et_pb_menu__logo{
content: url(https://g3n2x2r5.rocketcdn.me/wp-content/uploads/2022/09/logo-icon.png) !important;
width: 50px;
}
This will change the logo on scroll. Just change the absolute URL of your secondary logo.
Let’s add the fancy animation. To do this, we’ll use keyframes. So we need to add the complete code.
 .et_pb_menu__logo{
-webkit-animation: slide-top 0.5s cubic-bezier(0.250, 0.460, 0.450, 0.940) both;
animation: slide-top 0.5s cubic-bezier(0.250, 0.460, 0.450, 0.940) both;
}
@-webkit-keyframes slide-top {
0% {
-webkit-transform: translateY(20px);
transform: translateY(20px);
}
100% {
-webkit-transform: translateY(0px);
transform: translateY(0px);
}
@keyframes slide-top {
0% {
-webkit-transform: translateY(-100px);
transform: translateY(-100px);
}
100% {
-webkit-transform: translateY(-100px);
transform: translateY(-100px);
}
}
}
.has_et_pb_sticky .et_pb_menu__logo{
content: url(https://g3n2x2r5.rocketcdn.me/wp-content/uploads/2022/09/logo-icon.png) !important;
width: 50px;
-webkit-animation: slide-fwd-top 0.45s cubic-bezier(0.250, 0.460, 0.450, 0.940) both;
animation: slide-fwd-top 0.45s cubic-bezier(0.250, 0.460, 0.450, 0.940) both;
}
@-webkit-keyframes slide-fwd-top {
0% {
-webkit-transform: translateZ(0) translateY(-20px);
transform: translateZ(0) translateY(-20px);
}
100% {
-webkit-transform: translateZ(160px) translateY(-20px);
transform: translateZ(160px) translateY(-20px);
}
}
@keyframes slide-fwd-top {
0% {
-webkit-transform: translateZ(0) translateY(20px);
transform: translateZ(0) translateY(20px);
}
100% {
-webkit-transform: translateZ(160px) translateY(0px);
transform: translateZ(160px) translateY(0px);
}
}
These codes will add the fancy entrance and exit animation of both logos.
