Step-by-Step Guide to Crafting Stunning Divi Timelines
Hey, it’s high time we talked about timelines! A super-handy way to tell your brand’s story, detail project milestones, or condense a portfolio into a visual delight, timelines are a great way to give the user experience a boost.
While default Divi is certainly capable of enabling timelines, its functionality is a little lacking in places. For timelines that match the designs you have in your head, you’ll need a third-party plugin.
Among the many options available, the Timeline module in our own Divi Modules Pro stands out as a premium choice. Our plugin fills the timeline gap in Divi and also offers unique features like dynamic asset loading to ensure optimal site performance. With a variety of customization options, designers can craft visually stunning and informative timelines that perfectly align with their site’s aesthetic.
In this article, we’ll explore the native Divi timeline options, before comparing these to Divi Modules Pro and other popular plugins for creating captivating timelines. By the close, you’ll be something of an expert when it comes to creating timelines in Divi – and you’ll also know the methods that work best for you!
Creative Modules Built for Speed
Divi Modules Pro includes gorgeous creative modules without the bloat, & without slowing down your site! Thanks to our dynamic asset engine, you'll get the best modules with the best speed. 🔥
Creating a Timeline Layout in Divi Using Scroll Effects
First up, Divi’s scroll effects provide a means of creating some pretty nifty timelines without using a plugin. Using Divi’s built-in features, you can craft a visually dynamic timeline that responds to user scrolling, boosting the user experience on your website.
Here’s a step-by-step guide to achieve this:
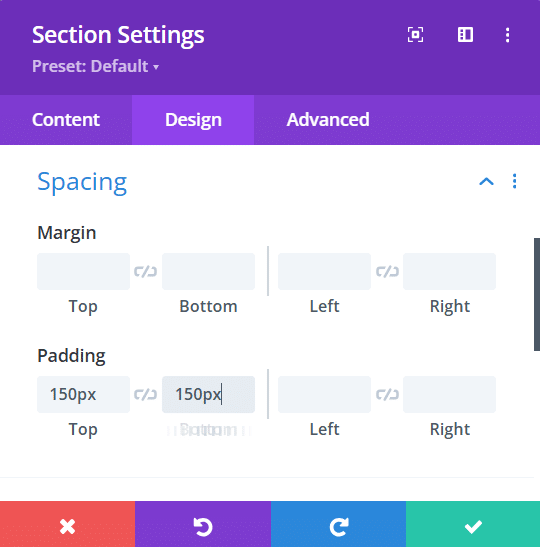
1. In Divi’s visual builder, start by adding a new section to your page. In the Section Settings, go to Content > Background and select a background color. Switch to Design > Spacing and add 150px to the top and bottom padding.
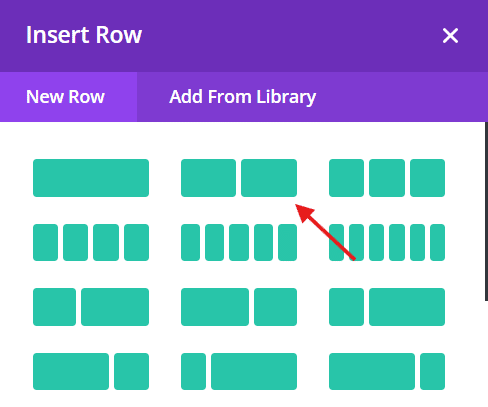
2. Insert a row and select a two-column layout.
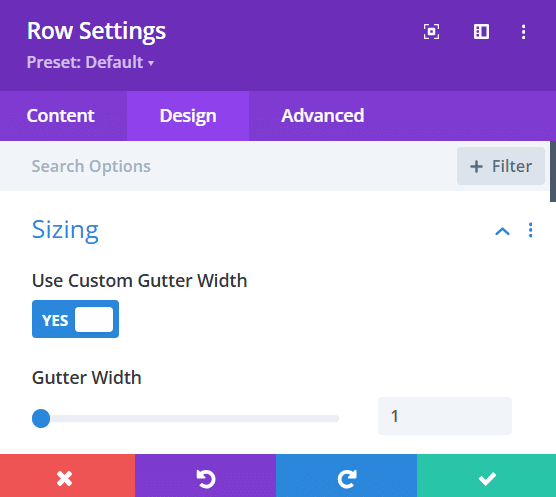
3. In the Row Settings, Go to Design > Sizing, enable the use of custom gutter width, and set it to 1.
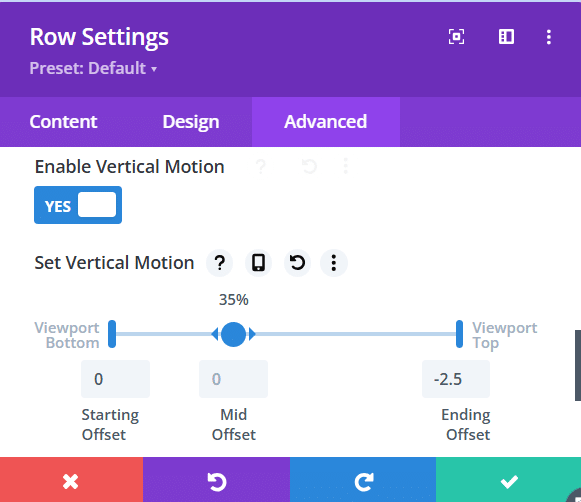
In Design > Spacing, set the top and bottom padding to 50px. In the Advanced > Position tab set z-index as 1, and in the Advanced > Scroll Effects tab enable vertical motion. Set the Starting Offset to 0, Mid to 0 and 35%, and Ending to -2.5.
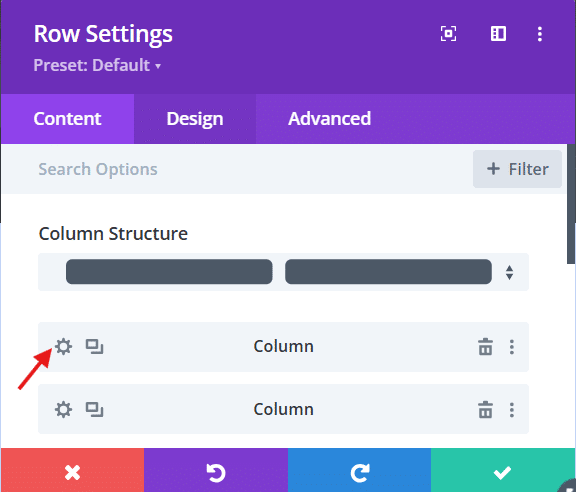
4. Go to Row Settings > Content and open the first column using the cog device.
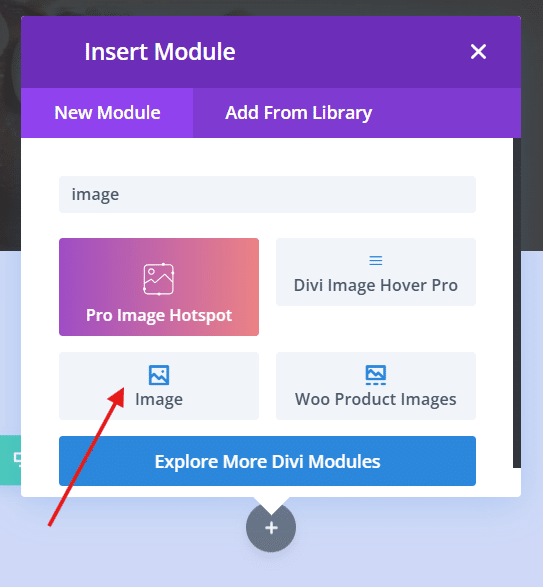
In Design > Spacing, set the right padding to 50px. Save the changes, then open an image module in the left-hand column. Right-align the image in Design > Alignment, then save changes.
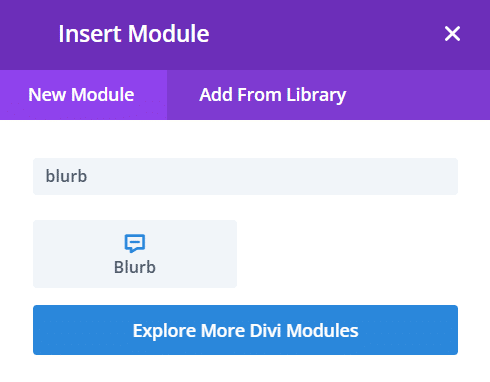
5. Add a Blurb module in the right-hand column.
In the Title field, add a year, and describe your first event in the body text. Add a suitable image as your timeline icon (in the below example we’ve chosen a flower). Go to the Design tab, align it to the left and adjust the size accordingly. Here’s the story so far:
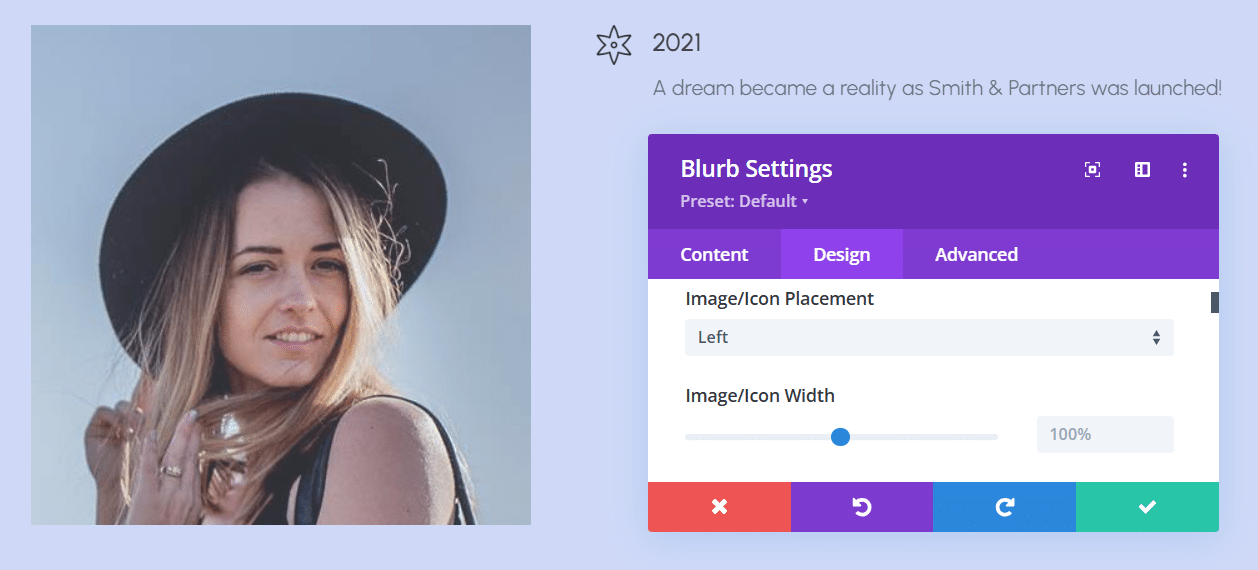
In Design > Spacing, add space to the top margin to centrally align it with your image. Next, create a new section below, and repeat the process with new images and text until your timeline is complete.
6. To add a dividing line to your timeline, add a 1-column row below its last section. In Design > Sizing, set the height to 100%, and in Design > Spacing set both top and bottom padding to 0px. In Advanced > Position, choose absolute and position things at the top center. Add a Divider module to the row you’ve just configured.
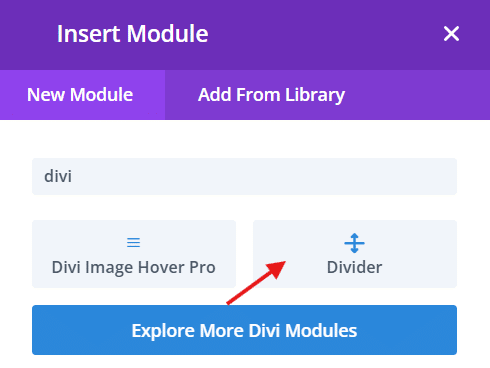
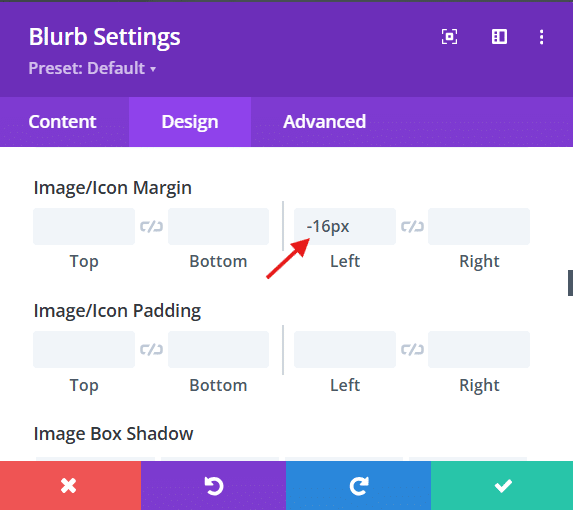
7. Go to your Divider module, and select Design > Sizing. Set width to 1px, height to 100%, and align it to the center. Once your line is in place, you may need to reduce the margin for your image/icon, to ensure it sits on the line. In this case, we’ve used -16px for a perfect fit.
Here’s our basic timeline:
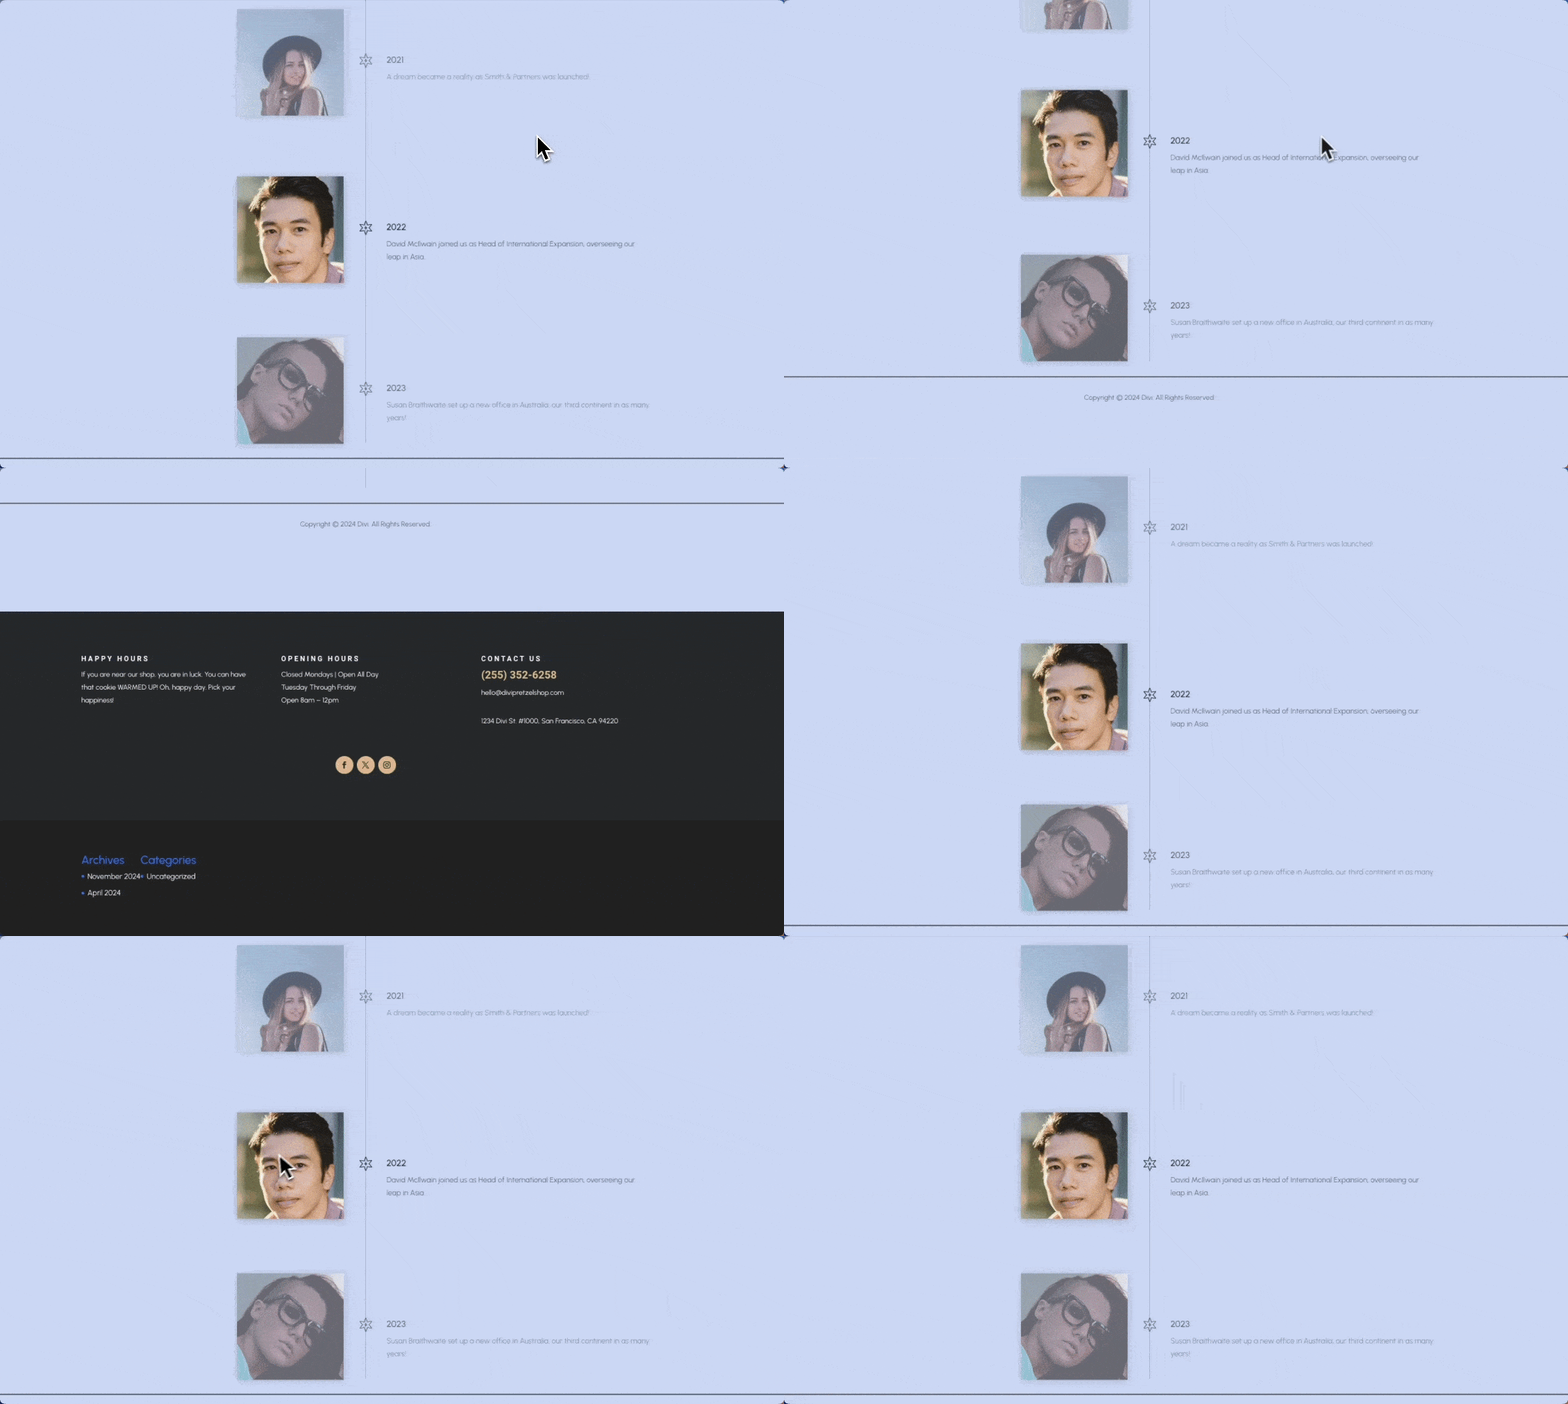
“This scroll-effect method can be combined with Divi’s conditional display feature to create ‘branching’ timelines that reveal different event paths based on user interaction, adding an extra layer of engagement to your timeline design.”
– Jennifer Rodriguez, Lead Developer at Divi Life
That’s all there is to it!
However, although this method offers extensive customization control, it does come with some limitations when comparing it to the results a dedicated timeline plugin can achieve:
- The initial setup can be time-consuming.
- It requires a deeper understanding of Divi’s features.
- Updates may be less flexible and more labor-intensive.
- Performance could be impacted on some devices.
- Lacks advanced functionalities like automatic date sorting or filtering.
With these shortcomings in mind, let’s take a look at the alternatives!
Exploring the Top Divi Timeline Plugins
When it comes to creating stunning timelines in Divi, several plugins stand out, each offering unique features, pricing, and advantages. Here’s the pick of the bunch.
Divi Modules Pro
- Features: Divi Modules Pro includes a responsive timeline module with dynamic asset loading, customizable layouts, and scroll effects, making it versatile for various design needs.
- Pricing: $49 for 3 sites, $79 for unlimited sites, and $129 for unlimited lifetime access.
- Pros: Fast load times due to dynamic assets, a wide range of modules included, and excellent customer support.
- Cons: May require some learning for complete mastery of all features – the rewards, however, are enormous!
Divi Pixel
- Features: Divi Pixel offers a customizable timeline module with responsive settings and multiple layouts (mixed, left, right) along with individual item settings.
- Pricing: Approx. $50/year for 1 site, $105/year for 3 sites, $157/year for unlimited sites.
- Pros: Highly customizable with a good range of features and responsive design.
- Cons: Higher annual cost, especially for multiple sites.
Divi Plus
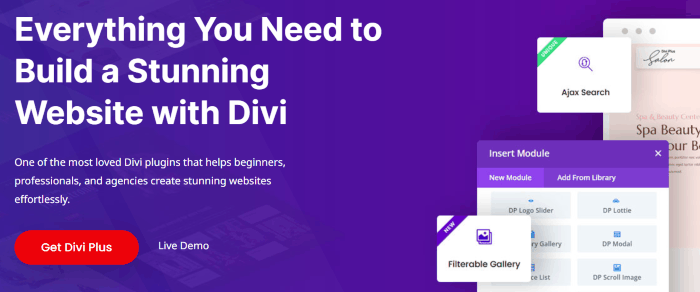
- Features: Divi Plus focuses on vertical timelines with multiple layout options and customizable single timeline items. It also includes sideline alignment for mobile views.
- Pricing: $79 for unlimited sites.
- Pros: Good value for unlimited sites and easy to use with responsive design.
- Cons: Limited to vertical timelines only, which may not suit all users’ needs.
Divi Supreme
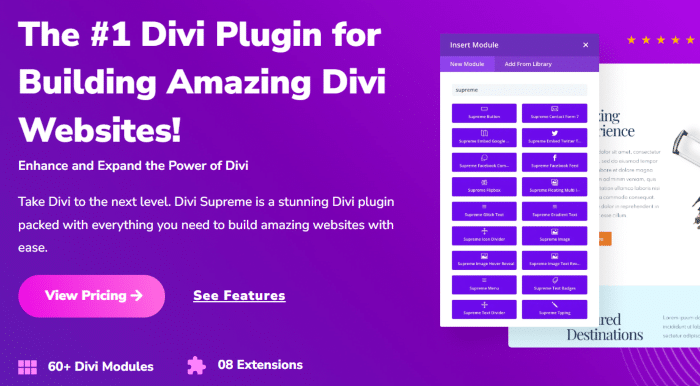
- Features: Divi Supreme provides a content timeline module with multiple styles, customizable icons and images, all while maintaining responsive design.
- Pricing: $79/year for unlimited sites.
- Pros: Versatile design options without requiring coding skills.
- Cons: Annual subscription required for updates and support.
How to Create Stunning Timelines with Divi Modules Pro
Creating visually appealing timelines using our own premium plugin – Divi Modules Pro – is a really straightforward process, and customization options abound! These site enhancements are just perfect for reflecting company milestones, history, or important events from specific industries – without having to write reams and reams of content.
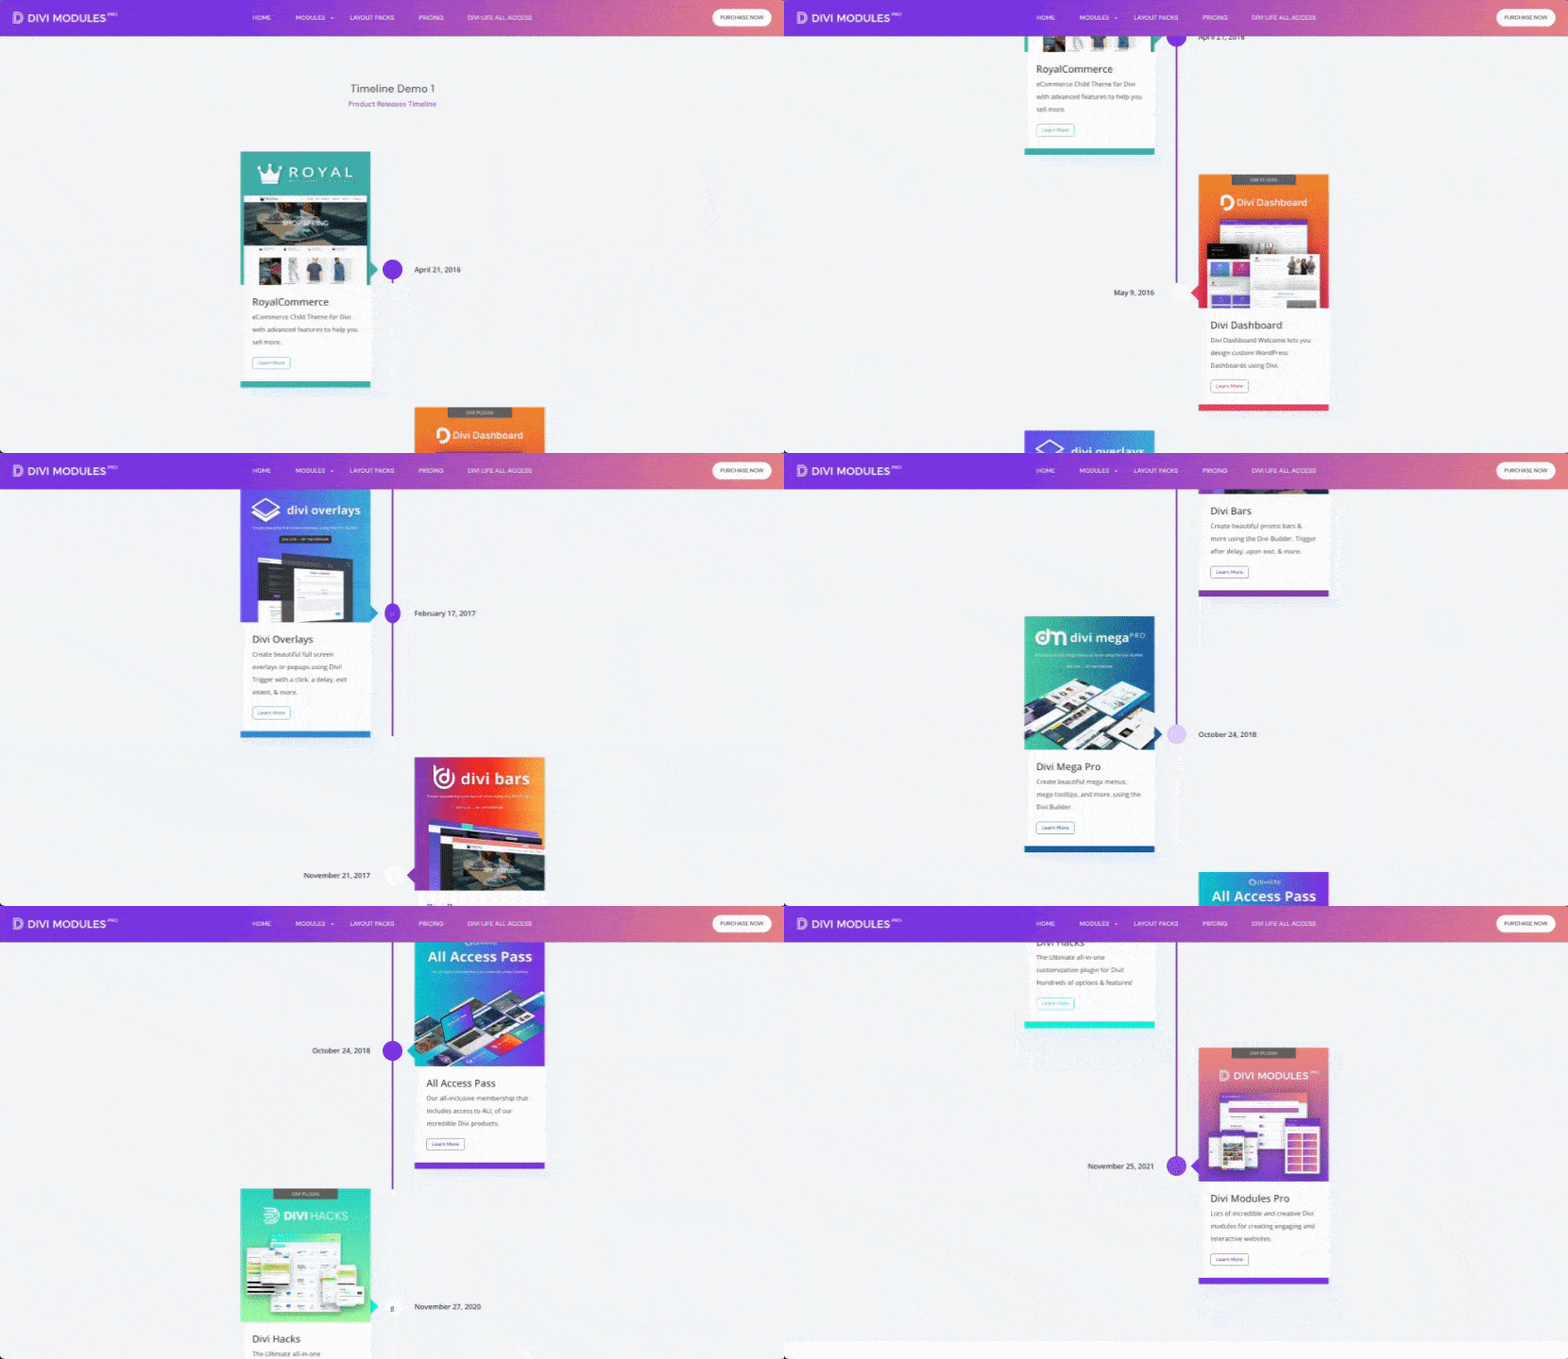
Here’s a step-by-step guide to working with the Timeline module:
1. Begin by navigating to the page where you want to add your timeline. Click on Enable Divi Builder to enter the editing interface.

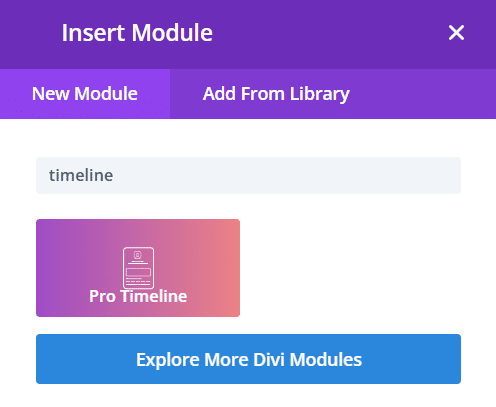
2. Once in the Divi Builder, click on the + button to add a new module. Search for and select the Timeline module from the list of available modules.
3. Next, you’ll see the Event Card. Options for text include date, event, and description, and you can of course add images too, as well as customize your backgrounds, icons, and more.
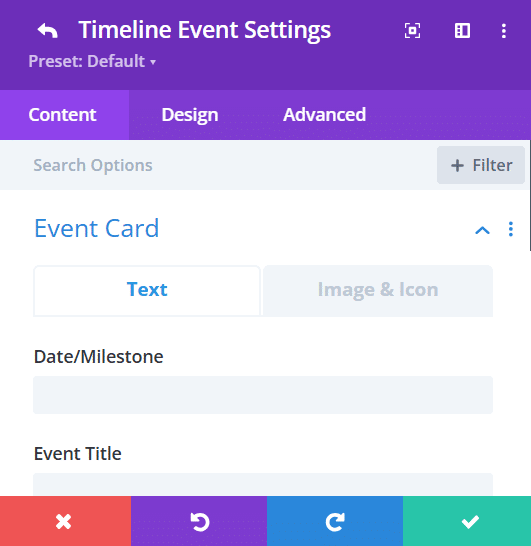
4. Start populating your timeline by adding entries. For each entry, input essential details such as dates, titles, and descriptions that will provide context and information for viewers.
5. Customize the look of your timeline in the Design tab by adjusting colors, fonts, and spacing. This ensures that your timeline aligns with your site’s branding and overall vibes.
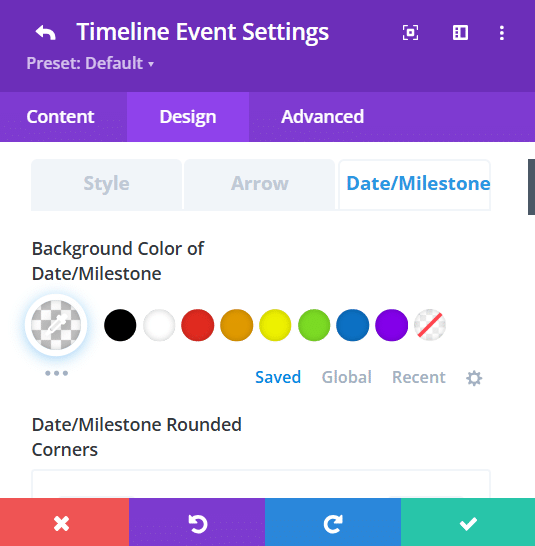
So why choose Divi Modules Pro over Divi’s native functionality? Well, we created the module with creatives in mind, so if you’re really looking for a tool that can bring your unique design ideas to life, there’s simply no better option.
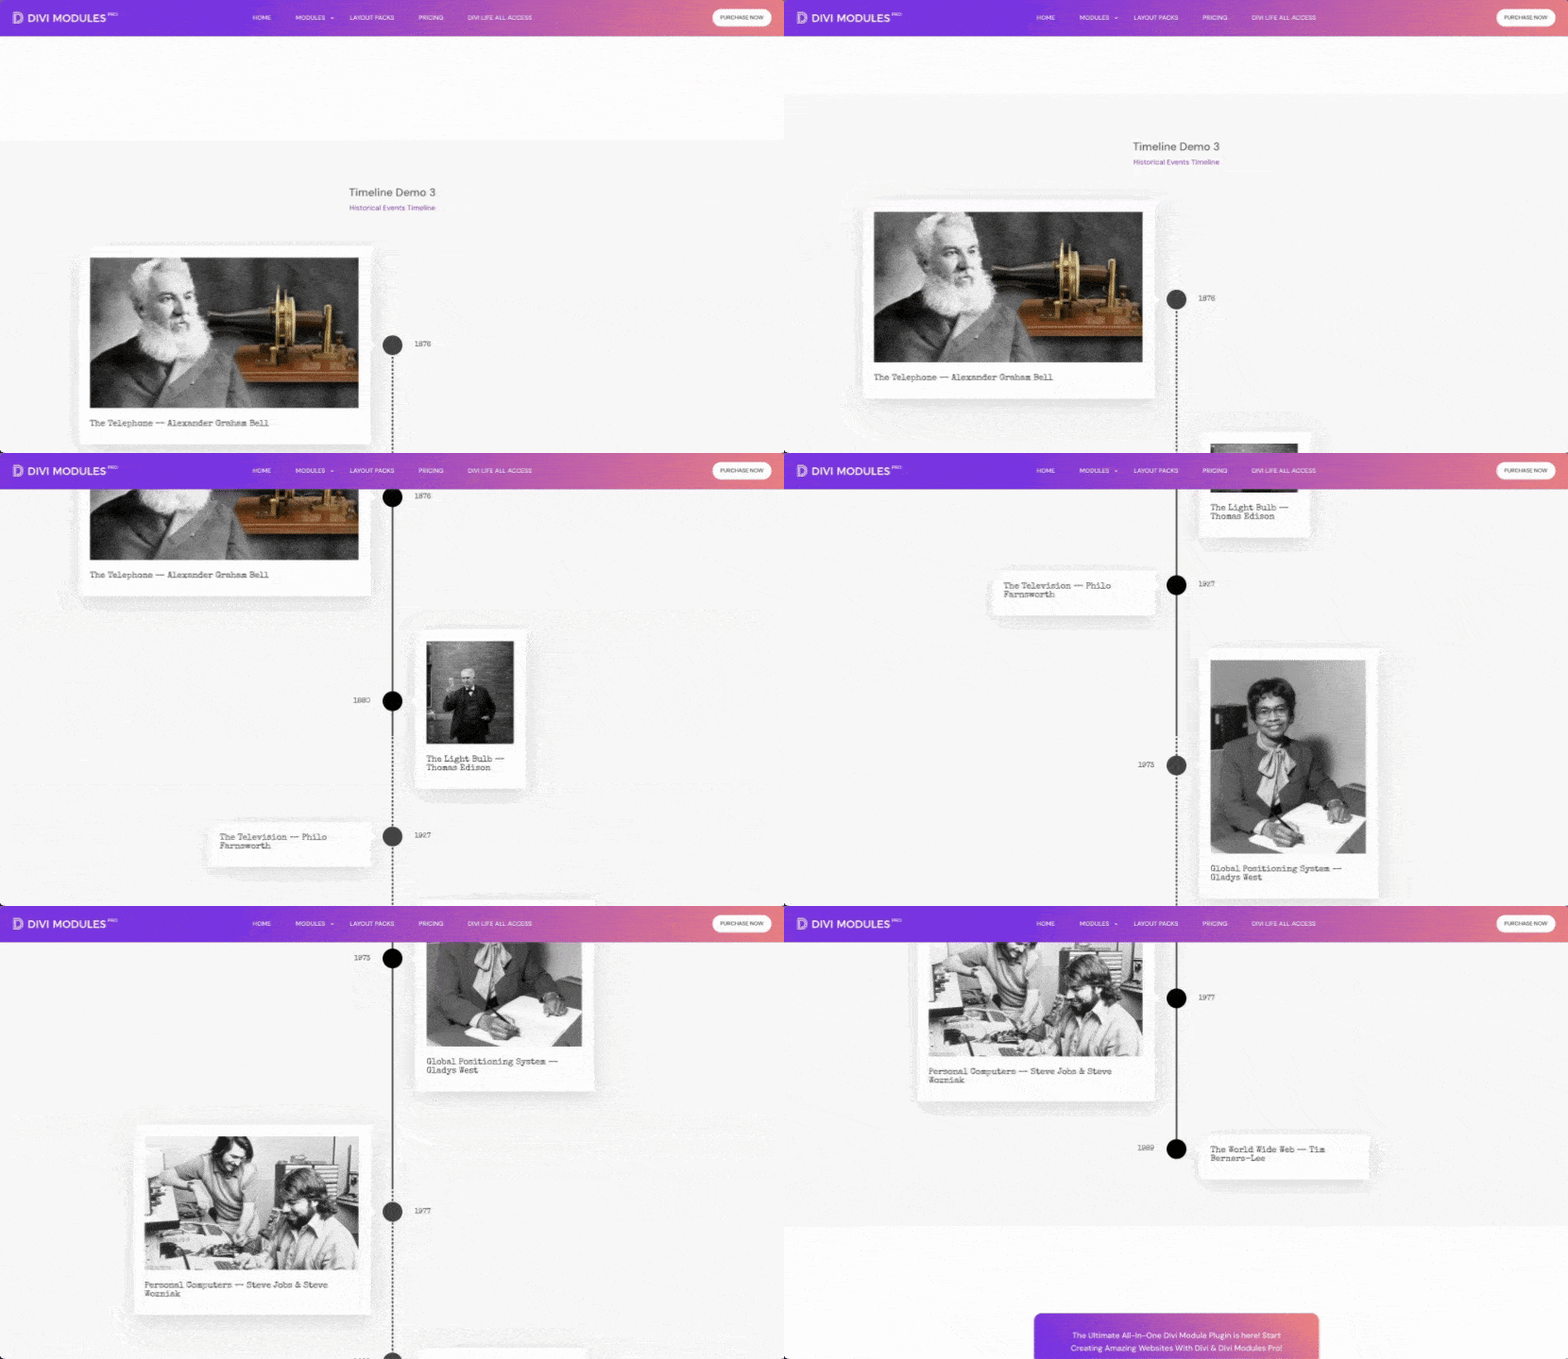
Here’s a taste of just some of the customization options available:
- Mobile optimization capabilities: The Timeline module is fully responsive, ensuring that your timelines look great on all devices, from desktops to smartphones.
- Option to use icons or images: Improve visual appeal by using icons or images for each timeline point, making it easier for visitors to engage with the content.
- Ability to add links/buttons: You can include links or buttons within timeline cards, directing users to additional resources or related content.
- Customizable content placement styles: Adjust how content is displayed within each timeline entry, providing flexibility in design and layout.
Transform Your Divi Site: Start Crafting Timelines Today
In the bid to give your site some real personality, timelines offer a fab way to present visual information. They’re a great way to tell stories, clearly showcase your company’s history or project milestones, and significantly improve user engagement.
Implementing original, wow-factor timelines in Divi is now easier than ever, thanks to a variety of solutions available to meet your design needs. Among these, our own Divi Modules Pro’s Timeline module stands out as the most powerful option of all. Its ease of use, extensive customization features, and performance benefits from dynamic asset loading make it an ideal choice for any creative web designer. Plus, it’s part of a larger suite of modules designed to boost your site’s functionality.
Timelines are a classy way of boosting your site’s visual appeal, so be sure your own creations have VIP appeal by trying Divi Modules Pro today!


0 Comments