Unleash the Power of Divi Menu Cart: From Basics to Advanced
Optimizing your menu cart is nothing less than essential – tasty visuals can help engagement, and a well-crafted cart drives sales. Think of carts as a ‘silent salesperson’, integrating with your site’s design while providing instant access to vital purchase information. Subtle enhancements encourage customers to complete their transactions, transforming casual browsers into committed buyers and even returning customers!
Whether you’re a store owner using Divi or a web designer aiming to increase client sales, mastering menu cart optimization is a must. In this article, we’ll explore advanced functionalities available through Divi Mega Pro, our Cart Module, and Side Cart plugin, alongside CSS tweaks that can make a substantial impact on your store’s performance. Here we go!
Do More with Divi Mega Pro!
Create beautiful & functional mega menus & mega tooltips with Divi Mega Pro, complete with included templates & advanced functionality. 🔥
Understanding the Native Options for Menu Cart Customization in Divi
As Divi natively integrates with WooCommerce, it’s easy for users to display a shopping cart as a standard feature on their eCommerce sites. Within Divi, there are eight dedicated cart and checkout modules that offer various design options, allowing you to create a good-looking shopping experience.

These modules provide some flexibility in styling product displays and checkout processes, but they come up short when it comes to customizing the cart within the site menu. Naturally, many store owners and designers turn to third-party plugins or custom CSS to achieve the menu carts they’re looking for.
Create a Mega Menu Shopping Cart with Divi Mega Pro
Our all-in-one plugin, Divi Mega Pro, is the ideal solution for creating custom mega menus using the Divi Builder. You can integrate mega menus into various elements of your website, including the header menu. Mega menus allow you to provide shoppers with instant access to their product details and cart total information, improving the shopping experience no end.
As Shafaq O Sheikh, Customer Support Manager at Divi Life, explains:
“A well-structured mega menu not only improves navigation but also acts as a powerful sales tool, guiding customers toward completing their purchases.”
To set up a mega menu from your header menu’s cart with Divi Mega Pro, install the plugin and follow these steps:
Step 1: Access Divi Mega Pro Posts
1. In your WordPress dashboard, navigate to Divi Mega Pro.
2. Open an existing Divi Mega Pro page or create a new one.
Step 2: Create the Mega Menu Content
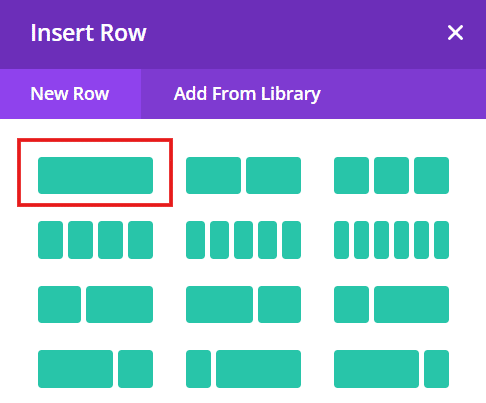
1. Add a new normal section and a row with 1 column in your Divi Mega Pro post.
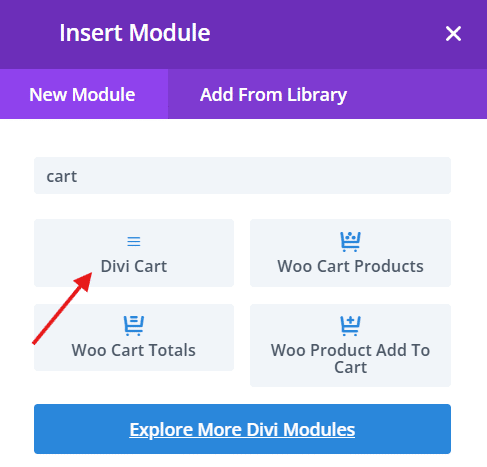
2. Add a cart module of your choice. In this instance, we’ll be using Divi Life’s Cart module.
3. Configure the settings and appearance in the Design tab. Style your mega menu according to your brand’s aesthetics. You can adjust colors, fonts, spacing, icon size, and more to ensure it aligns with your overall site design.
4. Once you’re happy with the design elements, publish your Mega Pro page.
Step 3: Trigger the Mega Menu
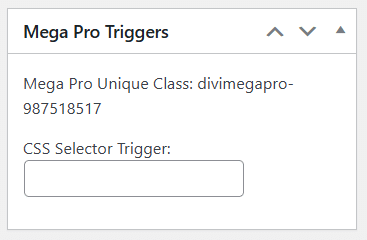
1. Copy the Mega Pro Unique Class from the Mega Pro triggers section of the page’s backend.
2. Go to Screen Options and ensure the Link Relationship (XFN) box is checked.

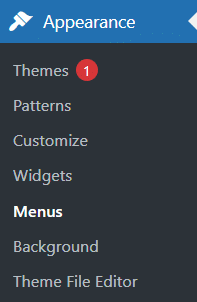
3. Go to Appearance > Menus.
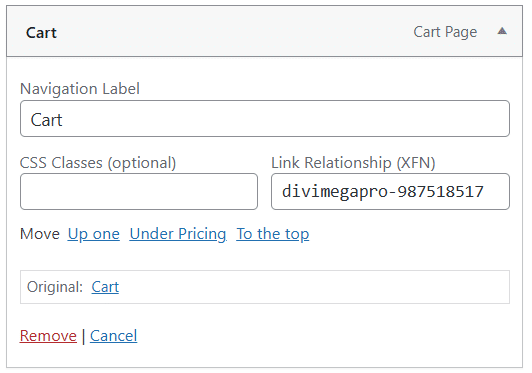
4. Ensure your correct header menu is selected, or create a new one. Be sure to add a Cart page to your menu, and paste the Mega Pro Unique Class into the cart page’s Link Relationship (XFN) section.
5. Select the menu as your primary menu, and save it.

Step 4: Test your Mega Menu
Return to your mega menu post and preview the live page. Your cart’s Mega Menu should now drop down whenever you hover your cursor over the cart section of your header menu.

Display the Item Count and Cart Total with the Divi Cart Module
There’s nothing like having options at your disposal when it comes to getting your designs just so! That’s why we created the Divi Cart Module – a dedicated solution designed to display essential cart information in your Divi-powered WooCommerce store.
This module serves several important functions, including showcasing the current item count and total price, which can boost user engagement and encourage conversions. One of the standout features of our Divi Cart Module is its ability to provide real-time updates of cart contents via AJAX. As customers add or remove items from their cart, the displayed count and total will now update instantly without requiring a page refresh. It’s a great way to maintain user interest and reduce any friction during the shopping process.
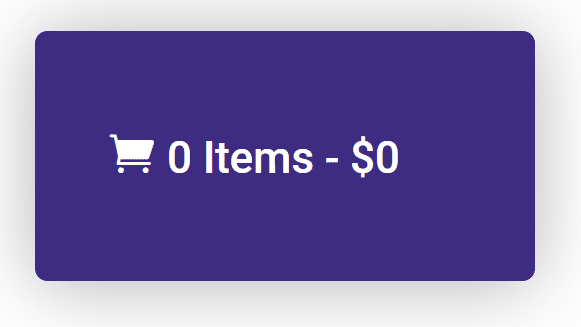
We also designed our Divi Cart Module to be fully responsive, ensuring that it looks great on mobile devices. With various stylistic options available – including padding, shadows, animations, and color customization – you can tailor the appearance of the cart to match your site’s branding.
Furthermore, placement flexibility allows you to position the Cart module anywhere on the page, whether in the menu, header, or a custom location. Placing it near your main navigation ensures that customers can easily see their cart status at all times, making it more likely they will proceed to checkout.

To create a custom cart using the Divi Cart Module, follow these steps:
1. Access Divi Builder: Open your page or post in the Divi Builder.
2. Choose placement: Decide where you want to place the Cart Module – options include the menu, header, or a custom location on your page.
3. Configure content settings: In the module settings, customize key content elements such as the icon, quantity/counter display, and price display.

4. Customize design: Use the design tab to adjust colors, fonts, sizes, and hover effects to ensure that your cart aligns with your overall site aesthetics.
5. Save changes: Once you’re satisfied with your settings and design, save your changes and preview them on your site. Here’s one we made earlier!
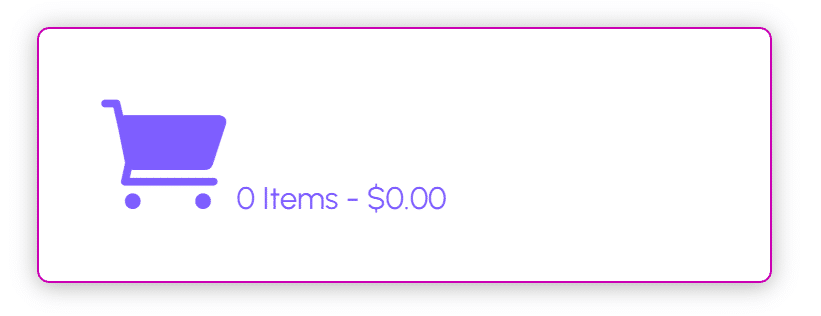
What’s more, our Divi Cart Module is compatible with the Divi Side Cart module, allowing for an even more cohesive shopping experience. Stay tuned to find out more!
Implement a Side Cart with Divi Side Cart
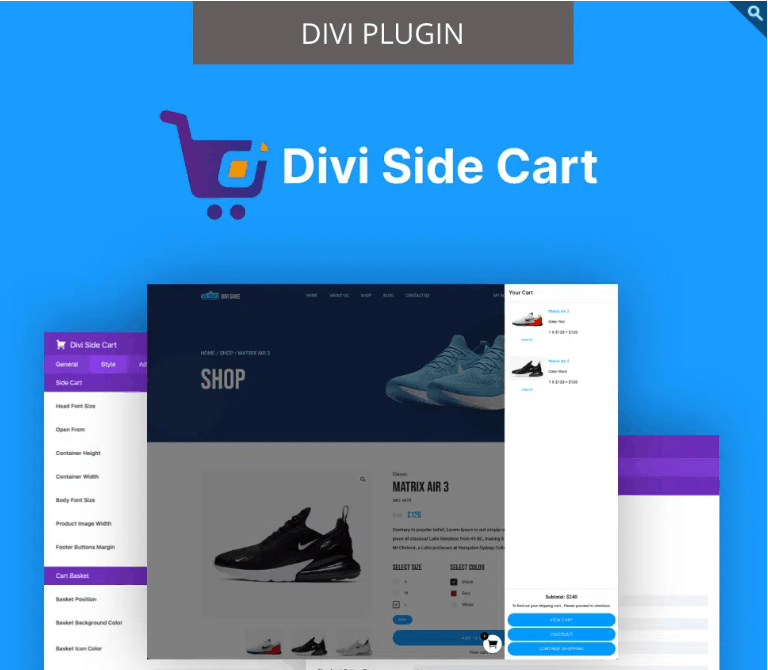
Our Divi Side Cart allows you to add a user-friendly slide-out cart feature to your WooCommerce store, giving customers quick access to their cart without navigating away from their current page.
We designed the side cart to smoothly slide in from the side of the screen, displaying essential cart information. Key features include AJAX-powered updates, which ensure that any changes made – like adding or removing items – are reflected in real time, for a great user experience. Customers can also edit quantities and remove items directly within the side cart, making it easy to manage their selections. The option to display product images and variations also increases visual appeal and helps users confirm their choices. We’ve also designed the side cart to be mobile-friendly!
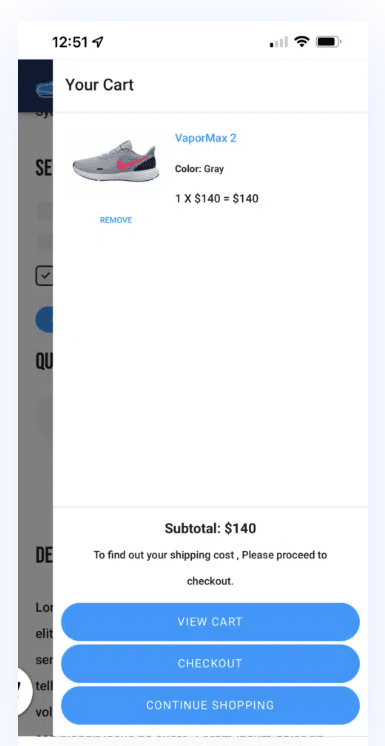
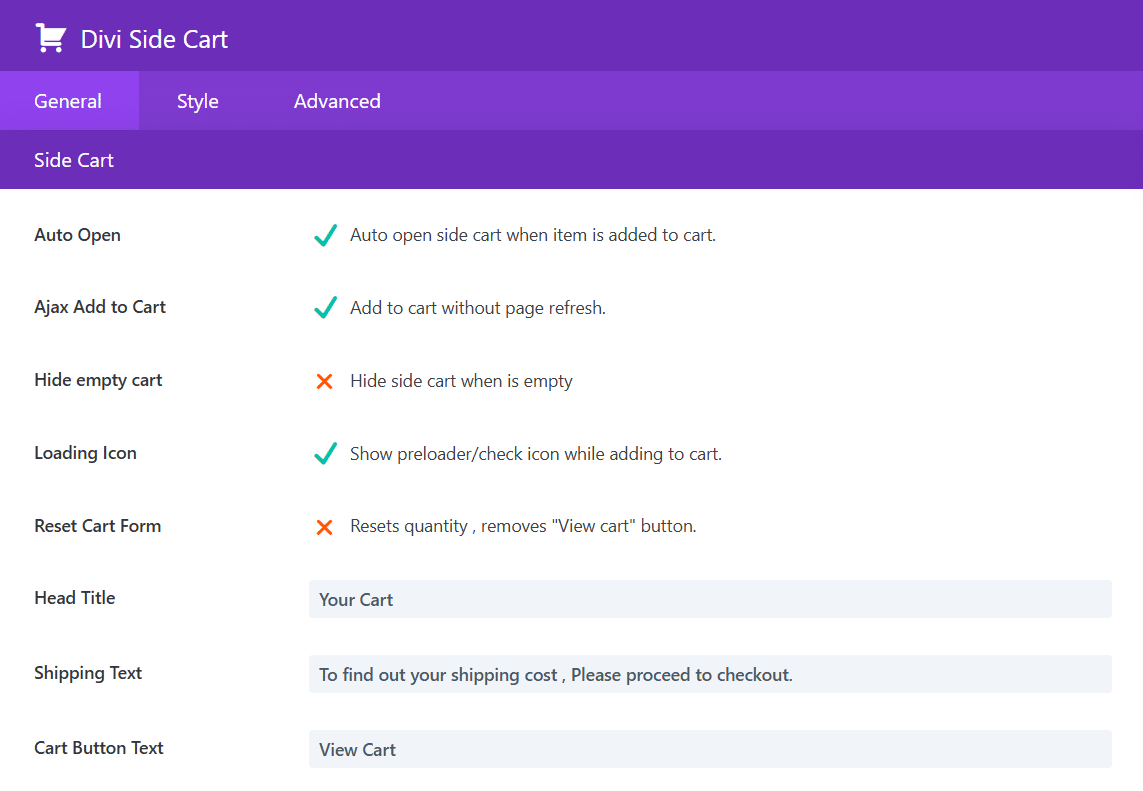
Our Divi Side Cart plugin comes with a host of creative settings, including the ability to auto-open the cart once a product is added. This feature encourages users to review their selections immediately, potentially increasing conversion rates.
To set up the Divi Side Cart, follow these steps:
1. Install and activate the plugin: Ensure that the Divi Side Cart plugin is installed and activated on your WordPress site. Once on your site, you’ll gain a direct link to the plugin’s settings.

2. Configure settings: Customize settings such as auto-open behavior, display options for product images, and whether users can edit quantities directly in the cart.
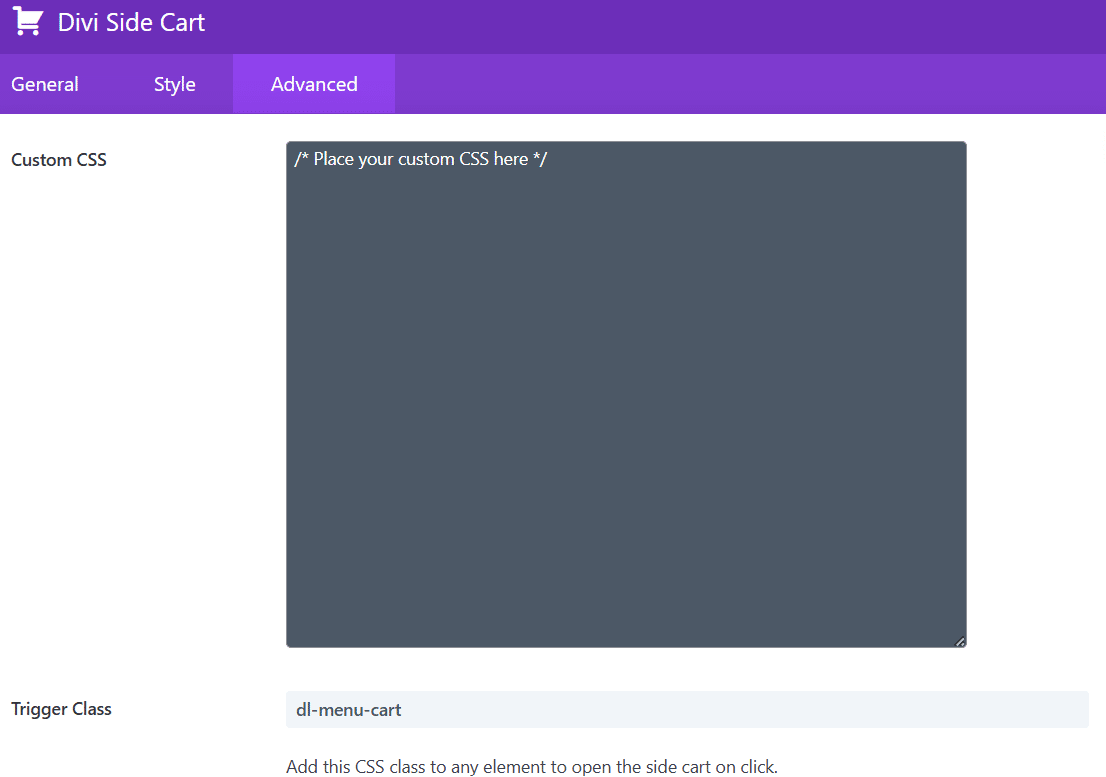
3. Create side cart triggers through CSS: In the Advanced tab, you can create a custom CSS class that can be added to any Divi module or menu item to trigger the side cart. You can find a handy selection of code snippets for various triggers in our introduction to the Divi Side Cart.
4. Link to your existing cart icon: To connect the side cart to your existing cart icon or menu item, navigate to your menu settings and ensure that the side cart module is linked correctly. This allows users to trigger the slide-out effect when they click on the cart icon.
5. Save changes: Once configured, save your changes and preview how the Divi Side Cart looks on your site.
Implementing a side cart improves user convenience and complements other features like the mega menu and Divi Cart Module. Together, these elements create a comprehensive shopping experience that keeps customers engaged and encourages them to complete their purchases.
CSS Tricks for Customizing the Divi Menu Cart
If you prefer not to use a plugin, CSS can be a powerful way to extend the native menu cart in Divi. For beginners, CSS (Cascading Style Sheets) controls the visual presentation of web elements. Here, we’ll cover two key customizations: changing the cart icon and removing it entirely.
Change the Cart Icon
Changing the Divi cart icon involves replacing the default icon with a custom one, allowing you to better reflect your brand’s identity. Here’s how to do it:
1. Identify the cart icon’s CSS selector: The default cart icon can typically be targeted using the selector .et-cart-info span:before. If your cart icon is nested differently due to custom tweaks, inspect the element using your browser’s developer tools to confirm the exact selector.
2. Choose a new icon: You can select a new icon from a Unicode character set or use a custom image for more personalization.
3. Add CSS to your theme: Insert the following CSS into your theme’s custom CSS area:
.et-cart-info span:before {
content: "";
font-family: 'ETmodules';
}4. Configure settings: Modify additional properties like size, color, and positioning to ensure your new icon fits seamlessly within your menu design.
Remove the Shopping Cart Icon From the Menu
There are valid reasons to remove the cart icon, such as creating a cleaner menu or opting for an alternative cart display. Here’s how to remove it using CSS:
1. Use the selector .et-cart-info to identify the cart icon in your menu.
2. Add this CSS code to the child theme’s functions.php file:
function remove_divi_cart_icon( $items, $args ) {
if ( 'primary-menu' === $args->theme_location ) {
$items = preg_replace( '/<li class="et-cart-info.*?<\/li>/i', '', $items );
}
return $items;
}
add_filter( 'wp_nav_menu_items', 'remove_divi_cart_icon', 10, 2 );
This code will hide the icon visually but won’t remove its functionality from your site. However, it’s important to provide an alternative way for users to access their cart to maintain a good user experience. Consider adding a link in another location or implementing a side cart for easy access.
Transform your Divi Menu Cart Today: Get Started with Divi Life’s Plugins
So, we’ve explored a variety of advanced cart customization techniques – all great ways of improving the user experience and potentially boosting conversions. From implementing a mega menu shopping cart to using the Divi Cart Module for real-time updates, these strategies enable you to create a fab shopping experience while keeping visuals in line with your branding.
With Divi Life’s long-standing expertise in Divi development since 2016, our plugins have become the secret weapons of top-performing Divi eCommerce sites. Even the smallest improvements to your cart design can mean significant improvements in user engagement and conversion rates. Our tools address specific limitations in standard Divi cart functionality, allowing you to add dropdown mini-carts and integrate cart displays within mega menus in just a few clicks.
To take your customizations into serious WOW territory, consider using Divi Life’s specialized plugins, such as the Divi Cart Module, Divi Side Cart, and the cool features of Divi Mega Pro. Explore our cart enhancement tools today and transform your menu cart into a major asset for driving sales!

Divi Mega Pro
Start Creating Gorgeous Full-Featured Mega Menus with Divi Today
Table of Contents
- Understanding the Native Options for Menu Cart Customization in Divi
- Create a Mega Menu Shopping Cart with Divi Mega Pro
- Display the Item Count and Cart Total with the Divi Cart Module
- Implement a Side Cart with Divi Side Cart
- CSS Tricks for Customizing the Divi Menu Cart
- Transform your Divi Menu Cart Today: Get Started with Divi Life’s Plugins


0 Comments