Build Custom Post Type Templates with Divi

You need custom post types if you hope to build smarter, more organized WordPress websites, especially when your content goes beyond basic blog posts or static pages.
Let’s say you’re managing a portfolio site with client work, a movie review site, or even a directory of local businesses. You don’t want to cram all that into the standard Posts section and hope tags and categories do the heavy lifting.
Custom post types let you define distinct content structures, making your site easier to manage and more intuitive for visitors.
Divi plays nicely with custom post types – in fact, it comes with one out of the box: Projects. That’s Divi’s way of nudging you toward a more modular approach to content.
We’ll walk you through creating your own custom post types, building custom templates for them with Divi’s visual tools, and showcasing your custom content in a way that feels intentional, not like an afterthought.
How to create a custom post type in WordPress
You have three main options for creating a custom post type:
- Using plugins.
- Manual coding.
- Using custom post type generators.
Let’s walk through each one with a guide on creating a custom post type for movies on a movie review website.
1. Using plugins
WordPress plugins like Advanced Custom Fields (ACF) and Custom Post Type UI provide the easiest way to create custom post types.
“Honestly, Divi and ACF together feel like the closest thing to design freedom I’ve found in WordPress. It’s like… structure without rigidity. I’m into it.”
– Jennifer Rodriguez, Lead Developer at Divi Life.
Here’s how to create a custom post type using ACF:
1. Install and activate the plugin.
2. From the admin dashboard, go to ACF > Post Types.
3. Click Add New at the top, then fill in the new post type’s details.
💡 The only fields you need are the plural and singular labels, as well as the post type key, but the last one will automatically populate from the singular label.

4. Save your changes, and the new post type should show up in the admin navigation menu.

At this point, you’re ready to go, but there’s one more tweak you can add to really make it your own:
5. Scroll down and toggle the Advanced Configuration option on.

6. When the additional options appear, go to the Visibility tab.
7. Scroll down to the Menu Icon section and pick one that you want to appear on the dashboard.
![]()
8. Save your changes and refresh the page. You should see the new icon for the post type, which is now easier to identify when the menu is collapsed.
![]()
We also recommend enabling archive functionality for the custom post type so we can create a navigable template for it later. To do this, go to the URLs tab of the advanced settings and toggle the Archive option on, then enter a custom slug.

To view the archive page, go to yoursite.com/slug-you-used.
2. Manual coding
On the complete opposite end of the spectrum is the custom code route, which is ideal for advanced users who want full control.
This method requires you to specify properties like the labels, visibility, whether or not it has an archive, and whether it’s accessible via the REST API. You’ll then need to register it using the built-in register_post_type function.
In your functions.php file or a custom plugin, add the following code:
/*
function register_movie_post_type() {
	register_post_type('movie', array(
    	'labels' => array(
        	'name' => 'Movies',
        	'singular_name' => 'Movie'
    	),
    	'public' => true,
    	'has_archive' => true,
    	'rewrite' => array('slug' => 'movies'),
    	'show_in_rest' => true,
    	'supports' => array('title', 'editor', 'thumbnail')
	));
}
add_action('init', 'register_movie_post_type');
*/
3. Using custom post type generators
Custom post type generators like Meta Box and GenerateWP sit somewhere in the middle between plugins and custom code.
They provide a visual interface where you can define what you want the custom post type to be, then they generate the code for you to add to your website. This makes them ideal for more technical users looking for as much control as possible but don’t want to write the code from scratch.
Meta Box works best for this type of user because it gives you more advanced options which are split into tabs, so it’s not too overwhelming:
- Visit the custom post type generator section of the website.
- Enter your post type’s details in the General tab. The required fields are plural and singular names and the slug, i.e., the key. The latter will auto-populate.
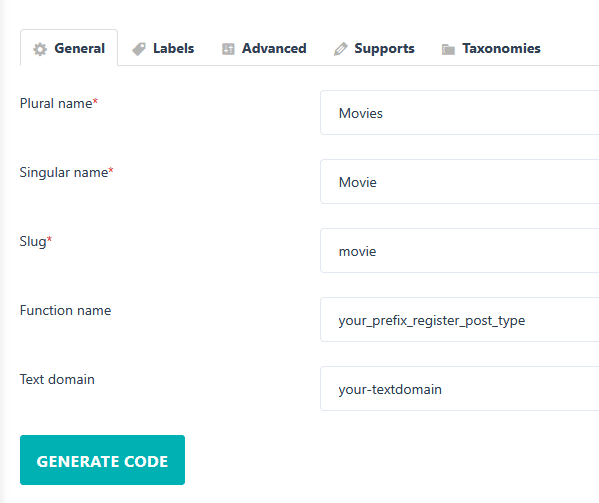
- Move through the different tabs and enter the details as needed – there’s even a menu icon section in the Advanced tab.
- Click Generate Code when you’re done.
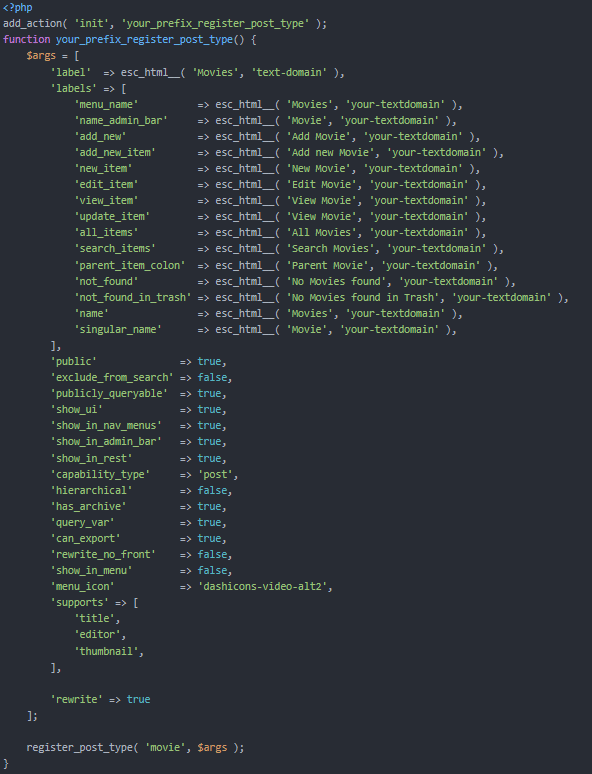
- Copy the code and paste it into your theme’s functions.php or a custom plugin.


The Ultimate Divi Toolkit 🚀
The Divi Life All Access Pass membership is a complete Divi toolbox with all the Divi plugins, child themes, layouts, & templates you'll ever need to create incredible Divi websites.
How to customize custom post type templates in Divi
Divi allows you to create a template and assign it to a specific custom post type so any new content appears preformatted. Here’s how to do it:
1. From your admin dashboard, go to Divi > Theme Builder.
2. Add a new template and choose the Build New Template option.
3. In the Template Settings menu, in the Use On tab, scroll down until you find the relevant custom post type, then check it.
4. Click Create Template, then open the editor. We’re going to start with the global body.
5. Use Divi’s Post Title and Post Content modules to display whatever you enter into the Gutenberg editor. Style these as you normally would any other module.
💡 Both modules allow you to tweak things like fonts and background colors. The Post Title module lets you include and style the featured image as well as some post meta. Here’s a template with the font and background colors changed:

6. Save the template.
Go back to your admin dashboard and navigate to Movies > Add New Movie. Fill in the details as you would any other post, including a featured image:
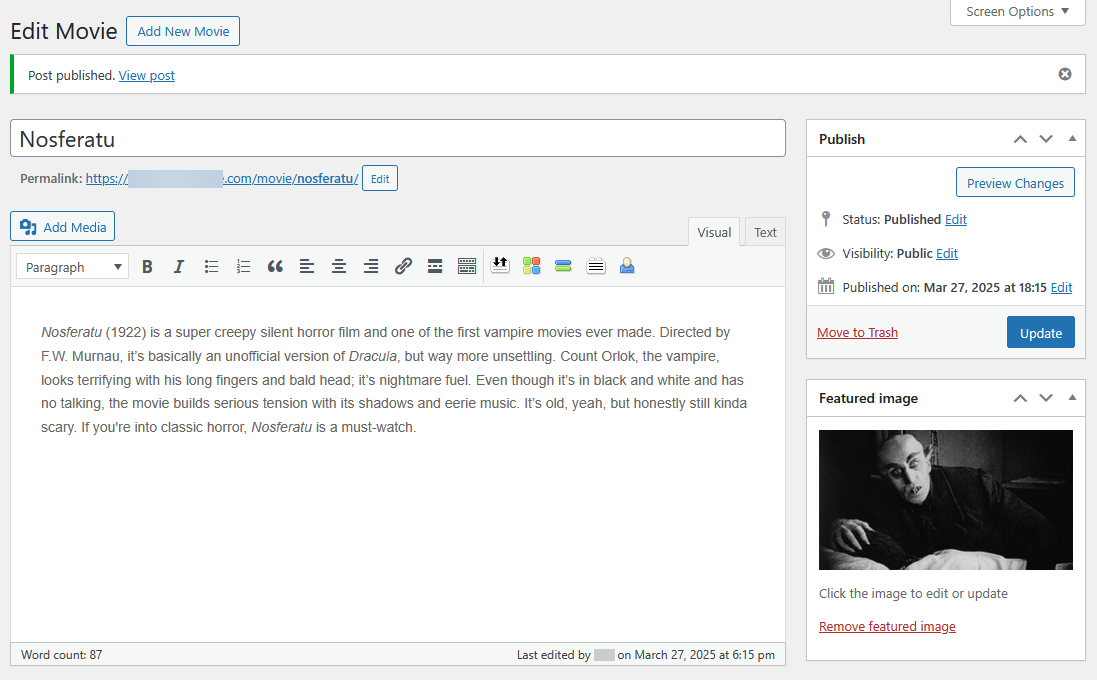
Publish it and load it on the frontend, where you should see your template in action:

Integrating custom fields in Divi with Advanced Custom Fields
When working with ACF, the fun doesn’t end with custom post types. Custom fields are in the name, after all.
If you want to include them in your custom post types, here’s what you need to do:
1. From your dashboard, go to ACF > Field Groups.
2. Add a new field group then fill in the details required for each field. For this walkthrough, we’ll create a Movie details field group and add fields for the year of release, director, and rating.

3. Scroll down to the settings and, under Location Rules, change it to show the field if Post Type + is equal to + Movie.
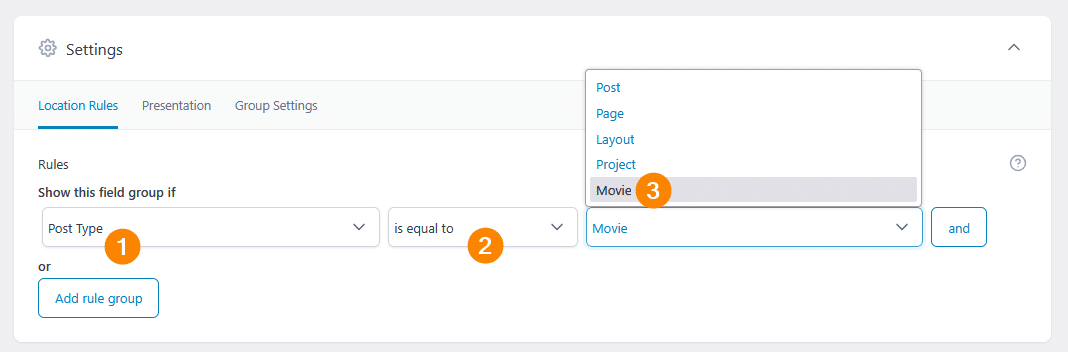
4. Save your changes.
When you create a new movie, you should see meta boxes where you can enter the details:

To display these field values on the frontend with Divi, you’ll need to use modules that pull from ACF. Here’s how:
1. Open the custom post type template from the Theme Builder.
2. Add a text box – we’ll use this to output the year.
3. In the body section, click the stacked discs icon to use dynamic content.

4. Scroll down to the ACF: Movie Details section and choose the Year field.

5. Add “Released: “ as the Before text to give it some context. Don’t forget the space!

💡 Use the Before and After properties to handle repetitive content, like we’ve done below for the rating field:

6. Repeat this process for the remaining fields.
The next time you view the post on the frontend, you should see your custom field data show up alongside it.

Creating custom post type archive page templates with Divi
Remember earlier when we said enabling archives for our custom post type would come into play later? It’s time!
Let’s use Divi to create a template for a post type’s archive page:
1. Open the Theme Builder.
2. Create a new template and, under Use On, select the archive page for your custom post type.

3. In the global body, add a Blog module and change the post type to match.

4. Style the module as needed. We’re going to:
-
- Hide the author, date, and other post meta for a less cluttered look.
- Change the excerpt length to 50.
- Round and color the featured image border.
- Add a background color, box shadow, and rounded border to each tile.
- Wrap things up by adding a background color to the entire section.
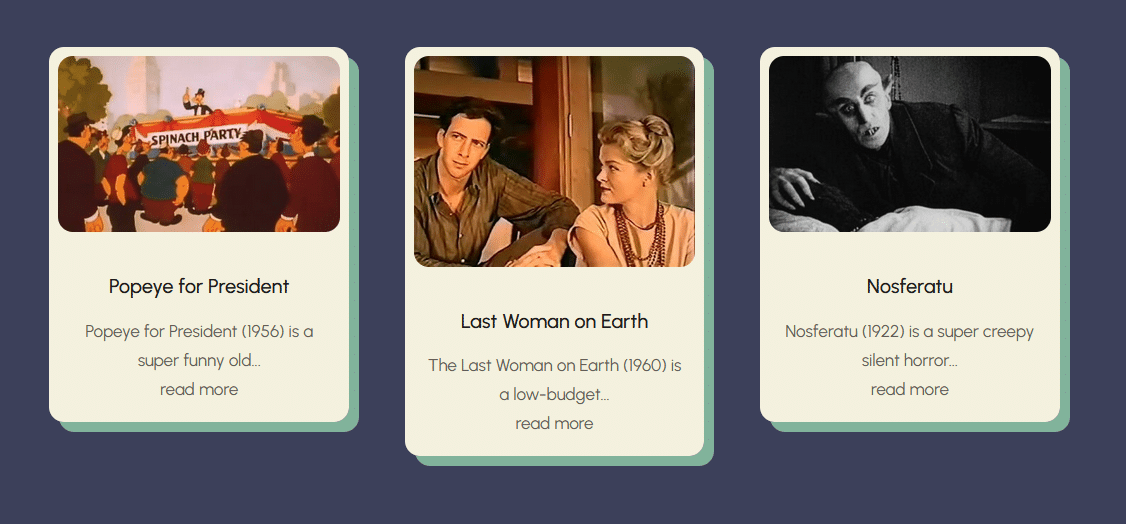
Visit the archive page, where your template should be ready!
Master dynamic templates with Divi Theme Builder Pro
If you’re a developer looking to push your Divi skills further and build truly customized websites, Divi Theme Builder Pro from Divi Life is a course you’ll want to check out.
It’s designed to help you go beyond the basics and get hands-on with the Divi Theme Builder – so you can craft dynamic layouts, custom templates, and flexible designs that work hard for your clients.
The course covers everything from building custom archive and page templates to integrating ACF in a way that feels intuitive inside Divi. It ties in perfectly with the concepts we’ve touched on here, giving you the tools and know-how to take your projects from good to seriously polished.
If you’re ready to build smarter, more powerful Divi sites without relying on code for every tweak, this is a great next move. Check out Divi Theme Builder Pro and enroll today!

0 Comments