Creating Effective Pricing Tables with Divi: A Step-by-Step Guide for Web Designers
When done well, a pricing table can have a major impact on conversions, serving as a primary call to action and presenting users with clear options that can influence their purchasing decisions. Giving these tables some serious TLC can make all the difference to your sales figures.
Divi offers remarkable flexibility in crafting customized pricing tables in line with your website’s style and objectives. However, achieving the ideal balance of aesthetics and functionality can be a real challenge – thankfully, you’ll find all the solutions right here!
Our guide will give you the knowledge to create stunning, high-converting pricing tables using Divi’s powerful tools and pre-designed layouts. We’ll dive into essential customization techniques, responsive design strategies, and best practices for optimizing conversions.
By the close, you’ll know how to:
- Maximize Divi’s built-in pricing table module.
- Apply advanced styling to make your tables stand out.
- Ensure your pricing tables look great on all devices.
- Understand why many Divi users turn to premade layouts.
- Use Divi Bricks layouts to improve workflows, coding-free.
- Create pricing toggles using Divi Modules Pro.
Regardless of your experience level with Divi, you’ll gain the skills required to craft professional pricing tables that impress clients and make your conversions fly – get ready for take-off!
Don’t want to spend the time building it yourself? 👇

Save Time With Divi Bricks!
Like LEGO bricks for your website: Divi Bricks includes thousands of section layouts (aka "bricks") that you can use to mix & match while building Divi websites.
Essential customization tips for the default Divi pricing table module
If you want to create visually appealing and functional pricing tables that convert visitors using default Divi options, you’ll have to pop your customization hat on. To access the settings in Divi’s built-in pricing table module, simply add a new module in the Divi Builder and select Pricing Table from the list. Here, you can adjust various options, including titles, prices, features, and styles.
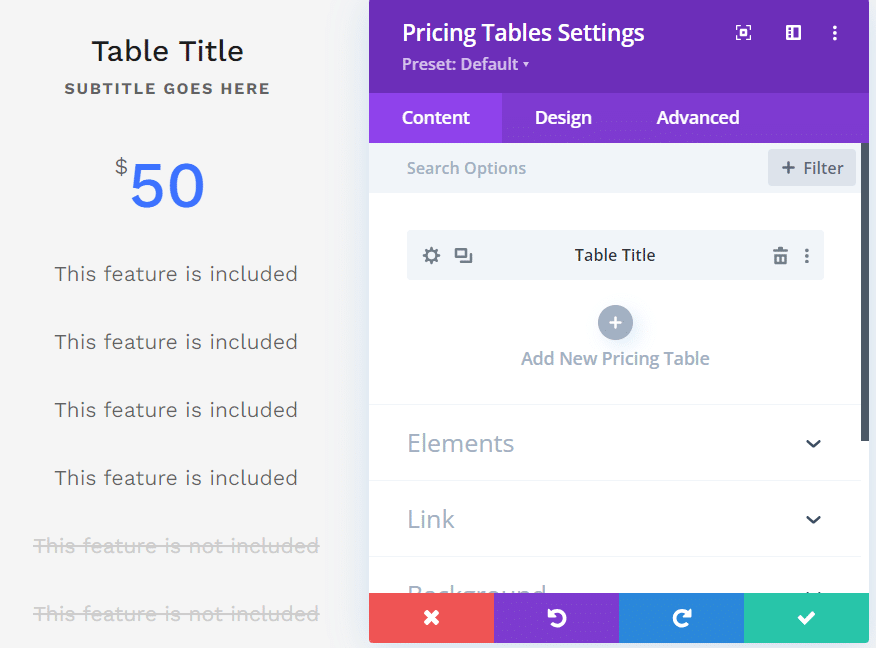
Check out some cool examples to follow below.
Styling individual columns and creating featured plans
Customizing individual pricing columns allows you to create a unique look for each plan while pushing specific offerings to the front. To access individual column settings in the Divi Builder, click on the gear icon for the desired column within your Pricing Table module.
Start by applying unique background styles to specific columns using solid colors, gradients, or patterns to differentiate them. For example, you could use a vibrant color for a featured plan to draw attention to it. Additionally, consider using borders and shadows to create depth. Subtle shadows can make a column appear elevated – a nice touch!
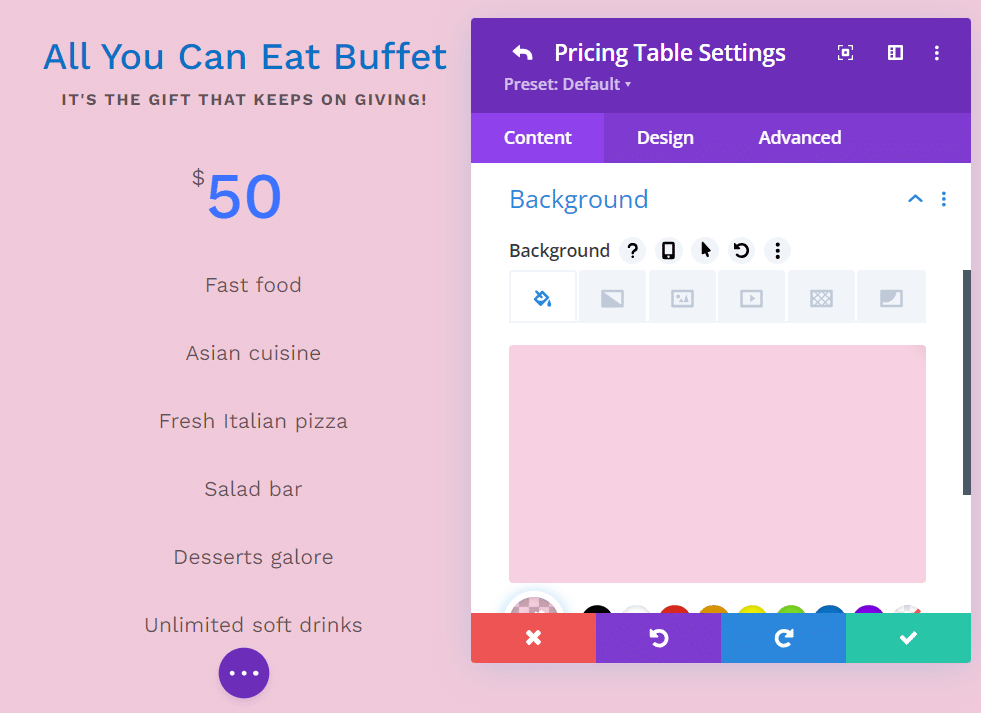
Consider using hover effects to encourage interactivity. You could implement a scale effect or change in the background color when users move their cursor over a column, for a more engaging result.
To highlight a featured or recommended plan, use the Make This Table Featured option. This feature adds a distinct visual treatment to that particular column, such as a bold border or increased padding. Adjusting padding and margins within columns can improve spacing and readability while maintaining the visual hierarchy.
Remember to keep your design cohesive – each column should complement the others while standing out in its own right.
Creating horizontal pricing layouts in Divi
Creating horizontal pricing tables in Divi allows you to display multiple pricing options side by side, making it easier for users to compare features and prices. Here’s how to set up horizontal pricing tables using Divi’s Visual Builder.
Step 1: Create a new page
- Log in to your WordPress dashboard.
- Navigate to Pages > Add New.
- Title your page.
- Click Build On The Front End for a visual view.
Step 2: Set up your section and row
- Click on the + icon to add a new section.
- Choose Regular Section.
- Inside the section, click on the + icon again and select Single Column.
Step 3: Add pricing tables
- Click on the + icon within your row and search for Pricing Table.
- Configure your first pricing table with the necessary details (title, price, features).
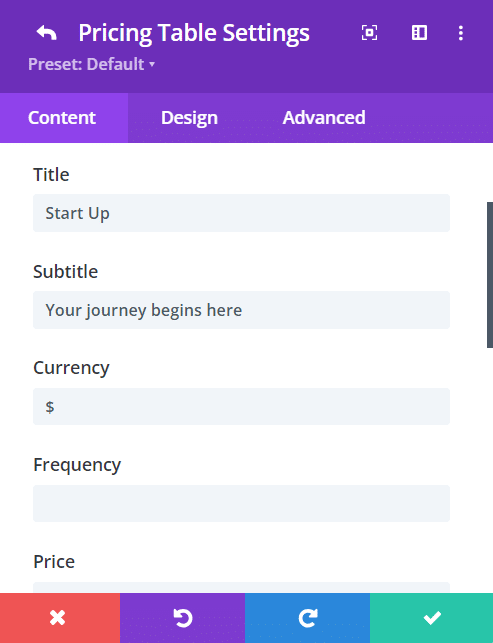
- Click on the duplicate icon (two overlapping squares) to create additional tables for each pricing option.
- Update each duplicated pricing table with different details (e.g. different titles, prices, and features).
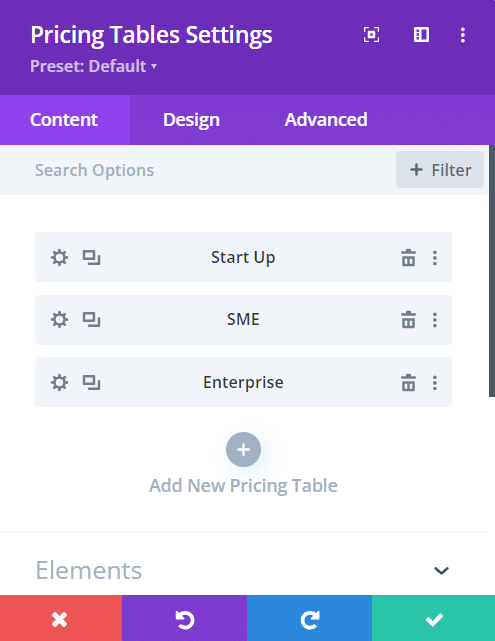
Step 4: Customize each pricing table
- Click on each pricing table module’s gear icon to edit.
- Customize each module’s design settings under the Design tab.
- Adjust font sizes, colors, and spacing as desired.
- Add custom borders or shadows for visual appeal.
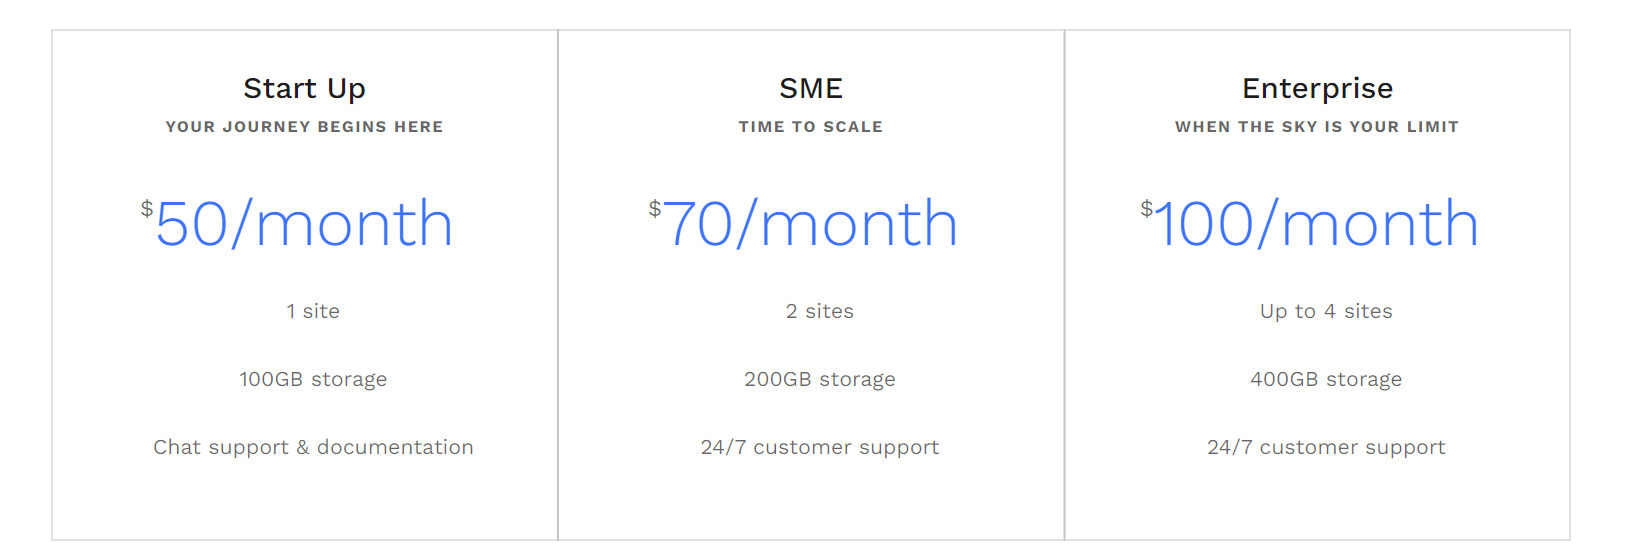
Step 5: Finalize your design
- Preview your page.
- Once satisfied with your layout and design, save changes.
When choosing between vertical and horizontal layouts, do consider readability, as horizontal layouts may require careful spacing adjustments to avoid clutter.
Ensure that text sizes are appropriate and add sufficient padding between columns. Use contrasting colors for text and backgrounds to improve legibility while keeping your design cohesive.
Mobile optimization: Ensuring responsive pricing tables across all devices
To keep mobile users engaged, creating responsive pricing tables that function well across all screen sizes is a must.
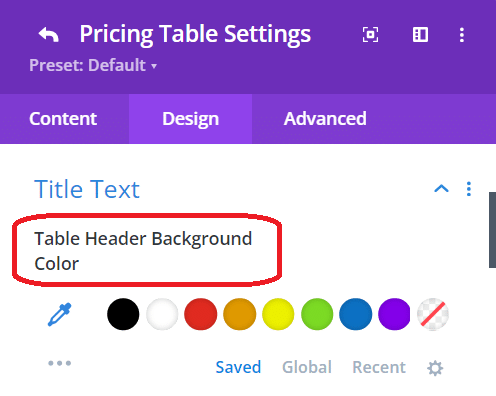
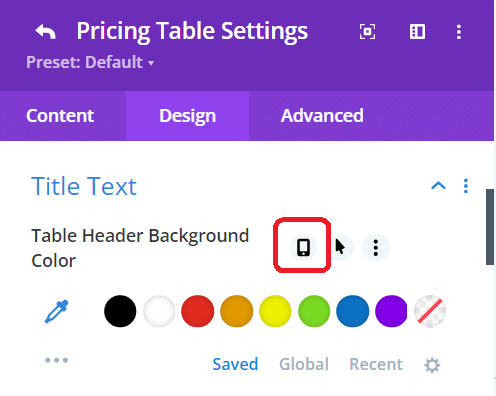
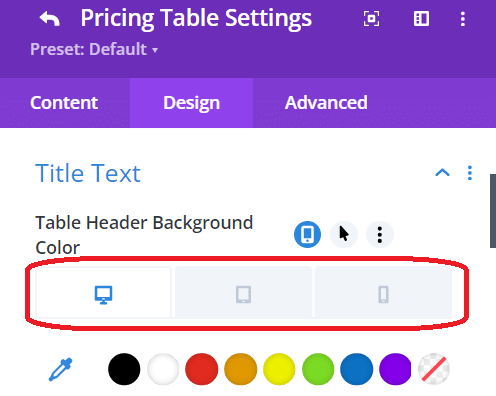
Begin by using Divi’s responsive editing modes to preview how your tables will look on different devices – desktop, tablet, and mobile. A mobile icon will pop up when clicking on a specified feature. Click on the icon and you’ll then be able to switch between desktop, mobile, and tablet views:
When optimizing layouts for mobile, dedicate some time to adjusting column widths. You may want to implement stacking so that each pricing plan appears one below the other instead of side by side. This minor adjustment ensures that users can easily read information without having to get busy with their zoom function.
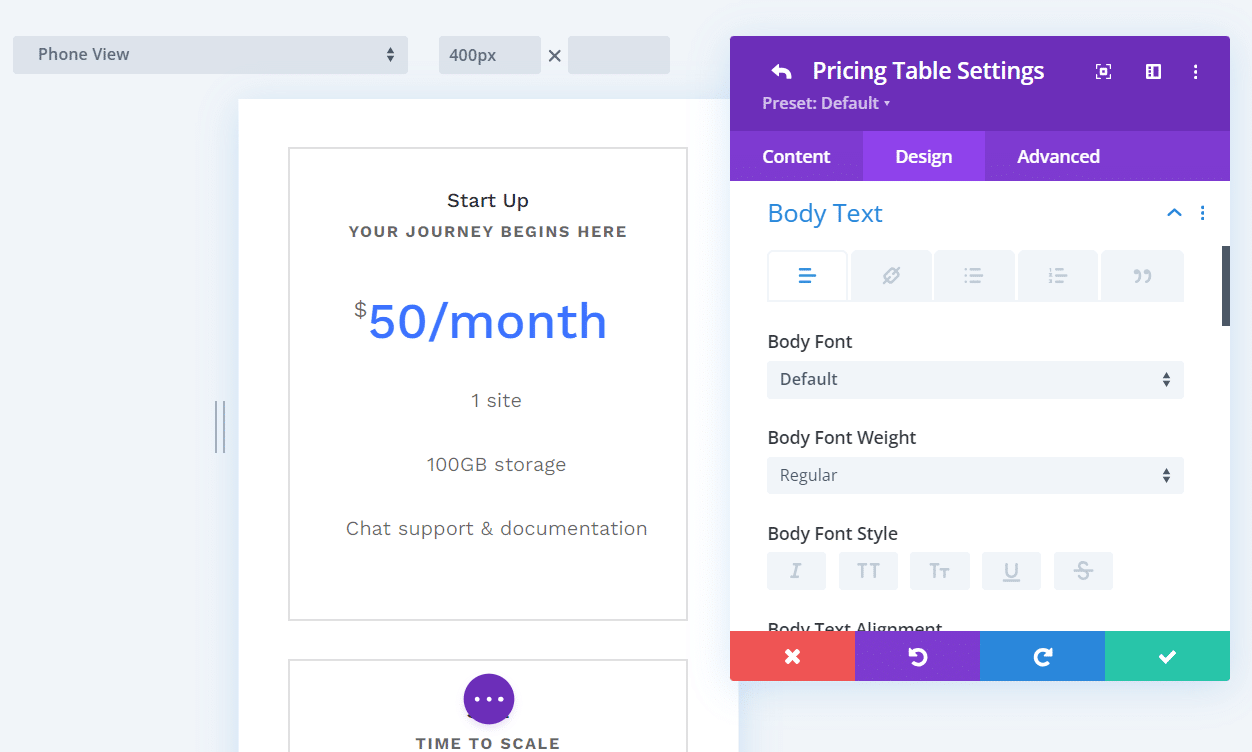
Typography also plays a notable role in mobile optimization. Ensure font sizes are legible on smaller screens – using Design > Title Text > Title Font – and consider increasing line heights for better readability. Adjusting padding – via Design > Spacing > Padding – is equally important. Too much space can lead to wasted screen real estate while too little can clutter matters. Check all of the options available in order to create truly memorable designs.
Simplifying layouts or conditionally hiding less crucial information on mobile can further improve the user experience. For instance, you might choose to display only essential features on mobile while providing full details on desktop views. You can use Divi’s responsive visibility settings to fine-tune how elements appear on different devices.
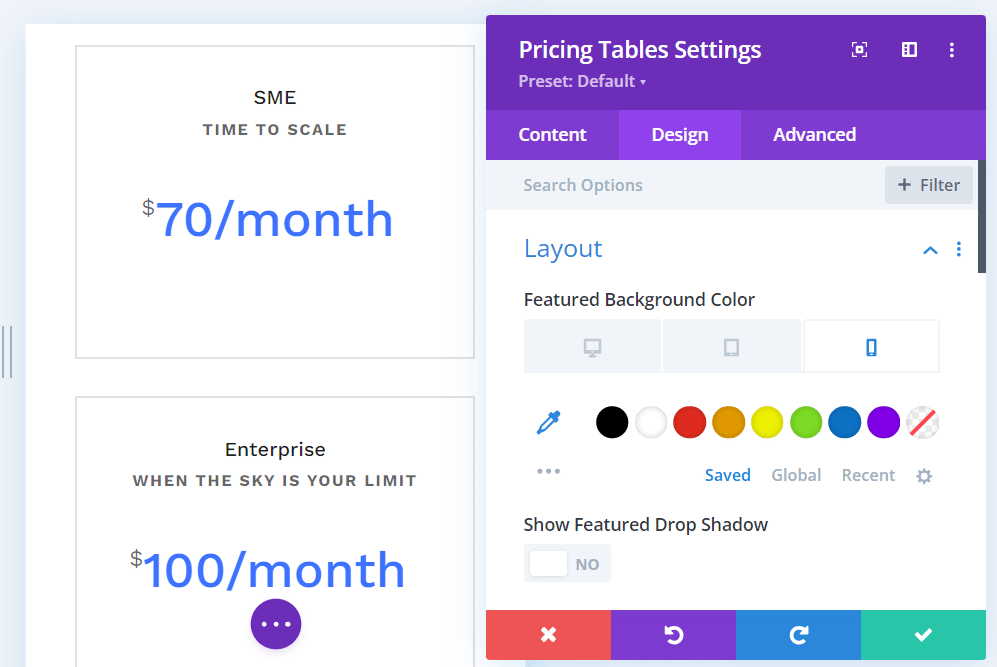
Finally, don’t forget to give your responsive designs a thorough test. Check how they render across various devices and troubleshoot common display issues such as overlapping text or misaligned elements.
Implementing custom icons and eye-catching hover effects
Adding visual elements to your pricing tables can make them far more engaging. One way to do this is by replacing default bullet points with custom icons from Divi’s extensive icon library. This approach adds personality while conveying information quickly.
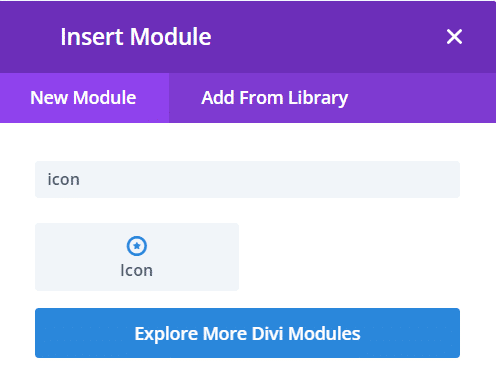
Simply click on the Icon module to select, or Add From Library to make use of any downloaded Divi files. For those looking for something unique, consider uploading custom SVG icons tailored specifically for your brand or service offerings. These icons can then be integrated into your pricing tables using one of the following methods:
1. Using a PHP code snippet
You can enable SVG uploads by adding a code snippet to your theme’s functions.php file. This allows WordPress to recognize SVG files as valid uploads:
function cc_mime_types( $mimes ) {
    $mimes['svg'] = 'image/svg+xml';
    return $mimes;
}
add_filter('upload_mimes', 'cc_mime_types');
After adding this code, you can upload SVG files directly through the WordPress media library.
2. Adding SVG code directly
Advanced users can add an SVG image directly by using its code. This method avoids any upload restrictions and allows for greater customization:
- Create or export your SVG file from design software (like Adobe Illustrator).
- Copy the SVG code.
- In Divi, add a Code module to your page and paste the SVG code directly into it.
This method also allows for styling and animation through CSS.
Creating hover effects for your pricing columns is another means of capturing user attention. Use Divi’s built-in options to implement effects such as color changes or subtle animations when users hover over a column, inviting users to stay put on your site and explore further!
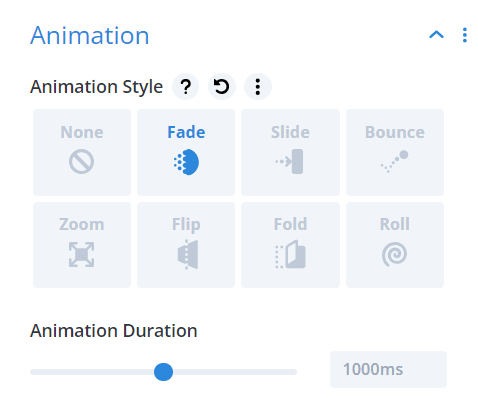
Adding subtle animations can highlight key features or calls to action within your tables without overwhelming visitors with too much movement. Ensure that any custom icons or effects are an enhancement, not a distraction – clarity should always remain your top priority.
Advanced design tricks: CSS hacks and Divi’s hidden gem
Custom CSS is a valuable option for creating unique pricing tables in Divi. By going beyond the standard module options, you can implement effects and styles to enhance the visual appeal and functionality of your pricing tables.
Here are some advanced ideas to follow, using CSS snippets:
Creating diagonal backgrounds
Create a delicious diagonal background effect for your pricing table with the following code:
.your-pricing-table-class {
    background: linear-gradient(135deg, #f06, #ffcc00);
    clip-path: polygon(0 0, 100% 0%, 100% 100%, 0 calc(100% - 50px));
}
Adding hover animations
This groovy snippet will slightly scale the pricing table on hover:
.your-pricing-table-class:hover {
    transform: scale(1.05);
    transition: transform 0.3s ease;
}
Customizing bullet point styles
Change the appearance of bullet points in your pricing features by adding this snippet:
.your-pricing-table-class ul li {
    list-style-type: none; /* Remove item markers */
    position: relative;
    padding-left: 20px;
}

.your-pricing-table-class ul li::before {
    content: '✔'; /* Use a checkmark or your preferred symbol */
    color: #28a745; /* Change to your desired color */
    position: absolute;
    left: 0;
}
Divi’s hidden gem: Using transform controls for 3D effects
Transform controls allow users to manipulate elements for even more creative results, from adjusting element sizes to rotating or distorting them. Divi’s transform options can add another dimension to your designs – simply adjust the perspective and rotation settings to go 3D.
To create a realistic 3D effect, you need to add perspective:
- Open the settings for the row (not just the module).
- In the Advanced tab, go to Custom CSS.
In the Main Element, add this CSS snippet:
perspective: 1000px; /* Adjust value for desired depth */Overview: Balancing custom CSS with maintainability
While custom CSS can seriously boost your designs, try to balance creativity with maintainability. Use meaningful class names and comment on complex code to ensure that future updates or changes are manageable. Following best practices for clean code will help maintain the integrity of your designs as your website evolves.
Why many Divi users turn to third-party layouts for pricing tables
While Divi’s built-in pricing table module is fine and functional, it does come with limitations that drive many users to seek a third-party solution. The basic design options may not align with modern web aesthetics, and the lack of advanced features can hinder creativity. One example is the lack of a functioning toggle, which can be used to switch between the likes of monthly and yearly pricing. This needs a plugin such as Divi Bricks or Divi Modules Pro – we’ll come to these in just a moment!
Additionally, creating complex, multi-tiered pricing structures can be cumbersome, making it difficult to present diverse offerings effectively. For many web designers, the resource-consuming process of crafting professional-looking tables from scratch can detract from other important tasks, and time, after all, is money!
Third-party pricing table layouts offer a great alternative, providing a diverse selection of pre-designed, conversion-optimized templates that save time and effort. These layouts come with advanced customization options, allowing for better brand alignment without the need for extensive CSS knowledge.
They’re also designed to be responsive and cross-browser compatible, ensuring an excellent user experience across devices. Regular updates keep these layouts in line with current design trends and Divi updates.
“Using third-party layouts allows you to create multiple pricing tables that are uniquely styled for each client without the hassle of coding. They can improve workflows and boost efficiencies, all the while wowing your clients with a visually appealing end result.”
– Jennifer Rodriguez, Lead Developer at Divi Life
Elevate your pricing tables with Divi Bricks’ pre-designed layouts
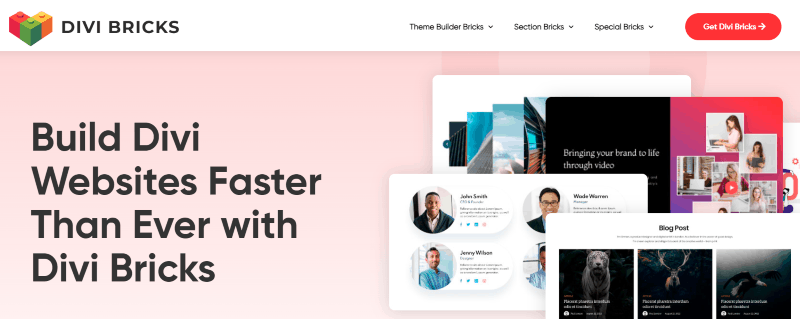
Allow us to introduce our very own Divi Bricks – creating eye-catching and effective pricing tables just got easy! As a collection of over 500 pre-designed layouts, Divi Bricks offers a diverse selection of pricing table designs to choose from, saving you valuable time compared to building from scratch.
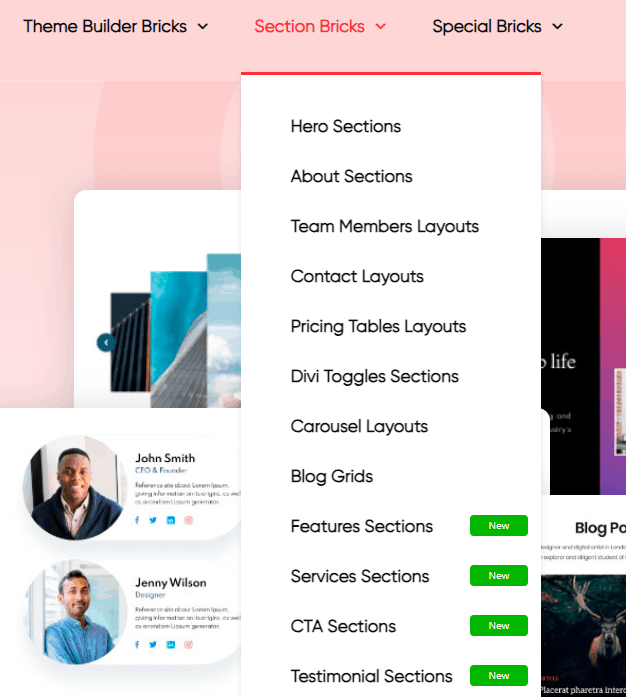
Within the Section Bricks category alone, there are over 50 pricing page layouts available, each carefully crafted to cater to different industries and business needs. From modern and sleek to classic and elegant, you’ll find a style that perfectly matches your brand’s personality.
Divi Bricks’ layouts come with built-in customization options, allowing you to easily adjust colors, fonts, and content to align with your branding. The layouts are also designed to be fully responsive, ensuring your pricing tables look great on all devices, from desktops to smartphones.
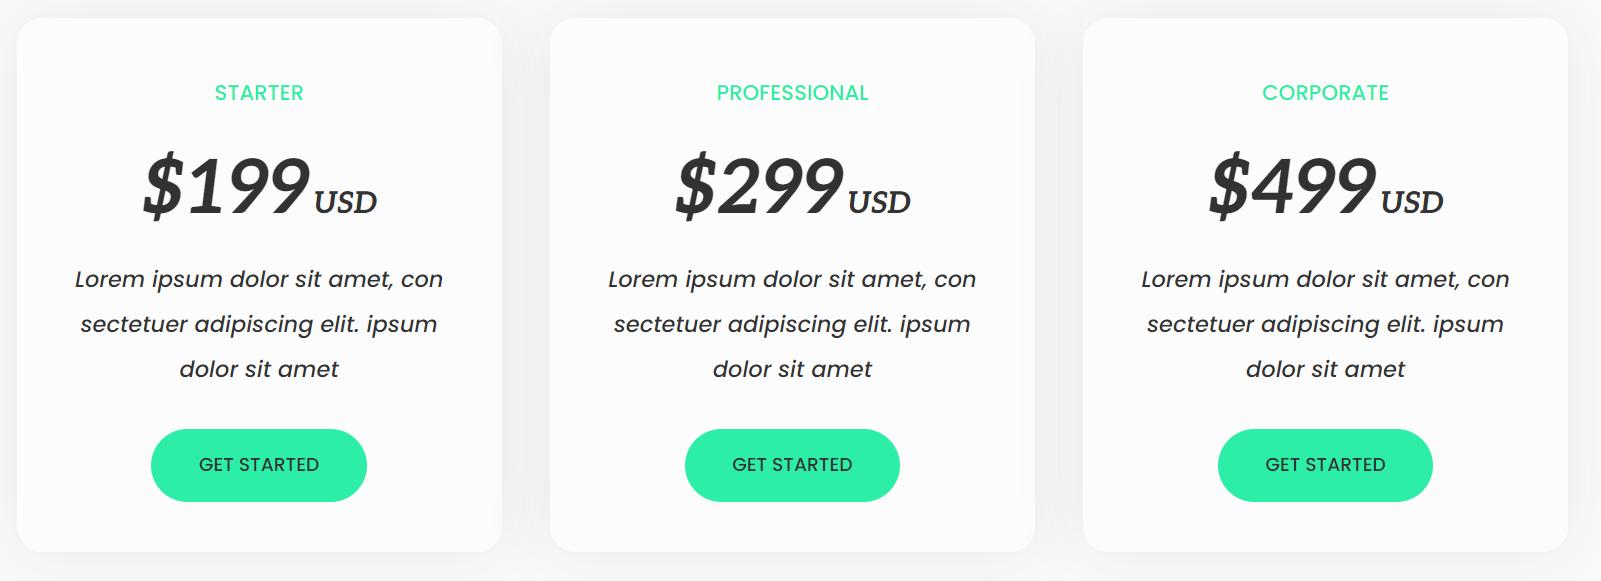
An added Divi Bricks bonus is its integration with Divi Cloud (get a big discount here!). By importing your favorite pricing table layouts into the Divi Cloud, you can easily access and organize them for quick use across multiple websites, reducing timescales and ensuring design consistency.
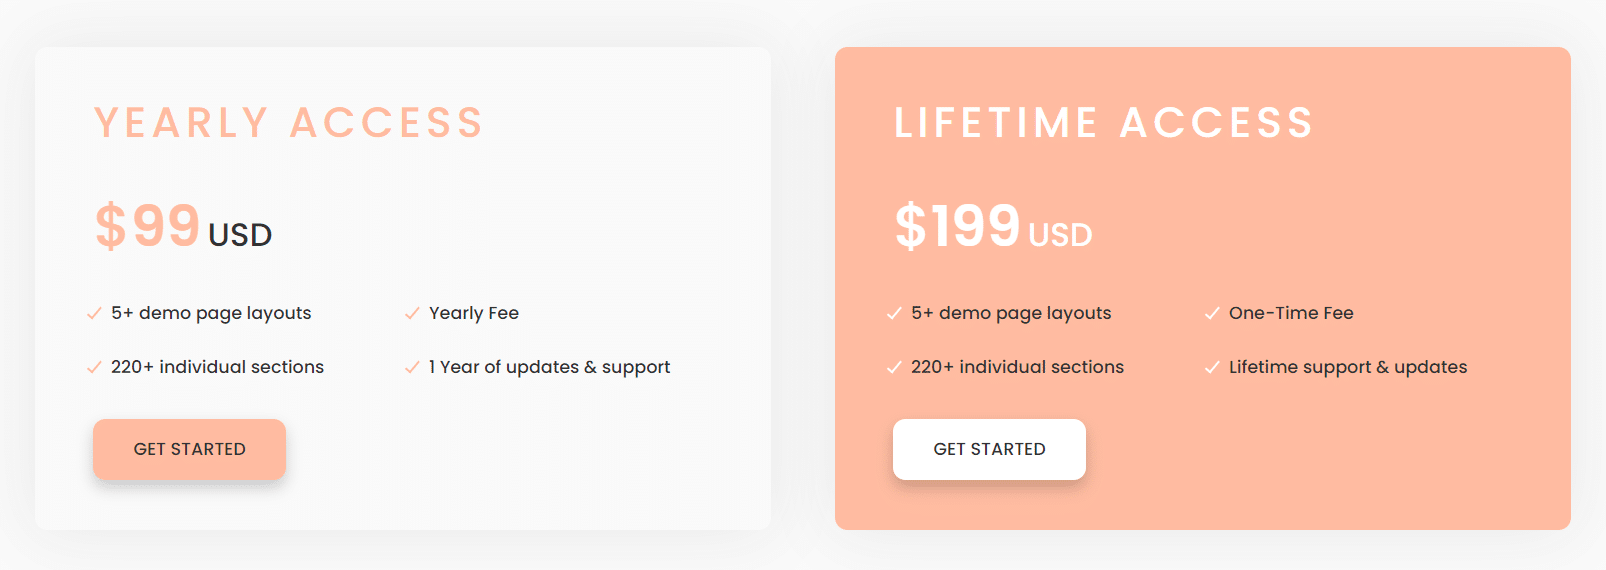
Furthermore, the Divi Bricks pricing table layouts employ all of the latest Divi functions, ensuring optimal performance across your site. You’ll find a variety of layout options, including monthly/yearly toggles, feature comparisons, and tiered pricing plans. These layouts can even be mixed and matched to create pricing sections that are unique to your brand.

To get started with Divi Bricks, simply follow these steps once you’ve downloaded your layouts:
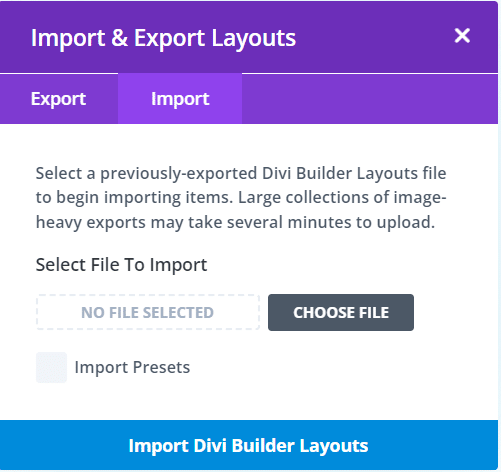
Import to Divi Library
- In your WordPress dashboard, navigate to Divi > Divi Library.
- Click on Import & Export at the top of the page.
- Select the Import tab and upload your JSON file directly to your current website’s library.
Using Divi Bricks
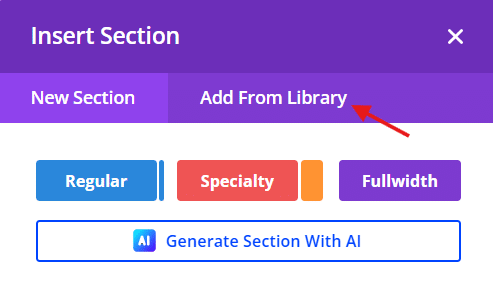
1. Add a new section:
- Create or edit a page using the Divi Builder.
- Click on Add New Section
2. Select your imported layouts
- From the section options, choose Add From Library.
- Browse through your imported layouts and select one to add to your page.
3. Customize your layout:
- Once added, you can customize each section using the standard Divi Builder controls.
- Adjust settings for layout, spacing, colors, and more as per your design requirements.
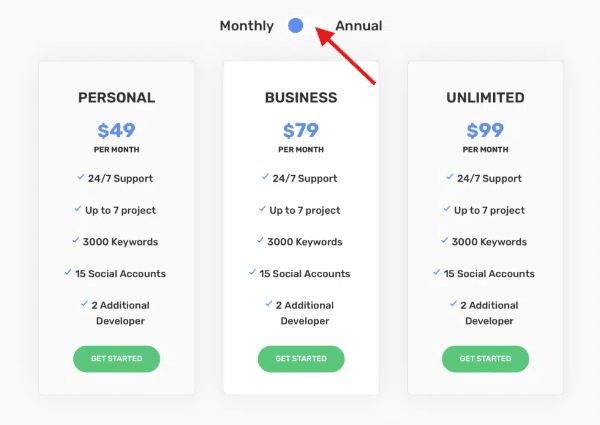
One popular example is the Pricing Table with Toggle layout. This innovative design features a toggle button that allows visitors to switch between monthly and annual pricing plans, making the decision-making process more interactive and engaging.
If you’re new to Divi Bricks, don’t worry – comprehensive documentation and our dedicated support are available to help bring your ideas into reality. Try our guide to using Divi Bricks to get going, or explore Divi Bricks layouts for more pricing table options and design inspiration!
“I rate their support as highly as their products. A+ overall!”
“Tim was quick to respond to my questions and very helpful. A+”
“You guys are as great as I heard you are!”
You can find more happy comments through our Customer Support Reviews.

Divi Bricks
Like LEGO bricks for your website: build your website faster than ever with thousands of website elements
Using Divi Modules Pro for monthly/yearly toggle pricing
To create monthly/yearly toggle pricing using Divi Modules Pro, follow our simple step-by-step tutorial below. You’re not limited to monthly/yearly toggling of course – restaurant menus can benefit from a lunch/dinner switch, and a travel company might want to offer a toggle between a standard and an all-inclusive package.
Whatever your cause, the Pro Content Toggle module allows you to display two different pricing options, making it easy for users to switch between them – without cluttering your layout.
1. Create a new page or edit an existing one
- Enable the Divi Builder.
- Click on the + icon to add a new section.
- Choose Regular Section.
- Inside the new section, click on the + icon to add a new row.
- Select a Single Column structure.
2. Add the Pro Content Toggle module
- In the row settings, click on the + icon to add a module.
- Select the Pro Content Toggle module from Divi Modules Pro.
- Enter titles for your monthly and yearly plans (e.g. ‘Monthly Plan’ and ‘Yearly Plan’, or ‘Lunch Menu’ and ‘Dinner Menu’).
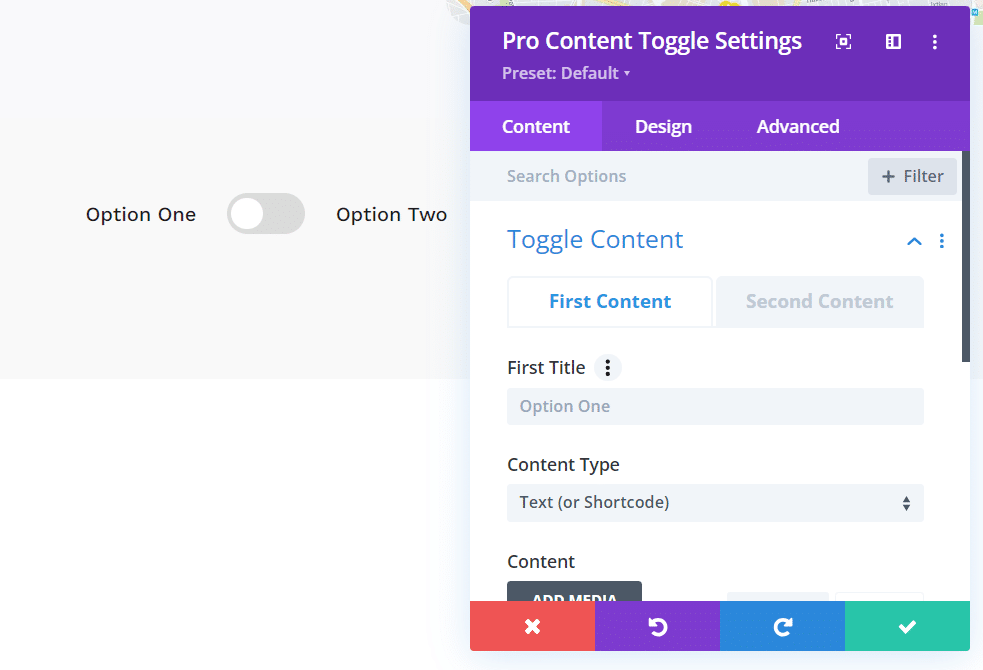
- In each toggle’s content area, you can add detailed pricing and any other information.
3. Style the toggle module
- Navigate to the Design tab of the Pro Content Toggle module.
- Customize settings such as background color for each toggle, and text colors for better visibility. and font size and weight to enhance readability.
- Adjust the toggle state by choosing which toggle should be open when the page loads.
- Save and preview your changes.
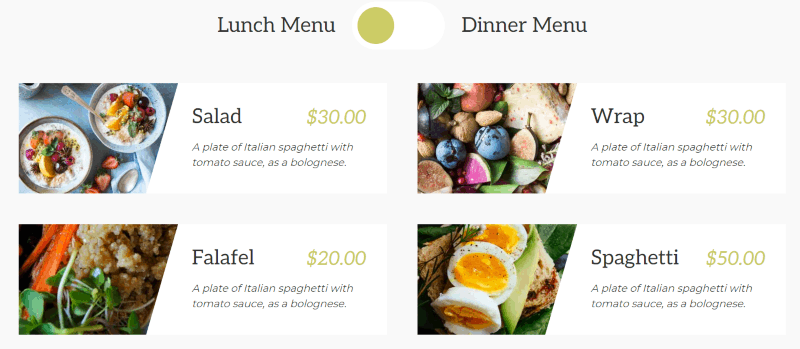
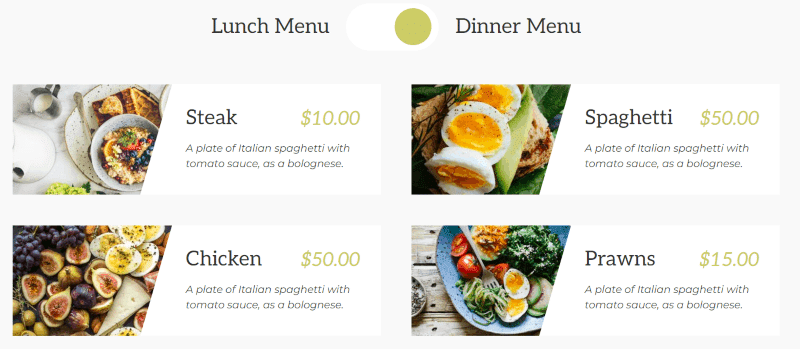
Check out this lip-smacking example below!
From bland to grand: Transform your pricing tables now
Consider well-designed pricing tables as a nifty method of maximizing your conversions – in essence, they’re a powerful call to action. To take your Divi pricing tables to the next level, start by applying the customization techniques discussed in this guide. Experiment with unique styles, hover effects, and advanced features, and visually appealing tables can be yours in no time at all!
Don’t forget to test and optimize your pricing table performance regularly. Analyze user interactions and conversion rates to identify areas for improvement. Consider trying out different layouts and styles to see what your audience responds to, and most of all, don’t be afraid to experiment.
For those seeking a quicker solution, our Divi Bricks layouts offer an extensive selection of pre-designed options that can significantly speed up your design process, and Divi Modules Pro comes with a toggle that’s easy to configure in just a few minutes. If you’re looking to fast-track your pricing table design, transform your tables from bland to grand in an instant by trying Divi Bricks or Divi Modules Pro today!

Divi Modules Pro
Get Divi Modules Pro & Access Dozens of Interactive Creative Design Modules
Table of Contents
- Essential customization tips for the default Divi pricing table module
- Advanced design tricks: CSS hacks and Divi’s hidden gem
- Why many Divi users turn to third-party layouts for pricing tables
- Elevate your pricing tables with Divi Bricks’ pre-designed layouts
- Using Divi Modules Pro for monthly/yearly toggle pricing
- From bland to grand: Transform your pricing tables now



0 Comments