Divi Popup Creation: A Step-by-Step Tutorial
Looking to create engaging and effective popups for your Divi-powered website? Then come on in, as we have the perfect guide for you!
Click Here to see the popup we’ll be creating in this tutorial! Pretty slick huh? Read on to see how you can achieve this. Plus, we have a free bonus gift for you! We’ll send you a popup layout for free, and you can easily import it into your website. 🎁
Whether you want to grow your email list, promote special offers, or share important announcements, popups can make a real impression. However, designing and implementing popups that capture your visitors’ attention without being intrusive can be a challenge for anyone. Thankfully, a little knowledge goes a long way.
In our complete guide, we’ll explore two main approaches to creating popups in Divi: using the built-in Lightbox functionality (no plugin required) and using a dedicated popup plugin (no coding required). You’ll discover the pros and cons of each method, and find step-by-step instructions to implement wow-factor popups on your Divi website.
Strap yourself in, and let’s get started on the journey to mastering Divi popups.
Before we dive into the tutorial: if you don’t want to have to deal with code and creating the popup manually, then we recommend grabbing Divi Overlays! 👇
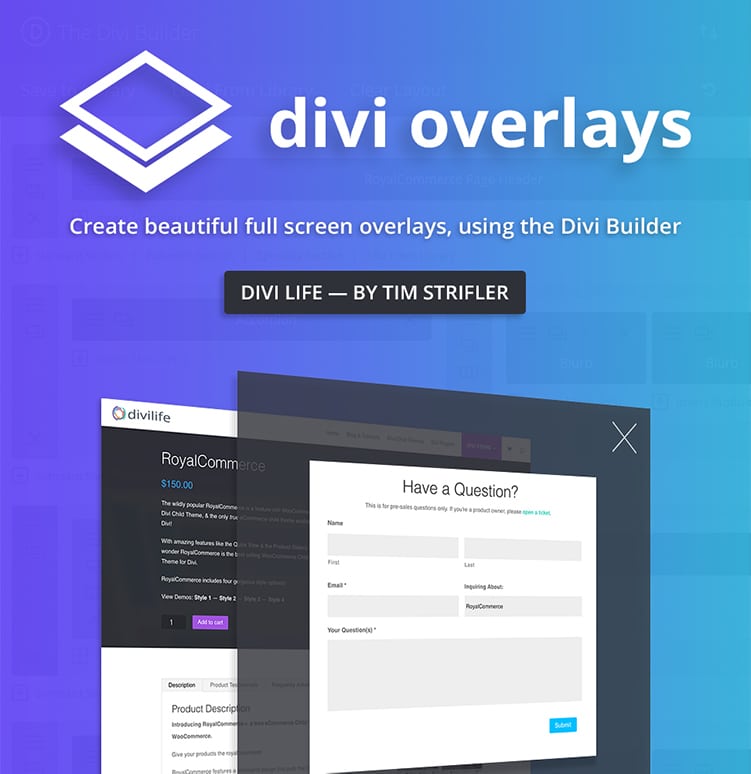
Do More With Divi Overlays!
Divi Overlays is the original popup builder for Divi, & remains the most powerful, most popular, & easiest to use popup builder for Divi! Easily create gorgeous, feature-rich popups! 😍
Creating Popups in Divi Without a Plugin: Using Divi’s Lightbox Functionality
As we’ve mentioned, you can create popups in Divi without an additional plugin by using its built-in Lightbox. This allows users to create simple popups that will do the job but won’t necessarily be spectacular. Those who only have minimal use for popups may find it useful.
That said, creating popups using Lightbox requires basic coding knowledge, which might be a barrier for some users. You might also get a wider range of features and customization options from some plugins.
In summary, the Lightbox functionality allows users to create simple click-triggered popups, but it doesn’t support automatic triggers based on user behavior, exit intent, advanced targeting, or pre-designed templates. With this in mind, it may not be the best choice for more complex popups.
Understanding Lightbox Trigger Elements and Lightbox Content Elements
If you’re looking to create popups in Divi without a plugin, understanding the concept of Lightbox Trigger Elements and Lightbox Content Elements is a must. Thankfully, it’s super straightforward!
The Lightbox Trigger is the element that a user interacts with to open the popup, such as a button, link, or image. This trigger element initiates the popup to appear on the screen. The Lightbox Content is the actual content that is displayed within the popup, which can include text, images, forms, or any other Divi modules.
To ensure that the popup functions as expected, both the Lightbox Trigger and Lightbox Content elements need to be created and configured correctly. Use structured CSS class names so it’s easier to call them up later with jQuery, which we’ll use to add interactivity and functionality to the popup.
Example of How to Create a Popup Using Divi’s Lightbox Functionality
So how do you achieve this little mission? Grab a coffee and follow our detailed guide on how to set up your popup:
Click Here to see the popup we’ll be creating in this tutorial!
Get the Popup Layout for Free
Want me to send you the popup layout so you can easily import it into your own site? Click the button below and enter your email, and we’ll send it your way!
Step 1: Create the Lightbox Content
Begin by adding a new section to your page that will contain the popup content. This section can include any Divi modules you desire, such as text, images, forms, or a combination of elements.
To identify this section as your popup content, navigate to the Section Settings, click on the Advanced tab, and add a CSS class that starts with lightbox-content, such as lightbox-content-1.
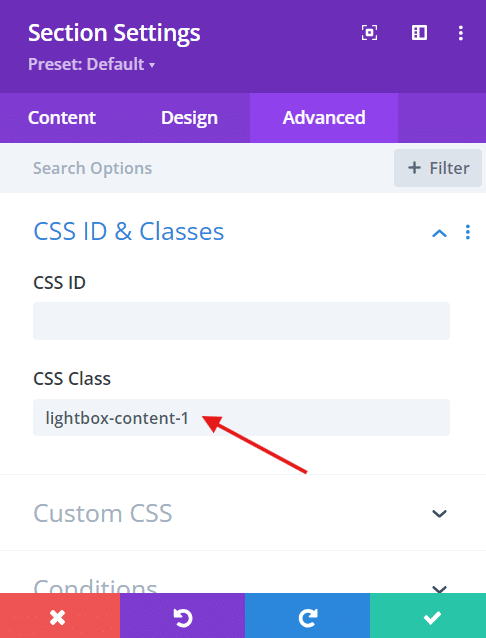
With the section ready, you can now design your content within it. Add any other modules you want to be visible in the popup.
Step 2: Create the Lightbox Trigger
Next up, choose the element you want to use as the trigger to open your popup. This can be a Button module, a link within a Text module, an Image module, or any other clickable element within your Divi layout. In the module settings for your chosen trigger element, navigate to the Advanced tab and add a CSS class starting with lightbox-trigger to identify it as the trigger for your specific popup, such as lightbox-trigger-1.
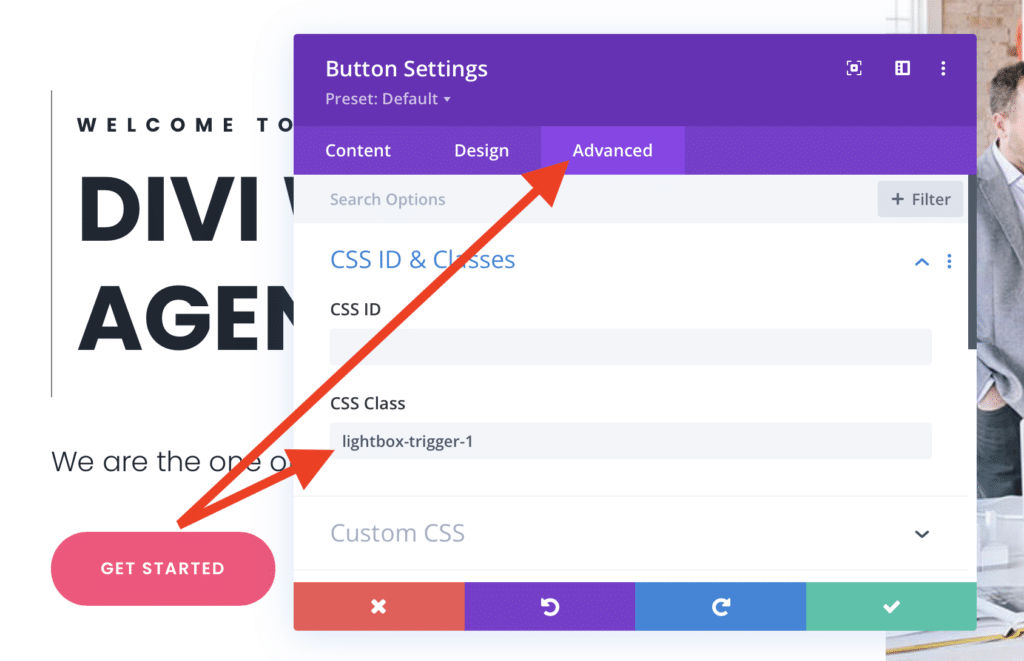
⚠ Ensure the final part of the class name matches the one used in the content module.
Step 3: Add the Code
To enable the Lightbox functionality, you’ll need to add a couple of lines of code. If you’re not an expert, don’t worry – this is the only part of the process where you’ll be interacting with code, it’s a simple copy-and-paste job, and it’s all annotated with comments so you know exactly what’s happening.
There’s two ways to add the code, depending on whether you’re going to be using popups on multiple pages or more than one page.
Adding the Popup to Only One Page: Open a code module on the page and copy the CSS code below into the code module. Then, copy and paste the jQuery code below into the same code module below the CSS code. You’re done!
Adding the Popup to Multiple Pages: Go to Divi > Theme Options > Integration > Add code to the < head > of your blog, and paste the following bit of CSS styling first, then add the jQuery code below it in the same box.
<style>
/* Overlay styles */
.lightbox-overlay {
	position: fixed !important;
	top: 0 !important;
	left: 0 !important;
	width: 100% !important;
	height: 100% !important;
	background-color: rgba(0,0,0,0.8) !important;
	z-index: 999998 !important;
	display: none;
}

/* Lightbox content styles */
[class*="lightbox-content"] {
	position: fixed !important;
	top: 50% !important;
	left: 50% !important;
	transform: translate(-50%, -50%) !important;
	background: #fff !important;
	padding: 30px !important;
	border-radius: 5px !important;
        width: 90%;
	max-width: 1440px !important;
	max-height: 80% !important;
	overflow: auto !important;
	z-index: 999999 !important;
	display: none;
	box-shadow: 0 0 20px rgba(0,0,0,0.2) !important;
}

/* Close button styles */
.lightbox-close {
	position: absolute !important;
	top: 10px !important;
	right: 10px !important;
	font-size: 24px !important;
	cursor: pointer !important;
	color: #333 !important;
	background: none !important;
	border: none !important;
	padding: 5px !important;
	line-height: 1 !important;
}

/* Prevent scrolling on body when lightbox is open */
body.lightbox-open {
	overflow: hidden !important;
}
</style>
💡 The !important declarators keep the values from being overridden by conflicting styles.
Next, you’ll need some jQuery to trigger the lightbox when you click on the button. Paste the following into a new line directly below the previous bit of code:
<script>
jQuery(document).ready(function($) {
	// Create overlay if it doesn't exist
	if ($('.lightbox-overlay').length === 0) {
    	$('body').append('<div class="lightbox-overlay"></div>');
	}

	// Process each lightbox content element
	$('[class*="lightbox-content"]').each(function() {
    	var $content = $(this);
    	// Move content to body if it's not already there
    	if (!$content.parent().is('body')) {
        	$content.appendTo('body');
    	}
    	// Add close button if it doesn't exist
    	if ($content.find('.lightbox-close').length === 0) {
        	$content.prepend('<button class="lightbox-close">×</button>');
    	}
	});

	// Open lightbox when trigger is clicked
	$(document).on('click', '[class*="lightbox-trigger"]', function(e) {
    	e.preventDefault();
    	var triggerClass = $(this).attr('class').split(' ').find(c => c.startsWith('lightbox-trigger'));
    	var contentClass = triggerClass.replace('trigger', 'content');
    	$('.lightbox-overlay').fadeIn();
    	$('[class*="' + contentClass + '"]').fadeIn();
    	$('body').addClass('lightbox-open');
	});

	// Close lightbox when overlay or close button is clicked
	$(document).on('click', '.lightbox-overlay, .lightbox-close', function(e) {
    	if ($(e.target).hasClass('lightbox-overlay') || $(e.target).hasClass('lightbox-close')) {
        	$('.lightbox-overlay, [class*="lightbox-content"]').fadeOut();
        	$('body').removeClass('lightbox-open');
    	}
	});

	// Close lightbox when Escape key is pressed
	$(document).keyup(function(e) {
    	if (e.key === "Escape") {
        	$('.lightbox-overlay, [class*="lightbox-content"]').fadeOut();
        	$('body').removeClass('lightbox-open');
    	}
	});
});
</script>
If you’re adding the popup to just one page, and you’ve added the code to a code module, be sure to save the module after adding the code.
If you’re adding popups to multiple pages, and you’ve added the code to Divi Theme Options, then make sure to click on Save Changes at the bottom of the page and wait for a green check to appear.
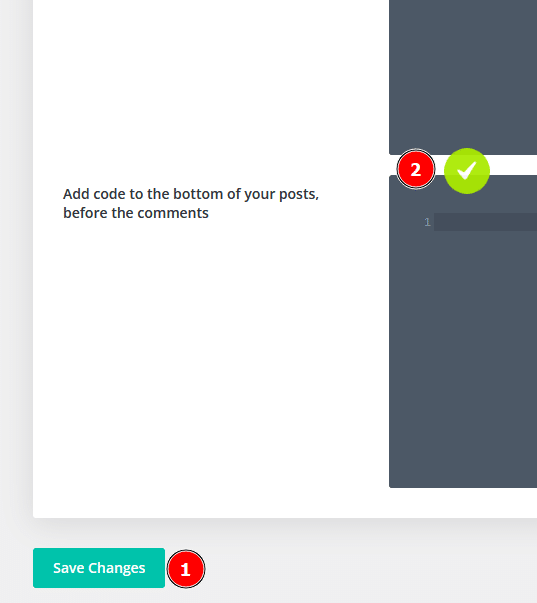
Step 4: Save and Test
Once you’ve completed the setup of your lightbox content, lightbox trigger, and added the necessary code, it’s time to save your page and preview the result. Click on the trigger element you created, whether it’s a button, link, or image, and verify that your hidden popup content appears in a lightbox as expected.
In the image below, for example, the button in the back triggers a popup with contact information and a contact form.
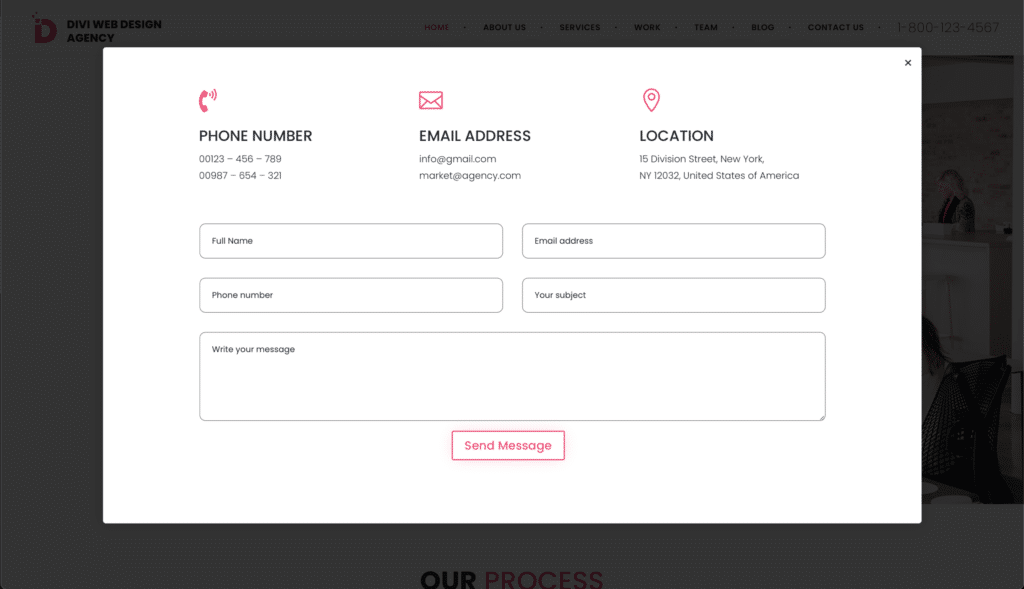
Congratulations! You’re now an official expert at creating popups in Divi using the built-in Lightbox feature. Keep the following in mind when creating future popups and you’ll find returning to the process easy as pie:
- The Lightbox Content section must have a unique lightbox-content-[your-preferred-identifier] CSS class.
- The Lightbox Trigger element must have a unique lightbox-trigger-[your-preferred-identifier] CSS class.
- The final part of the class names need to match for both the content and trigger. For example, lightbox-content-30 should always go with lightbox-trigger-30.
- The jQuery code handles the click event and opens the appropriate content in a popup.
- The CSS code styles the popup.
Get the Popup Layout for Free
Want me to send you the popup layout so you can easily import it into your own site? Click the button below and enter your email, and we’ll send it your way!
Using a Plugin to Create Popups in Divi
As we’ve seen, the Lightbox method is one way to achieve popups but it’s not for everyone. Using a dedicated popup plugin is the preferred method for many, considering the relative ease of use.
Dedicated plugins typically come with simple interfaces and drag-and-drop builders, allowing you to create popups quickly and without any coding knowledge.
Another advantage of popup plugins is the wide range of customization options they provide. It’s much easier to tailor popups to match a website’s design and branding when using a plugin. Many tools come with pre-designed templates, color schemes, and font options, making it easy to create visually appealing popups in line with your brand.
Some users opt to use the Bloom plugin included in their Divi package, though as we’ll see this isn’t an ideal choice.
The Limitations of Divi’s Bloom Plugin for Popups
How does Divi’s Bloom plugin measure up as a popup enabler? Well, the tool comes included with Divi and is a popular choice for creating email opt-in forms. However, it may not be the best option for creating other types of popups. Bloom is primarily designed for email and list building, so it lacks flexibility for creating popups like announcements, promotions, or content upgrades.
Bloom also doesn’t have a visual drag-and-drop builder for designing popups. Users are limited to customizing pre-made templates with the options provided, whereas other plugins offer more flexibility in design. Bloom also comes without some popular popup types like notification bars, fullscreen welcome mats, and content lockers that other plugins provide.
A further drawback of Bloom’s use for popups is that it doesn’t have an exit-intent trigger option – a very effective and commonly used popup trigger. This means you’ll miss out on the opportunity to capture visitors’ attention as they are about to leave the website. Thankfully though, we’ve a better option for popups right here!
The Better Option: Divi Overlays by Divi Life
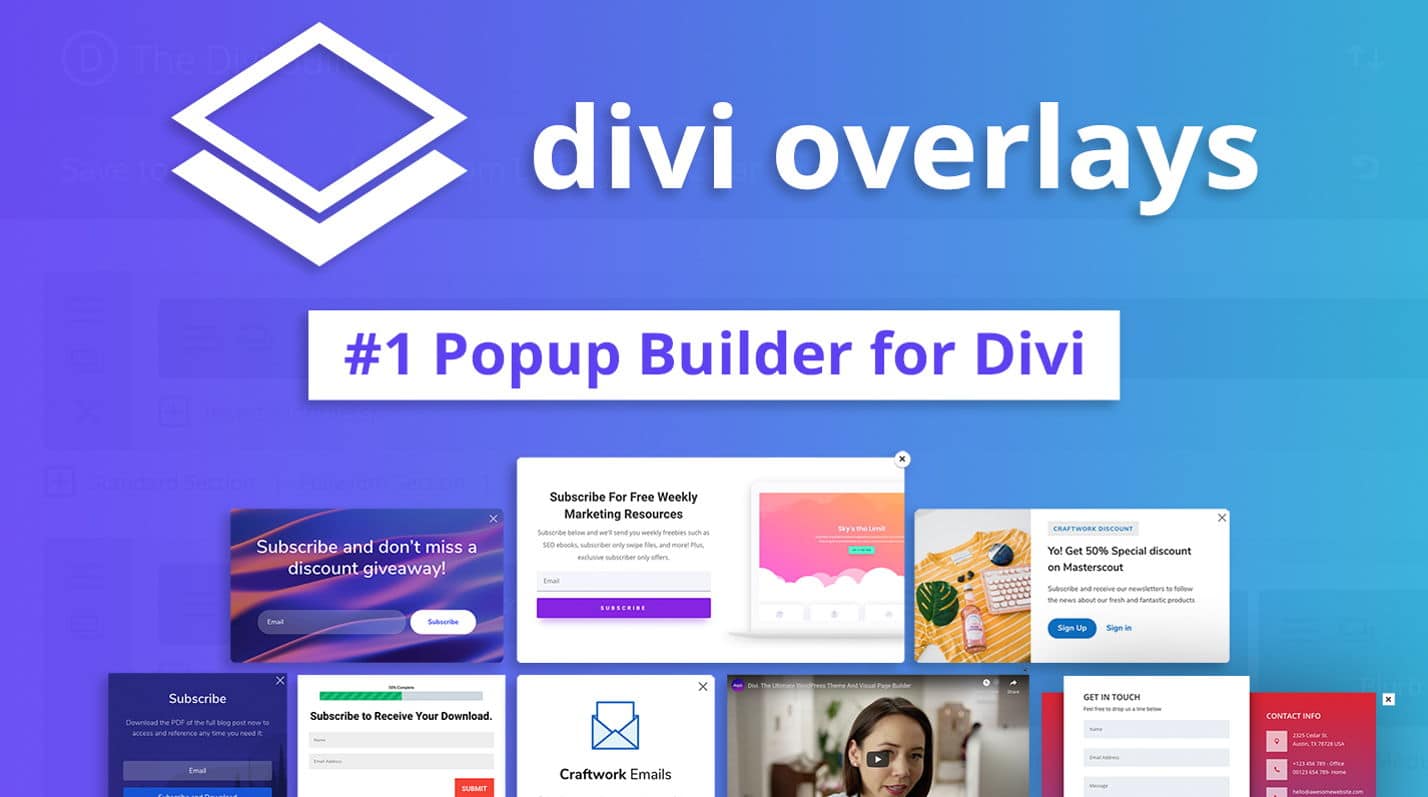
Say hello to Divi Overlays by Divi Life, a versatile and highly recommended popup plugin solution. Our plugin offers a wide range of features and customization options, making it easy to create popups in line with your designs and specifications.
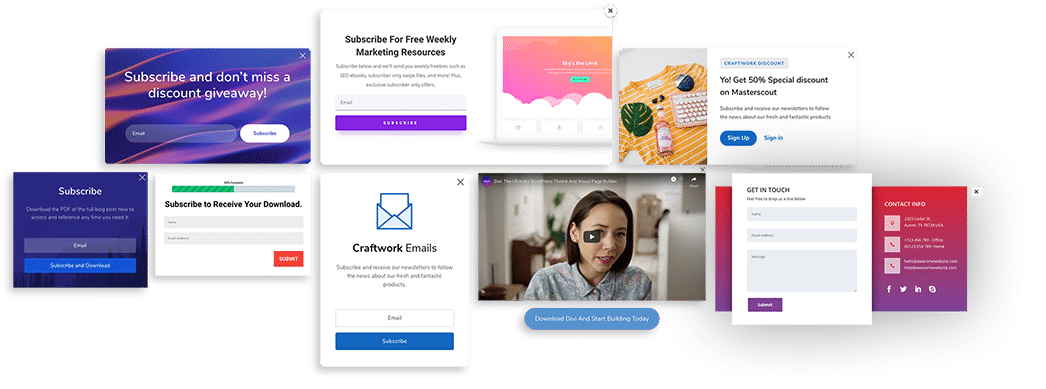
For starters, Divi Overlays houses a collection of customizable templates. These include progress bars, subscribe forms, and splash popups, and they provide a great starting point for design and can be easily modified using the familiar Divi Builder interface. Our plugin also offers various animation options to create eye-catching and dynamic popups to wow your visitors.
Divi Overlays provides several trigger options to control when your popups appear. The timed delay trigger allows you to set a specific delay before the popup is displayed, while the scroll delay trigger activates the popup when a user reaches a certain point on the page. The exit-intent trigger is particularly effective, as it detects when a user is about to leave your site, giving you one last chance to charm them into staying put.
One of the biggest advantages of Divi Overlays, is being able to design the popup using the Divi Builder! 🤩
Divi Overlays was not only the first popup builder for Divi to offer the advantage of designing the popup with the page builder, but it was actually the first popup builder for WordPress to have this feature! In other words: we invented the page builder powered popup!
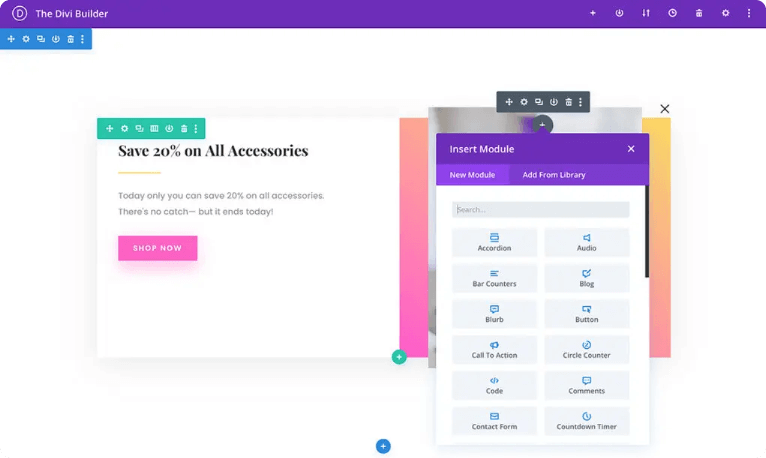
The plugin’s ease of use and flexibility are also notable advantages. With Divi Overlays, you can create popups containing various types of content, such as pricing tables, video, contact forms, image galleries, and even shopping cart overlays. Such versatility allows you to tailor your popups to match specific needs and goals, and the aforementioned popup templates simplify the creative process even further.
If you’re looking for a popup solution that can handle any type of content, look no further than Divi Overlays!
A Step-by-Step Guide to Creating a Pop-up with Divi Overlays
Those itching to get started on creating incredible popups using Divi Overlays can rest assured that the process is a simple one. Follow the steps below and you’ll be good to go:
Step 1: Choose a Popup Template (Optional)
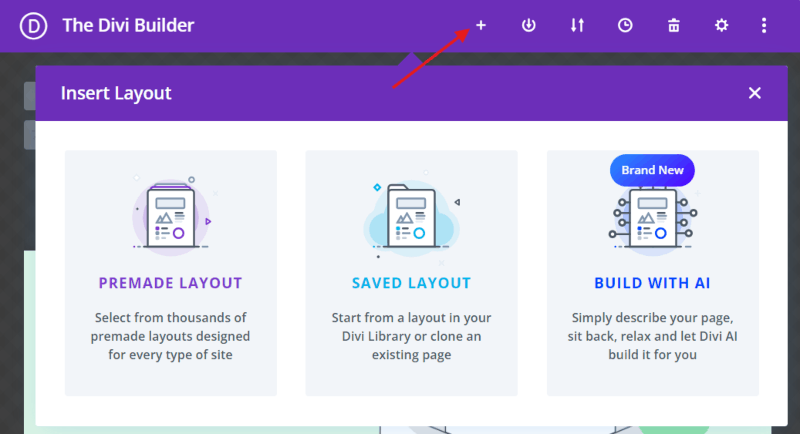
Divi Overlays comes with a variety of pre-designed popup templates that you can import and customize, saving you time in the design process. To use a template, simply click on the + icon on the Divi Builder to open the Insert Layout tab, then select Premade Layout. Remember – these are just a starting point for your designs, and you’ll be able to tweak their design to your heart’s content.
Step 2: Customize the Popup Layout and Design
Using the familiar Divi Builder interface, you can easily customize your popup’s layout and design.
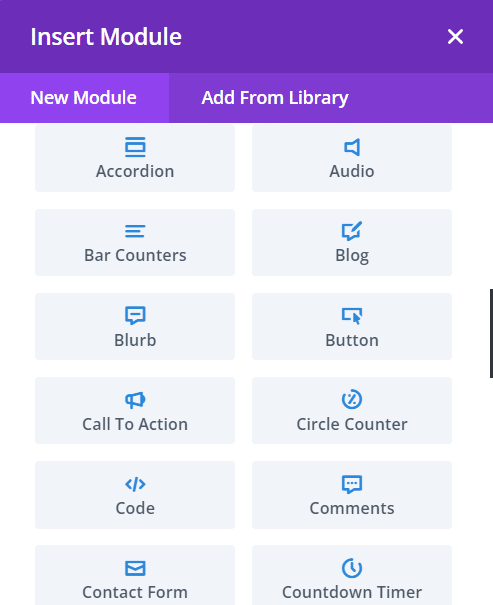
Add or remove modules as needed, and adjust the module settings to create the perfect look and feel for your popup. Don’t forget to style your popups to match your branding, so they sit pretty with the rest of your site’s design.
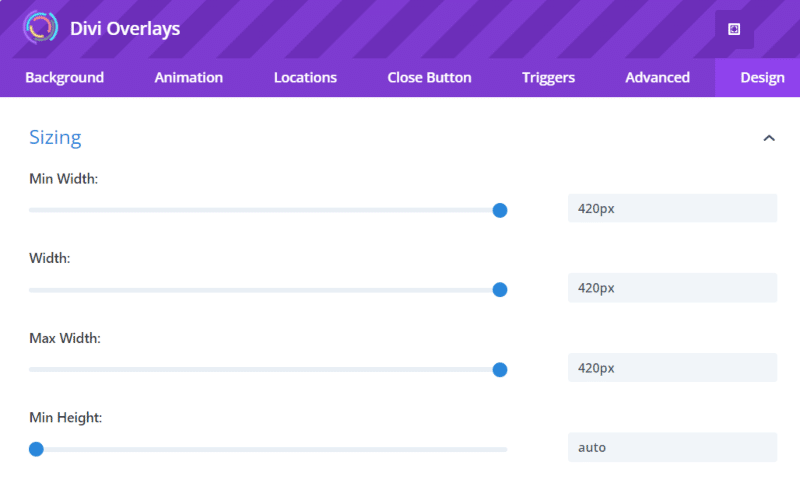
Step 3: Configure Popup Settings
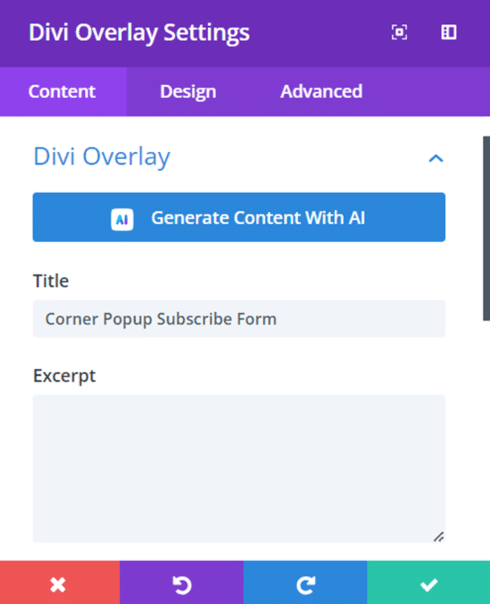
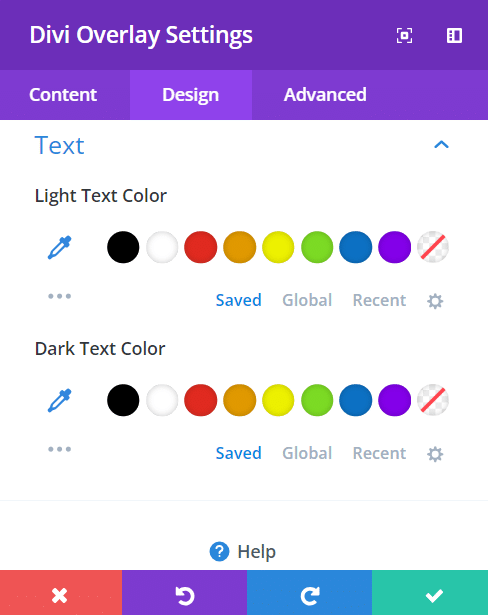
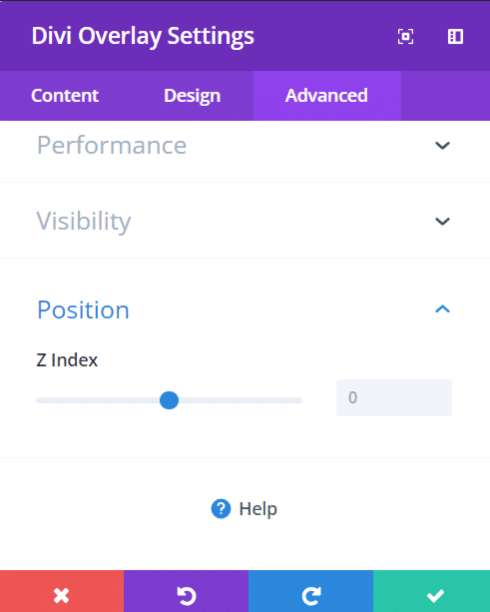
Divi Overlays offers a wide range of popup settings that you can configure to suit your needs. Access these settings by clicking on the Divi Overlays Settings button in the popup editor. Here, you can adjust the popup size, position, animation, background overlay, and close button options. Take the time to experiment with these settings to create the perfect popup experience for your visitors.
|
|
|
Step 4: Set Up Triggers
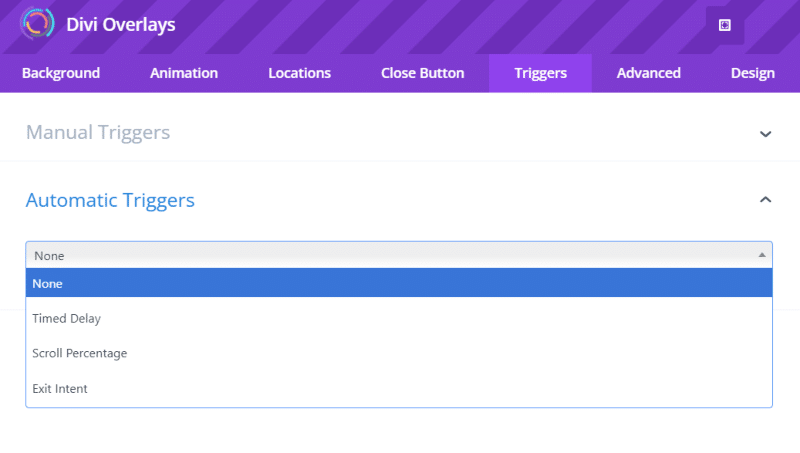
One of my favorite features of Divi Overlays is its variety of trigger options. You can choose from click, hover, exit-intent, scroll, and time delay triggers, each designed to capture your visitors’ attention at the perfect moment.
To set up a trigger, navigate to the Triggers tab in the popup settings and select your desired trigger type. Follow the on-screen instructions to configure the trigger settings, such as the delay time or scroll percentage.
“Crafting the perfect popup is all about understanding your audience and their journey on your site. Timed popups are great for giving visitors a chance to engage with your content before presenting an offer, while scroll-triggered popups capitalize on user interest as they explore your page. Exit-intent popups are your last chance to make an impression, ideal for reducing cart abandonment or securing signups. The key is to use the right popup at the right moment, with a clear, compelling message that connects with your visitors.”
– Shafaq O Sheikh, Customer Support Manager at Divi Life
For a detailed guide on creating an exit-intent popup with Divi Overlays, check out my video tutorial: How to Create an Exit Intent Popup with Divi Overlays.
Step 5: Preview and Test Your Popup
Before publishing your popup, make sure you preview and test its functionality across different devices and browsers. Divi Overlays provides a convenient preview option that allows you to see how your popup will appear to visitors. Take the time to test your popup thoroughly, ensuring that it displays and functions as intended on all devices.

Step 6: Publish and Manage Your Popup
Once you’re satisfied with your popup’s design and functionality, it’s time to publish it and manage its settings. In the popup editor, click the Publish button to make your popup live on your website. You can also manage scheduling, display rules, and analytics tracking from the Divi Overlays dashboard.
Now, take a glance at what our users have to say!
“Divi Overlays was easy to set up, works with the Divi Builder, and does exactly what I wanted and needed it to do. Plus it has so many other options. I can’t wait to play with it further.”
– Jose Valasco Jr
“This takes the place of so many things for me!! Used it for like 10 mins and was in love with all the capabilities.”
– Laura Allahverdi
“Divi Overlays is in my top 3 favorite Divi plugins to date. It’s just awesome. So versatile, so customizable and more importantly, reliable.”
– Josh Hall
Create Attention-Grabbing Popups Today with Divi Overlays
So there you have it! Divi Overlays is so easy to use and comes with such a broad range of design choices that it easily stands out as the premium popup solution around.
The ability to visually design popups using the Divi Builder gives you complete control over the look and feel of your popups. Users can customize animations to grab visitors’ attention and choose from various trigger options to display popups at the perfect moment.
With Divi Overlays, the possibilities are endless! Take a look at the following use cases where popups can be worth their weight in gold:
- Welcome visitors to your site, or give them an incentive to stay.
- Generate leads by offering exclusive content in exchange for email signups.
- Promote your latest products, services, or events.
- Keep your visitors informed with important announcements or updates.
Ready to take your website to the next level with a host of visitor-pleasing popups? Unlock the full potential of your brand by trying Divi Overlays today.
Divi Overlays
Get the #1 Popup Builder for Divi & Start Creating Gorgeous Popups
Table of Contents
- Creating Popups in Divi Without a Plugin: Using Divi’s Lightbox Functionality
- Understanding Lightbox Trigger Elements and Lightbox Content Elements
- Example of How to Create a Popup Using Divi’s Lightbox Functionality
- FREE Divi Popup Layout 🎁
- Using a Plugin to Create Popups in Divi
- The Limitations of Divi’s Bloom Plugin for Popups
- The Better Option: Divi Overlays by Divi Life
- A Step-by-Step Guide to Creating a Pop-up with Divi Overlays
- Create Attention-Grabbing Popups Today with Divi Overlays
Phone Number
00123 – 456 – 789
00987 – 654 – 321
Email Address
Location
15 Division Street, New York,
NY 12032, United States of America
Get the Popup Layout FREE!
You can get the layout 100% free when you subscribe below. By downloading, you agree to receive occasional emails from us (and only us) about other offers, freebies, etc. You can unsubscribe at anytime.
Type your name and email below, and we’ll send the FREE Divi Popup Layout directly to your email for free!

0 Comments