Add User Registration to Your Divi Website

Divi websites are famed for their visual polish and design consistency, but creating custom registration forms presents a frustrating challenge. Divi doesn’t offer a native way to build user registration forms, and the Divi theme builder cannot access or customize the WordPress registration page. When you’ll have spent such a long time creating a distinct visual style, having to rely on the default WordPress registration form can not only be disheartening but make for a disconnected experience for your readers! Luckily, we can solve this for you.
As Divi designers, we need registration forms that slot right into our layouts, matching the style and user experience of every other module. Registration is often the first real interaction a visitor has with your site, so its strategic importance is not to be underestimated. Whether you’re building a membership community, launching an online course, or gating exclusive content, your registration form needs to have the same premium feel as the rest of your Divi site.
While native WordPress options are limited, solutions like Divi Overlays make it possible to create fully integrated, branded registration experiences. We’re going to show you exactly how, so you can give your Divi forms some genuine user appeal.
Key takeaways
- Overcome native WordPress form restrictions by combining a plugin with the Divi Builder for brand-based design and customization.
- Boost conversions and user satisfaction by using modal popups and smart triggers.
- Prioritize clear layouts, concise instructions, and responsive design for high completion rates across all devices.
- Transform user engagement and site growth by making registration fast, visually appealing, and fully integrated.
The limitations of native WordPress options and Divi functionality for registration forms
When building registration forms with WordPress and Divi, you’ll quickly notice several technical roadblocks that can disrupt your workflow first and the user experience later.
Divi’s theme builder cannot access or style the default WordPress registration page, so users are met with a generic form that breaks design consistency. Divi itself doesn’t offer a native registration form module. Its contact form can’t register users, only collect data, so you can’t onboard users directly into the WordPress system without extra tools.
Adding custom fields for essential data like phone numbers or company details just isn’t possible with default WordPress forms – you’ll need separate plugins or custom code for anything beyond name and email. Integrating with Learning Management Systems (LMS) is another sticking point, since many LMS plugins lock down their registration pages, preventing visual customization with Divi’s builder.
User role management is limited to WordPress’ basic roles unless you bring in additional plugins, making advanced membership tiers or access levels hard to implement. Security and validation features are also minimal, leaving your forms more vulnerable to spam and abuse.
In managed or institutional WordPress environments, further admin restrictions can block customization of registration workflows. Even simple tasks like redirecting users after signup require custom code to execute.
Creating powerful registration forms with Divi Overlays

Divi Overlays gives you the flexibility to design registration forms that feel fully integrated with your Divi site.
With Divi Overlays, you can create custom registration forms that appear in stylish modal popups, triggered by buttons, links, images, or even timed actions anywhere on your site. This means you control exactly where and when users see your registration form, boosting engagement and conversions.
Designing these forms is easy! Use the full power of the Divi Builder to craft your form’s layout, style, and branding, just like any other Divi module. You can add custom fields to collect the info you need, and even use conditional logic to show or hide fields based on user choices. Want different forms for memberships, newsletters, or events? Divi Overlays makes it easy to create and manage multiple registration experiences.
To get started, download the Divi Overlays plugin.

- Navigate to Divi Overlays > Add New.
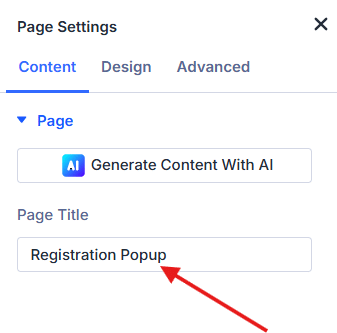
- Via Page Settings, give your overlay a title (e.g., ‘Registration Popup’).
Next up, you’ll need to insert your registration form. If you don’t already have one, you can use a third-party plugin to build a user registration form, then add this form to your overlay – check out how to do this in the next section!

Do More With Divi Overlays!
Divi Overlays is the original popup builder for Divi, & remains the most powerful, most popular, & easiest to use popup builder for Divi! Easily create gorgeous, feature-rich popups! 😍
Connecting Divi to your registration system
Divi Overlays handles the visual side of your registration forms, but you’ll need a registration-capable plugin to actually create WordPress user accounts.
The good news is that Divi works with leading plugins like WPForms Pro, Gravity Forms, and Ultimate Member, giving you full control over the registration process and user data.

WPForms Pro offers a dedicated User Registration add-on. You can build a registration form with all the essential fields – username, email, password – and map each one directly to WordPress user fields.
Custom fields are easy to add, and you can map them to user meta for more advanced data collection. WPForms also lets you assign user roles, set up post-registration redirects, and send welcome emails automatically.

Gravity Forms also comes with a User Registration add-on. Once you’ve created your form, you can map fields like username, email, and password, as well as custom fields, to WordPress user profiles.
Gravity Forms supports assigning user roles, integrating with membership plugins, and setting up custom redirects after signup.

Ultimate Member is purpose-built for user registration and membership. Its drag-and-drop builder makes it easy to add custom fields, set up conditional logic, and assign user roles.
Ultimate Member also handles user directories, profile pages, and content restriction, making it a great choice for membership or community sites.
To embed your chosen registration form inside a Divi Overlay, use the plugin’s shortcode or, for WPForms, the dedicated Divi module. Here’s a basic template used by WP Forms:

Once downloaded, you can then style your form to match your brand needs via the Overlay settings in Divi’s visual builder.

Be sure to configure all key fields and map any custom data to WordPress user meta. Most registration plugins also support integration with membership tools like MemberPress or LMS platforms such as LearnDash and LifterLMS, so you can create advanced onboarding workflows.
Designing your Divi registration form layout
When building registration forms with Divi Overlays, be sure to strike a balance between visual appeal and user-friendliness. The most effective layouts prioritize clarity and ease of use, like this simple example below:

Keep your most important fields – like name, email, and password – visible without requiring users to scroll. According to research by OurRitual, 80% of users miss content hidden in scrollable sections, so keeping everything above the fold improves completion rates.
Use Divi’s row and column structure to group related fields together, such as personal details in one row and account credentials in another. This grouping creates a logical flow and helps users process information.
Establish a clear visual hierarchy with section headings and field groupings. Use Divi’s text modules to add concise instructions or explain any complex requirements. Only include essential fields in your initial registration form; you can always collect additional data later. This helps users complete the form quickly.
Use Divi’s spacing controls to add breathing room between fields, preventing the form from feeling cluttered. Consider incorporating trust indicators – like testimonials or security badges – near the submission button. These elements can reassure users about privacy and security, increasing the likelihood of form completion.
Finally, always test your form on mobile devices! Divi’s responsive design tools let you preview and adjust layouts for smaller screens, ensuring your form remains easy to use on any device.
Setting up form fields and validation rules
Your registration form should include at least some of these core fields:
- Username (or use email as username, depending on your membership model).
- Email address with built-in validation.
- Password field, ideally with a strength indicator to guide users on security requirements.
- Password confirmation to catch typos and mismatches.
- Any custom fields you require, such as company, phone, or other profile data. Bear in mind that these need to be mapped directly to user meta, and many plugins will support this.
- Privacy policy and terms acceptance checkboxes for legal compliance, which can be added with simple code or plugin options.
- Anti-spam protection, such as honeypot fields or reCAPTCHA, to block bots and reduce fake registrations.

For WordPress user registration, make sure every field maps correctly to the user database. Most registration plugins allow you to assign user roles, set up post-registration redirects, and trigger welcome emails automatically.
To maximize usability, keep your form as short as possible by only asking for essential information up front. Use smart defaults and contextual examples to help users fill out fields correctly the first time, like showing password requirements before typing begins. Inline validation, which provides real-time feedback as users type, can further reduce errors and frustration.
Always test your form’s validation rules on both desktop and mobile to make sure everything looks and works as intended.
Styling your registration form to match your website
When using Divi Overlays, you can style your registration forms using the same Divi Builder controls you already know, so every form blends perfectly with your site’s branding.
Start by applying your brand colors to form fields, buttons, and backgrounds with Divi’s intuitive color pickers. Match your typography by setting the same font family, size, and weight as the rest of your site, creating a unified look.

Use Divi’s design options to style input fields with clear borders, generous padding, and distinct focus states so users always know where they’re typing. Make your submit button stand out by using bold colors, larger text, and hover effects to encourage clicks. Subtle animations or transitions can add polish and make the form feel interactive without being distracting.
Error messages should be visually distinct but not overwhelming, using color and spacing to draw attention without clashing. Maintain strong color contrast (at least 4.5:1 for normal text) to
meet accessibility standards and keep your forms usable for everyone.
Customize the overlay container itself with background colors or images, rounded corners, and shadow effects for depth. You can even adjust entrance and exit animations for a smooth, on-brand pop-up experience.
Enhancing your login experience with the Login Customizer plugin
Just as a good-looking, usable registration form reinforces your brand, a custom login page ensures users feel connected to your site from the moment they log in.
You have a couple of flexible options for achieving this with Divi. One approach is to use Divi Overlays with the Divi Login Module. This lets you display a login form in a stylish popup, using the login template as an entry point.

If you prefer a dedicated login page instead of a pop-up, the Divi Login Customizer plugin is your best bet. This plugin allows you to build a completely custom login page using all of Divi’s design tools, with no coding required. You can style every element, from backgrounds and buttons to error messages and animations, so your login experience matches your site’s aesthetic.

To make the process even smoother, Divi Bricks offers 20 pre-built login section blocks tailored for the Divi Login Customizer plugin. Examples include minimalist login panels, bold full-width layouts, and login forms with branded backgrounds. Simply import a block, tweak the colors and fonts, and you’ll have a professional, on-brand login page in minutes!


Save Time With Divi Bricks!
Like LEGO bricks for your website: Divi Bricks includes thousands of section layouts (aka "bricks") that you can use to mix & match while building Divi websites.
Transform your website today with Divi Overlays registration forms
Divi Overlays takes the hassle out of building professional, on-brand registration forms that fit into your Divi layouts. By replacing generic WordPress registration pages with custom, visually consistent popups, you’ll create a much-improved user experience.
Optimized registration means more leads, smoother member onboarding, and richer user data – all fueling your site’s growth. Features like modal triggers, full Divi Builder design control, and custom field integration solve the pain points of disconnected, hard-to-customize default forms. Users are far more likely to engage with forms that fit in with a website’s general aesthetic, and are non-complex and quick to complete.
To give your site’s first impression a real boost, start building a more powerful, user-focused website by using Divi Overlays today.

Table of Contents
- The limitations of native WordPress options and Divi functionality for registration forms
- Creating powerful registration forms with Divi Overlays
- Connecting Divi to your registration system
- Enhancing your login experience with the Login Customizer plugin
- Transform your website today with Divi Overlays registration forms
0 Comments