Make Your Images Pop: Divi Overlay Techniques Explained

In a bid to boost your website’s storytelling and interactive credentials, try creating image overlays! These can provide context to images, encouraging users to engage with your content – whether that’s exploring team member bios, viewing product details, or diving into project portfolios.
Imagine showcasing your team where hovering reveals detailed bios, or designing a product gallery that displays pricing options on interaction? Such attention to detail can help your designs stand out from the crowd and keep users on your site for longer.
However, with Divi, native support for image overlays is limited, necessitating the use of custom CSS or third-party modules. In this article, we’ll delve into both approaches, showing the benefits of using modules like our free Divi Image Module and the Hover Box Module from Divi Modules Pro. We’ll also provide a handy CSS example for those who prefer a hands-on coding approach. Here we go!
What you’ll learn:
- Efficient methods for creating image overlays in Divi.
- How Divi lacks native support for advanced image overlays, requiring custom CSS for each overlay type, which can be time-consuming and difficult to maintain.
- Why a solution can be found in third-party modules, particularly the Hover Box module from Divi Modules Pro.
Understanding image overlays in Divi: Manual vs module approaches
For those starting out on their Divi design journey, the default Divi Image Module provides basic overlay capabilities through the Design tab’s Filters > Blend Mode > Overlay settings, allowing for simple color overlays and icons. However, these features are pretty limited.
Creating text reveals, multiple content layers, or custom animations requires extensive custom CSS. The module also lacks built-in hover effects beyond basic color changes, which can hinder interactivity.

Traditionally, implementing custom image overlays in Divi requires writing code for hover effects, positioning overlay elements, and managing responsive breakpoints. While this manual approach offers complete control over design aspects, it demands significant development time and thorough testing across various browsers.
Purpose-built overlay modules eliminate these challenges by integrating with Divi’s Visual Builder. They handle complex animations and touch interactions automatically, saving hours of development time while ensuring a consistent performance across your site.
Moreover, dedicated modules receive automatic compatibility updates, reducing the technical debt associated with custom CSS solutions. Although we’ll demonstrate a CSS method later in the article, creating engaging image overlays is a much more efficient and customizable process once you’ve a dedicated plugin onside.

Creative Modules Built for Speed
Divi Modules Pro includes gorgeous creative modules without the bloat, & without slowing down your site! Thanks to our dynamic asset engine, you'll get the best modules with the best speed. 🔥
A free and powerful solution: The Divi Image Hover Module by Divi Life
If you’re eager to start experimenting with image overlays, our very own Divi Image Hover Module is the perfect entry point! This free plugin is incredibly user-friendly and boasts over 150 hover animations crafted with pure CSS, ensuring your website remains lightweight and fast.

With this module in your box of tricks, you can create engaging overlays that display titles and descriptions, making it ideal for various applications. For instance, you can showcase team member profiles with their roles and social links, design product cards that reveal pricing and feature details on hover, or highlight service boxes that emphasize key benefits.
Here’s how to create image overlays using the Divi Image Hover Module:
1. Download the module from the Divi Life website and install it via your WordPress dashboard.
2. Open the Divi Builder on your desired page and add the Divi Image Hover Module.

3. Click on the image icon to upload your desired image.
4. In the module settings, add your title and description text. You can also choose from various hover effects for interactivity.
5. Use the Visual Builder to see your changes in real time, making adjustments as needed.


Divi Modules Pro: An essential toolkit with an image hover box module

For an even more comprehensive option, check out Divi Modules Pro! This is a premium plugin we designed specifically for creative Divi users, offering a collection of powerful modules that add unique touches to the web design process.
Among these, the Hover Box module stands out by transforming static images into engaging interactive elements without the need for custom CSS. This module allows designers to create visually compelling overlays, driving engagement from your site visitors. Check out a cool example below! 

While the Hover Box module is part of a paid-for plugin, it provides exceptional value by including numerous other essential modules for Divi web designers. These include the Flip Box, Before and After Slider, and Masonry Gallery module, all of which give greater options for those looking to create aesthetically pleasing websites.
In comparison to our free Divi Image Hover Module, the Hover Box Module provides more granular control over each animation. Users can customize:
- Overlay colors and opacity levels.
- Positioning and spacing.
- Animation timing and effects.
- Typography and button styling.
- Mobile display settings.
A particularly powerful feature of the Hover Box module is the ability to create and customize call-to-action buttons directly on the overlay. This functionality is instrumental in driving conversions, making it easier for you to guide visitors around your site.
To create image overlays with the Hover Box module:
1. Purchase and install the plugin via your WordPress dashboard.
2. Open your desired page in the Divi Builder and select the Pro Hover Box module.
3. Go to Content > Hover Box Text (Default) and add your image, title, and body text as required.

4. Go to Hover Box Text (Hover) and enter the content that you want to appear when users hover over the box.
5. Use the Content and Design tabs to adjust settings such as animation type, background color, and styling.
6. Use the Visual Builder to see how your hover effects look in real time. Here’s one we made earlier: 

Creating image overlays with CSS
As a trickier but additional option, using CSS to create image overlays offers a high degree of flexibility. Those competent in coding can create custom designs to improve a website’s aesthetics, although this method requires ongoing maintenance and testing across various devices.
For developers seeking granular control or those learning CSS with Divi, this approach can be beneficial – and it’s entirely free. However, each new effect necessitates additional code and careful attention to cross-browser compatibility, so tread carefully!
In the following guide, we’ll demonstrate one of many effective methods for creating image overlays using CSS. Our example showcases how to build an overlay that reveals a color tint on image hover.
Steps to create an image overlay with CSS:
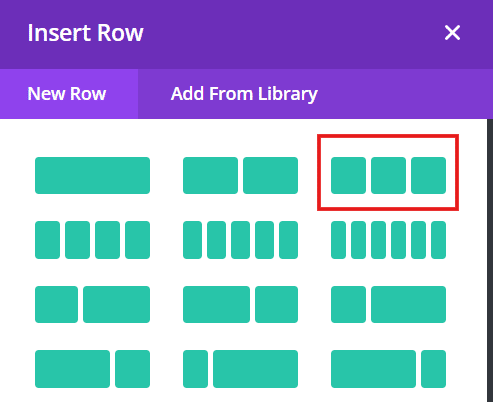
1. Start by creating a new section in Divi and adding a three-column row.
2. In the first column, insert an image module with your desired image.

3. Add overlay color: Below the image, add a Divider module.
-
-
- Go to Advanced > Position and set it to absolute so it overlays the image completely.
- In Design > Sizing, set width and height to 100%.
- Via Content > Background, adjust the background color to create your overlay effect (e.g. rgba(0, 0, 0, 0.5) for a semi-transparent black).
-

4. Insert text and button: Add a text module in the same column, for your overlay heading and body text, positioning them below the Divider module. Go to Advanced > Position and set it to absolute to overlay the image.

5. Apply custom CSS: In the Advanced settings of the Divider module, add custom CSS classes such as .et-overlay-container for the container and .et-overlay-item for text elements. This will help manage their visibility and animations on hover.

Style your elements: Add the following snippet to the Custom CSS option in the Divider module:
/*
 Place Code for Tutorials Here
*/
.et-overlay-container:hover {
    background-color: rgba(0, 0, 0, 0.7); /* Change background color on hover */
}

.et-overlay-item {
    opacity: 0; /* Start hidden */
    transition: opacity 0.3s ease; /* Smooth transition */
}

.et-overlay-container:hover .et-overlay-item {
    opacity: 1; /* Show text on hover */
}
And here’s the finished effect, with a dark tint overlay on hover: 

Transform your Divi website with professional image overlays today
And there it is! Image overlays can transform your website from static to dynamic, and now you’ve all the knowledge needed to create engaging experiences for your visitors. Whether revealing team bios, showcasing product details, or highlighting portfolio work, overlays serve as natural interaction points that guide users through your content.
As we’ve seen, the creative possibilities are endless when it comes to overlays. We’ve explored various methods, with our free Divi Image Hover module offering an excellent introduction to overlay design, and the Hover Box Module in Divi Modules Pro standing out as the most powerful and user-friendly option of all. And of course, those with coding skills also have the CSS option at their disposal.
Don’t miss the opportunity to add some originality to your web design! Explore Divi Modules Pro or our free Divi Image Hover module today, and start transforming your Divi website into an interactive masterpiece.

Divi Modules Pro
Get Divi Modules Pro & Access Dozens of Interactive Creative Design Modules

Table of Contents
- What you’ll learn
- Understanding image overlays in Divi: Manual vs module approaches
- A free and powerful solution: The Divi Image Hover Module by Divi Life
- Divi Modules Pro: An essential toolkit with an image hover box module
- Creating image overlays with CSS
- Transform your Divi website with professional image overlays today
0 Comments