Divi Contact Form Not Sending Email? Here’s How to Fix it Quickly!
If you’re experiencing the issue of your Divi Contact Form submission emails not being sent to you, you are certainly not alone!
It’s a very common problem, but it’s actually not a Divi problem. It’s actually not a WordPress probably either.
The problem is with your web server. But before you go and find new web hosting, let me share with you the solution! Because it’s actually a quick fix, and changing hosts won’t necessarily solve the problem.
Potential Causes of Contact Form Submissions or Other WP Emails from Being Sent
- Web Server does not have email sending properly configured on your hosting account
- IP Blacklisting: The IP Address of your hosting server could be blacklisted, which would prevent emails from being sent. This is especially possible with lower quality web hosts, and shared hosting.
- Lack of Proper SPF, DKIM, and DMARC records on your domain.
How to Solve WordPress Email Sending Issues
Whether it’s your Divi contact form emails not being sent, or any of the other potential WordPress emails (password reset emails, comment moderation emails, etc), the fix is actually pretty easy!
The solution: use an SMTP plugin and 3rd party service for sending emails!
Web servers are not designed to be sending emails, and they’re not optimized for it. It’s better to outsource emails to a service that specializes in it specifically.
Step 1: Install an SMTP Plugin
SMTP (Simple Mail Transfer Protocol) is the technology we’ll use to send emails reliably.
1.Navigate to your WordPress Dashboard.
2.Go to Plugins > Add New.
3.Search for SMTP and review your options.
4.Install and activate Fluent SMTP. This plugin is 100% free and includes all necessary features, like email logging, without requiring a paid upgrade.
Step 2: Choose an Email Sending Service
We recommend SendGrid because it offers:
•A free plan (up to 100 emails/day).
•Easy setup without requiring a credit card.
Note: If you anticipate higher email volumes, you may need to upgrade or choose an alternative service.
Step 3: Create a SendGrid Account
1.Visit the SendGrid website and create an account.
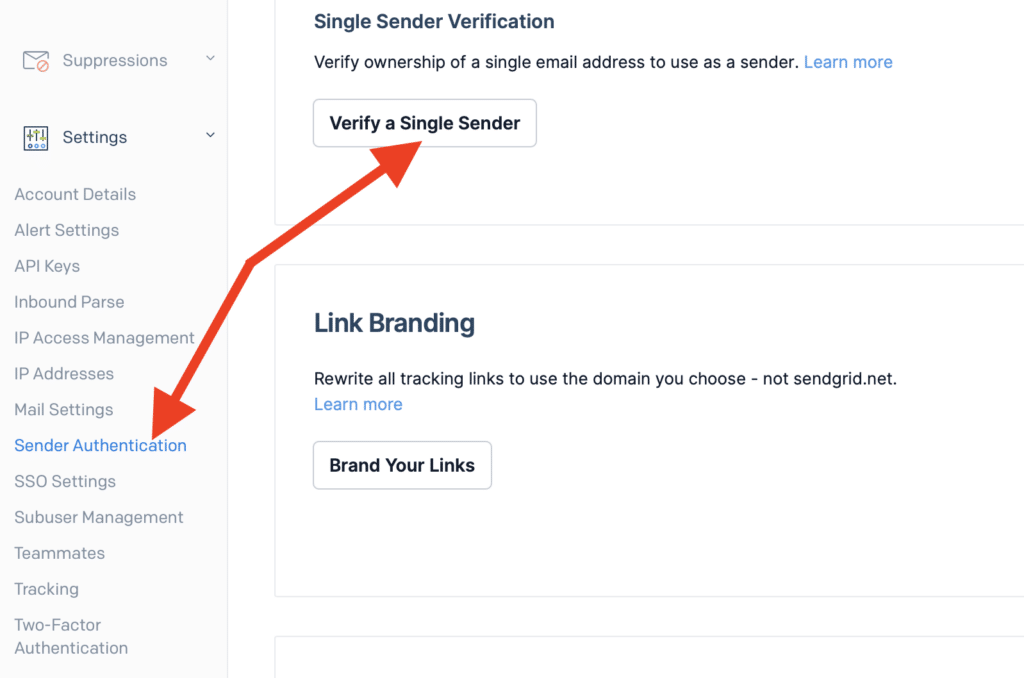
2.Follow the setup prompts to verify your email domain.
•Go to Sender Authentication and verify the email address you’ll use.
Step 4: Configure Fluent SMTP with SendGrid
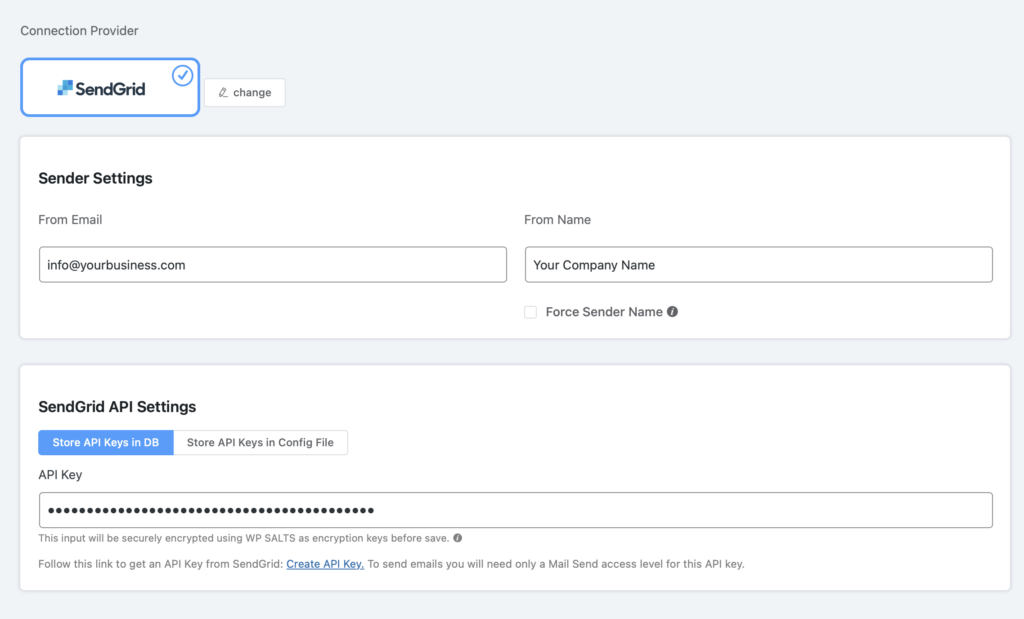
1.In your WordPress dashboard, go to Fluent SMTP > Settings.
2.Select SendGrid as your email service.
3.Enter the verified From Email (the one authenticated in SendGrid).
4.Add your name for personalization.
5.Generate an API key in SendGrid:
•Go to API Keys in the SendGrid dashboard.
•Create a new API key with full permissions and copy it.
6.Paste the API key into Fluent SMTP and save the connection settings.
Step 5: Test the Setup
1.Navigate to Fluent SMTP > Email Test.
2.Enter an email address to receive a test email.
3.Choose whether to send an HTML or plain text email.
4.Click Send Test.
5.Confirm the test email was received.
That’s it, you’re done! You’ve successfully set up email sending through Sendgrid! 🥳
Why Avoid Free Gmail SMTP?
While it’s technically possible to send emails through a free Gmail account, it’s not recommended. Google discourages this method, and excessive email sending can result in account shutdowns. For a professional, reliable solution, stick with services like SendGrid.
Final Thoughts
By using an SMTP plugin like Fluent SMTP and outsourcing email delivery to a service like SendGrid, you can avoid email-sending issues entirely. This setup ensures that all your contact form submissions, password resets, and other WordPress-generated emails are reliably delivered.


When I tried to send the test email it failed.
Any suggestions?
Maybe it is a DNS thing. I went ahead and made some changes to the DNS records.
Any suggestions about how to help integrate my WordPress website with SendGrid and have this contact form work would be great.
Is there maybe a problem with the Divi module intracting with FluentSMTP?
Hmmm not sure exactly. FluentSMTP and Divi work great together from my testing. It’s most likely a SendGrid issue. I’d try reaching out to them for support. The set up can be a bit tricky with SendGrid.