How to Add Falling Snowflakes to Your Divi WordPress Website
If you’re in the Northern Hemisphere, it’s currently winter time. The weather is colder, and as we approach Christmas, everyone seems to be in the holiday spirit.
As we gear up for the holidays, one fun way that you can get into the spirit of the season, is to liven up your website with some falling snowflakes. It’s fun, it’s festive, and it’s really easy to do!

In this tutorial, I’m going to show you how to add falling snowflakes using PURE CSS (plus images). That means no plugins, no javascript. Just some images (that I’m giving you, or create your own), and CSS animations.
We’re going to go over several methods of implementing the CSS. From adding it site wide, to just one page, and even to just certain sections, rows, and modules too!
Adding falling Snowflakes to Your Entire Website
The first thing we’ll look at, is adding the snowflakes to your entire site. This is very simple and requires just one step:
Copy the below CSS, and paste it into your Divi Theme Options custom CSS box, or your child theme’s style.css file.
body {
   position: relative;
}

body:before {
   content: '';
   display: block;
   position: absolute;
   z-index: 2;
   top: 0;
   left: 0;
   right: 0;
   bottom: 0;
   pointer-events: none;
   background-image: url('https://s3.amazonaws.com/divi-life-plugin-layouts/tutorials/snow/divi-life-snowflakes-b.png'), url('https://s3.amazonaws.com/divi-life-plugin-layouts/tutorials/snow/divi-life-snowflakes-c.png'), url('https://s3.amazonaws.com/divi-life-plugin-layouts/tutorials/snow/divi-life-snowflakes-a-1.png');
    animation: divi-life-snow 10s linear infinite;
}

@keyframes divi-life-snow {
 0% {background-position: 0px 0px, 0px 0px, 0px 0px;}
 50% {background-position: 500px 500px, 100px 200px, -100px 150px;}
 100% {background-position: 500px 1000px, 200px 400px, -100px 300px;}
}

@-moz-keyframes divi-life-snow {
 0% {background-position: 0px 0px, 0px 0px, 0px 0px;}
 50% {background-position: 500px 500px, 100px 200px, -100px 150px;}
 100% {background-position: 500px 1000px, 200px 400px, -100px 300px;}
}

@-webkit-keyframes divi-life-snow {
 0% {background-position: 0px 0px, 0px 0px, 0px 0px;}
 50% {background-position: 500px 500px, 100px 200px, -100px 150px;}
 100% {background-position: 500px 1000px, 200px 400px, -100px 300px;}
}

@-ms-keyframes divi-life-snow {
 0% {background-position: 0px 0px, 0px 0px, 0px 0px;}
 50% {background-position: 500px 500px, 100px 200px, -100px 150px;}
 100% {background-position: 500px 1000px, 200px 400px, -100px 300px;}
}
That’s it! You should now see the falling CSS on your entire website! Easy enough, right?
For faster loading, it’s best to download the images, and then upload them to your own site. You’ll need to update the above image URLs to match your own URLs on your site.
How to Make it Snow on Just One Page
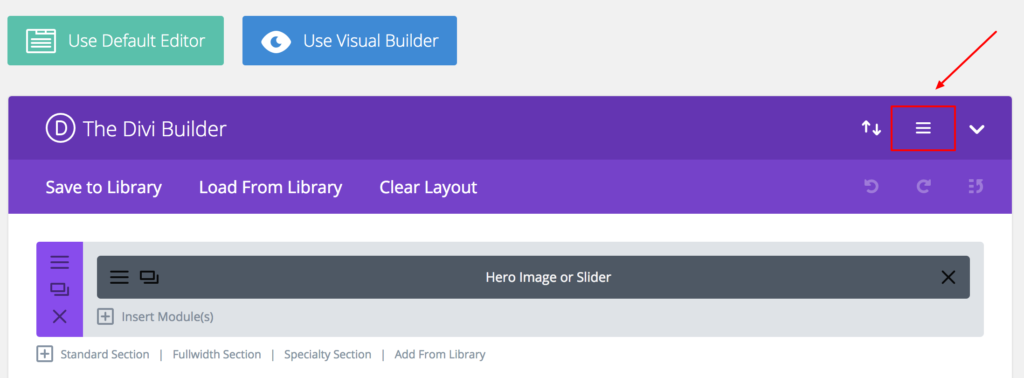
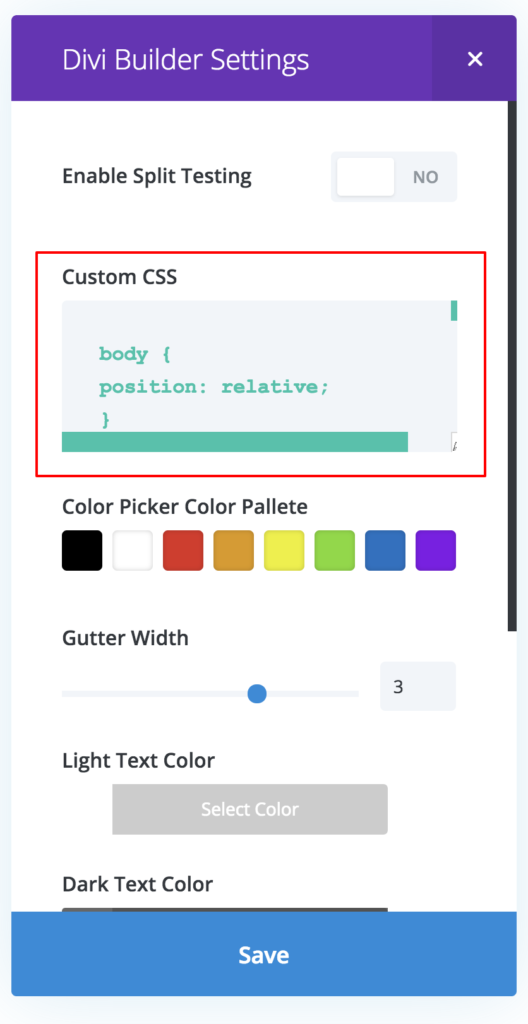
What if you only want it to snow on a single webpage? Perhaps on a sale or promo page. You can do that easily by adding the above CSS to your custom CSS box on the individual page, within the Divi Page Settings.


How to Add Falling Snowflakes to Divi Sections, Rows, or Modules
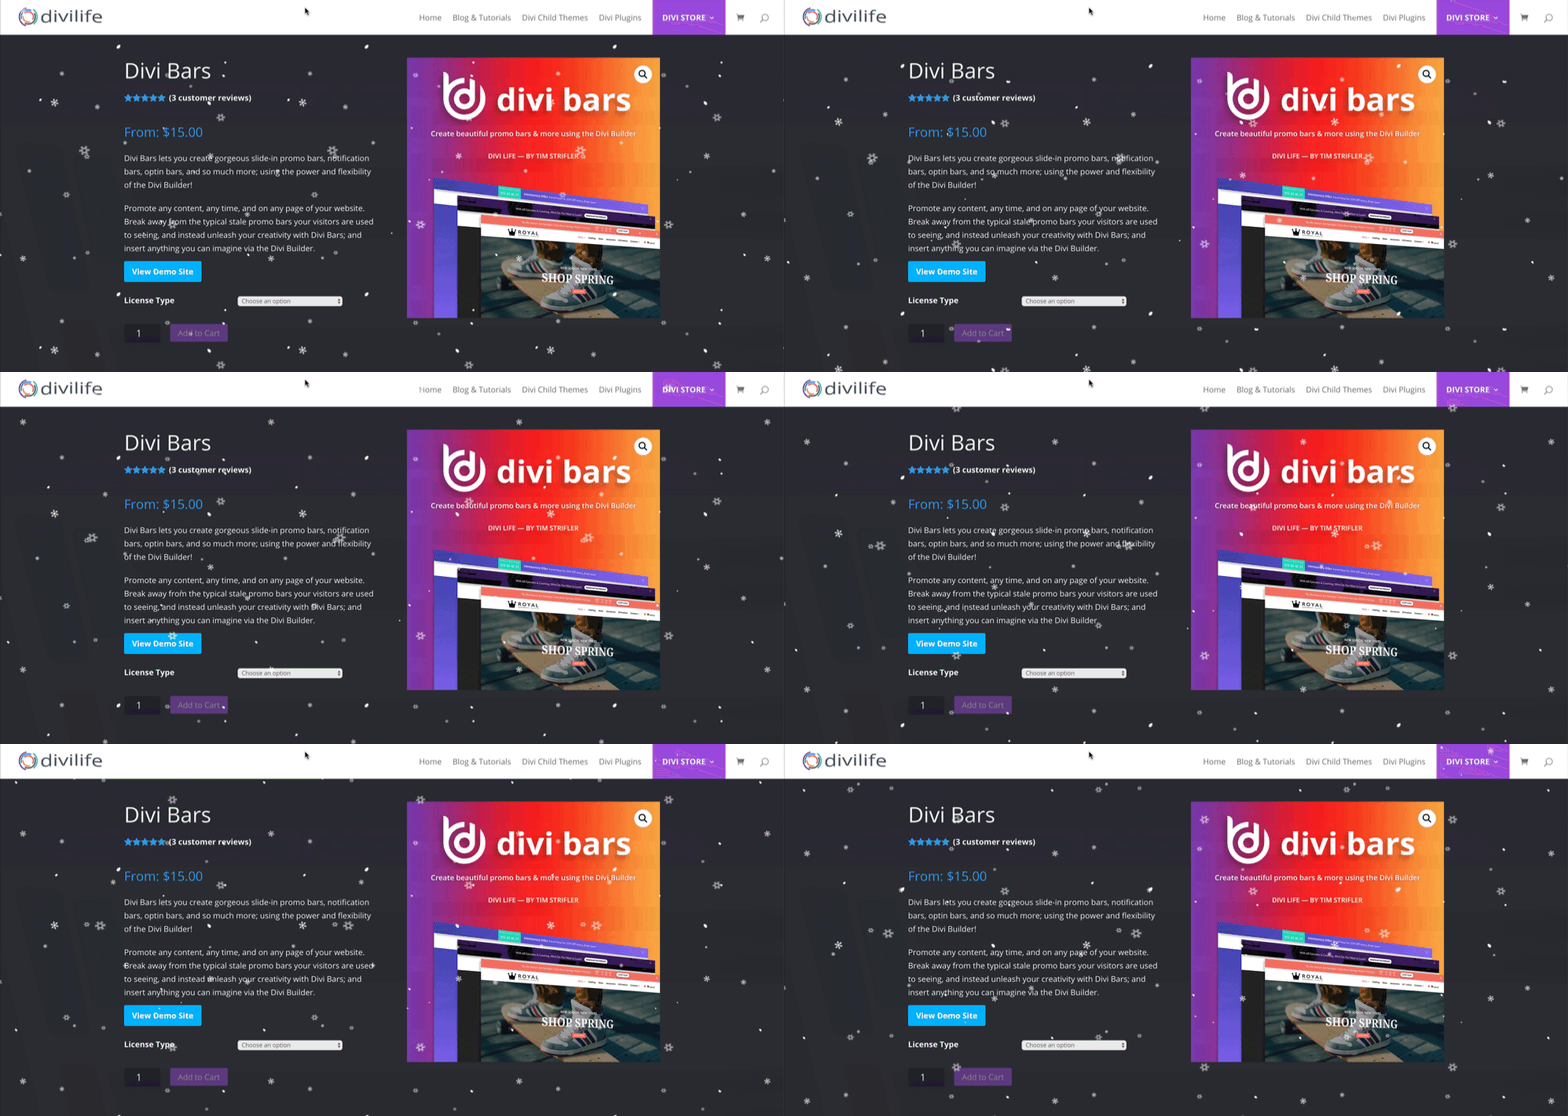
Okay, so it’s simple enough to make it snow on your entire website or a single page. But what if you don’t want the whole page to snow? What if you only want to apply it to certain sections, rows, or modules? Perhaps in a slide module, or in a full width header module (like we have on this post page), or even in a website promo bar using Divi Bars! We can do just that with some minor tweaks to the CSS!
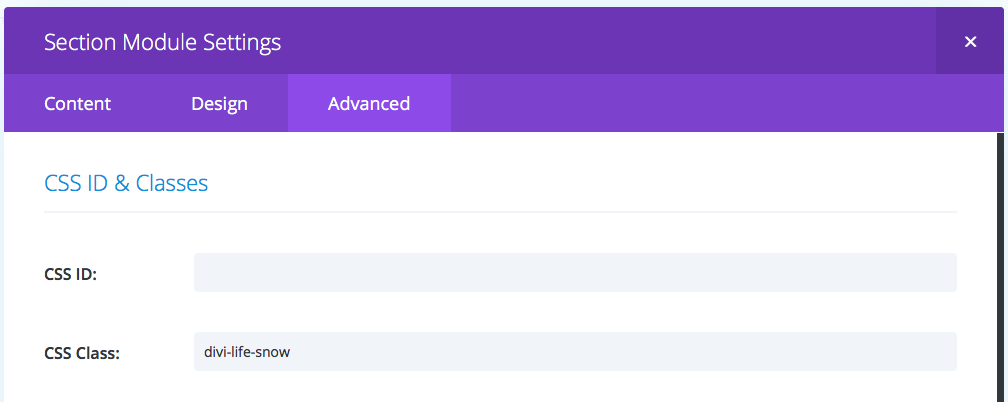
So instead of applying the snow and CSS animations to the Body, you can apply it to just a CSS class. Then, you can add the CSS class to any section, row, or module in the Divi Builder’s advanced tab’s CSS class field.
So first step is to copy the below CSS and paste it into your Divi Theme Options custom CSS box.
.divi-life-snow {
   position: relative;
}

.divi-life-snow:after {
   content: '';
   display: block;
   position: absolute;
   z-index: 2;
   top: 0;
   left: 0;
   right: 0;
   bottom: 0;
   pointer-events: none;
   background-image: url('https://s3.amazonaws.com/divi-life-plugin-layouts/tutorials/snow/divi-life-snowflakes-b.png'), url('https://s3.amazonaws.com/divi-life-plugin-layouts/tutorials/snow/divi-life-snowflakes-c.png'), url('https://s3.amazonaws.com/divi-life-plugin-layouts/tutorials/snow/divi-life-snowflakes-a-1.png');
    animation: divi-life-snow 10s linear infinite;
}

@keyframes divi-life-snow {
 0% {background-position: 0px 0px, 0px 0px, 0px 0px;}
 50% {background-position: 500px 500px, 100px 200px, -100px 150px;}
 100% {background-position: 500px 1000px, 200px 400px, -100px 300px;}
}

@-moz-keyframes divi-life-snow {
 0% {background-position: 0px 0px, 0px 0px, 0px 0px;}
 50% {background-position: 500px 500px, 100px 200px, -100px 150px;}
 100% {background-position: 500px 1000px, 200px 400px, -100px 300px;}
}

@-webkit-keyframes divi-life-snow {
 0% {background-position: 0px 0px, 0px 0px, 0px 0px;}
 50% {background-position: 500px 500px, 100px 200px, -100px 150px;}
 100% {background-position: 500px 1000px, 200px 400px, -100px 300px;}
}

@-ms-keyframes divi-life-snow {
 0% {background-position: 0px 0px, 0px 0px, 0px 0px;}
 50% {background-position: 500px 500px, 100px 200px, -100px 150px;}
 100% {background-position: 500px 1000px, 200px 400px, -100px 300px;}
}
Now that the CSS has been added to your site, we need to assign it to a section, row, or module. To do this, simply copy the class divi-life-snow and paste it in the CSS class field of the advanced tab, of whichever section, row, or module you’d like to make snow.

Make sure you add it to the CSS Class, and not the ID. Also, make sure you don’t have a period in front of it. It should look exactly like it does in the above image.
And that’s it! Easy enough right?
So How Does it Work?
As I mentioned at the beginning of this post, this is purely CSS with some images. So it’s very easy to understand. Basically, we have three separate images that make up the snowflakes. Each image has 4 different unique snowflakes. And then they are scattered around and duplicated across the image. Then, each image has all of the snowflakes in a different arrangement.
If you’d like to create your own unique snowflakes, you can grab my images, and open them up in Photoshop as a template. Then, create your own unique layout. I used snowflakes from this free vector found on Freepik. Freepik has a bunch of other free snowflake vectors you can use as well.
So the first chunk of CSS adds the snowflakes to the page with the :after CSS selector via the background image. Then, the keyframes are what control the animation. Feel free to play around with the keyframe positioning to customize the falling snowflake animation. You can also change the speed of the snow falling by adjusting the animation in the first chunk of CSS. Simply change is from 15s to something else. :)
Pretty simple right! Oh, and the beauty of adding snowflakes to your site is it’s not just for Christmas, but can be left up all winter long :)

It doesn´t seem to work, I’ve put the sitewide css and nothing happens.
It could be due to caching. Make sure your caching plugin has been cleared, as well as your browser cache. You’ll notice in my video when I refreshed it once and it didn’t clear. I had to do it a second time with a hard refresh (Control/Command + Shift + R) for it to fully refresh.
It doesn’t work on Game Boys. It has to be a real computer.
Love it – thanks for the information.
You’re welcome! Glad you found it useful 😃
Cool. thank you. But Theme Customizer Additional Css doesn’t like the last bit of your code, specifically the last rule which it wouldn’t allow:
@-ms-keyframes snow {
0% {background-position: 0px 0px, 0px 0px, 0px 0px;}
50% {background-position: 500px 500px, 100px 200px, -100px 150px;}
100% {background-position: 500px 1000px, 200px 400px, -100px 300px;}
}
I just deleted that rule and it worked great.
Good to know! Yeah the last key frame isn’t really necessary. It’s really just for older browsers.
Same here. Looks great though!
Thanks, David. I’m glad you like it 🙂
Same for me, it didn’t work until I deleted it. Now it’s working.
Thanks for the cool post Tim!
You’re welcome! Glad it worked!! 🙂
I deleted only the -ms- part and it worked. I searched on the internet and it seems it’s an update to wordpress, no need for that bit anymore when using keyframe
This is really so awesome!
Thanks so much!
You’re welcome! Glad you like it!! 😊👍🏻
You’re a Rainmaker! (Snow-maker, I guess.)
Haha! Love it! 😂
Works terrific. A super easy CSS drop to impress clients. Thanks Tim!
You’re very welcome! 😁
Yes… saves the bloat of an extra plugin! Thanks guys and all the best!
Definitely! Lightweight for sure! 😄
Brilliant, using this now 🙂
Awesome! Glad you found it useful 😊👍🏻
It doesn’t work on iPhones and ipads?
No it does. It should work just the same. Make sure you’ve cleared your cache before testing.
I am having a real problem with it working on Safari.
Got it working on all devices when I removed ?dl=1 from the image url.
Love it Tim 🙂
Interesting! I didn’t have that problem. But I’m glad you got it figured out! And thanks for sharing the fix! 👍🏻
What a nice holiday gift! So easy and looks great. I used it on top of a background video on my home page and I think it looks great. Thanks so much!
You’re welcome, Joe! That’s awesome, glad it worked out for you 😄
Jep It’s not working in safari or phone. I already try to remove ?dl=1 without luck…any ideas
Fixed it by uploading the images to my website! This is just amazing. Thank you guys!
Okay great! Glad you got it working 🙂
Hmm that’s very odd. Yeah the ?dl=1 is what lets the Dropbox file be viewed/accessed directly, so I wouldn’t think that would work. Best thing is to always upload to your own site so you’re not relying on any other servers.
Thanks! This is fantastic, strange it’s not showing on my homepage though. It’s appearing on all of the other pages.
danielleshaw.com
Hi Danielle,
Try replacing the two instances of “body” in the CSS with #page-container
That may solve the problem 🙂
Tim that is sooo nice of you. I am a happy customer man.
Glad you found it useful, Ziv! 🙂
Thanks Tim!
You’re welcome, Noz 🙂
Thank you so much! I’ve never tried anything like this before and it was so simple! Your instructions were great!!
You’re welcome, Fiona! I’m so glad it worked out for you!! 😄👍🏻
Thank you so much for putting the time and effort into this. Wishing you happy holidays!
You’re welcome, Grant! Merry Christmas and Happy Holidays to you too!! 🙂
It works very well on my site. 🙂 Thank you!
You’re welcome! 😀
Hello. Now, it doesn’t work. It shows: Expected RBRACE at line …, col 1.
… @keyframes snow {
I deleted this:
@keyframes snow {
0% {background-position: 0px 0px, 0px 0px, 0px 0px;}
50% {background-position: 500px 500px, 100px 200px, -100px 150px;}
100% {background-position: 500px 1000px, 200px 400px, -100px 300px;}
}
but it didn’t help.
I use Google Chrome.
Thanks Tim for being so generous with your time and expertise. Love the effect on our website!
You’re very welcome, Jeff. I’m stoked to hear it worked out for you! 🙂
Thank you so much!
I would just ask you about mobile mode. I’ve added the CSS to my page (main page) as you’ve shown, but it works only for my computer, not mobile device.
How to make it working for all devices, please?
Thak you!!!!!
Hi Halyna,
Others were having the same problem. I think it can be solved by downloading the images and uploading them to your own site. You’ll need to change file paths in the CSS though. Hope that helps!
Thank you! It works fantastic.
Great! Happy to hear it, Edgar!
Awesome. Thanks for mentioning this in the newsletter. I’ve added it to my site for the winter. It works great!
Awesome!! You’re very welcome 👍🏻
Thanks, Tim, it looks great. Let’s try it 😉
Awesome, glad you like it 🙂
I am using the Divi theme but for some reason in December it started displaying snow and is still doing it? Any ideas what made that happen or how I can stop it doing it?
Hey Tony,
I clicked on your website URL and looked at the code. It looks like you have the Jetpack module “Holiday Snowstorm” turned on. Should be a simple switch to turn it off 🙂
Hi Tim,
Thanks for the info on the Holiday Snowstorm module however I seem to have no way of getting to that setting through my admin area? My site is not hosted on Wordpress I added Jetpack to my installation and I only see 4 options under the menu item in the admin area, I seem to be missing the General option which is the one I need to be able to turn off Snowstorm – any idea?
Hi Tim, I have found the setting by logging directly into my account on the Jetpack website and turned it off from there. Thanks for you help with this.
Tom, This is soooooo AWESOME! Thank you so much!!!
Correction to above…Tim…so very sorry!
haha no worries at all 🙂
Glad you like it!! 🙂
Thank You, c’est super!
Snowing in Virginia Beach, so now it’s snowing on websites here too! Thanks!
Perfect! Glad you enjoyed it Shay!! 😊
I just found this .. just in time for Christmas .. @Tim .. this is Awesome! Thanks .. One question .. I see it on my desktop but on the mobile .. any idea why? thanks
You’re welcome! I’m glad you like it! Some phones may not render certain CSS animations. It depends on the phone/OS.
I love the code, really nice! Only have one little problem, it ends on the middle of the page and I would like to add it on the whole page. I tried to use background-repeat unfortunately nothing worked.
Is this to fix?
https://www.hakoena.com/vlees-kopen-bij-de-boer/
Hi Fabio, it looks like it’s working to me. Did you get it figured out?
Hi Tim,
Yess, I figured out. Thank you! But I have another question. At the moment the start is very hard and if the animation runs one time and start over again, you can see it very clear. Is it possible to make a smooth transition?
I’m having this exact issue and can not sort out a solution. Can you help?
Thank you so much!!! It works wonderful!
You’re very welcome!!
Far better than using a plugin, and can just be commented out for the rest of the year.
Needed to change the z-index to 9999 and removed the last frame to stop jittering, but works fine now.
Thanks, and Happy Christmas!
That’s great!! And yes, super simple to comment out and preserve for next year 🙂
This is so awesome. Thanks a lot for the as always great tutorial Tim! Here it will stay in the header for 2-3 months: https://www.jm-dancestation.de/
Awesome!! I’m glad it worked for you Levent! 🙂
Great, simple way. Now I love Divi even more.. Big thanks..
by the way I used Auto prefix to fix the last CSS section . And it is now so:
/*prefix CSS*/
@keyframes divi-life-snow {
0% {background-position: 0px 0px, 0px 0px, 0px 0px;}
50% {background-position: 500px 500px, 100px 200px, -100px 150px;}
100% {background-position: 500px 1000px, 200px 400px, -100px 300px;}
}
@-webkit-keyframes divi-life-snow {
0% {background-position: 0px 0px, 0px 0px, 0px 0px;}
50% {background-position: 500px 500px, 100px 200px, -100px 150px;}
100% {background-position: 500px 1000px, 200px 400px, -100px 300px;}
}
/*Thanks*/
Great, thanks for sharing!
I have issues on some of my client sites. Tried all variations mentioned above, but with one site it fails. Cache not used, only Divi static pages. Tried adding the class to sections, modules and columns. Can make it work fine on other sites, this one gives me nada snow…
Hi Johan,
Do you have Divi’s new performance features turned on? If so, you may need to try turning them off. I’d recommend starting with the defer Jquery option. Having that turned on will likely cause issues with something like that. So try turning it off, clearing cache (including browser cache), then test again.
Hi Tim,
Thanks for replying.
All performance features except “Defer Additional Third Party Scripts” was enabled. But after disabling all new features and turning them on again, snow finally started to fall!
Thanks for a great feature, why not make it into a plugin?
I’m glad you got it resolved, Johan! And that’s a great idea 🙂
Hey Tim, I have the snow applied to a section. Within the section, I have a video module. Unfortunately the snow plays on top of the video. Is there a way to bring the video in front of the snow?
You could try increasing the z-index for the video module in the Advanced Settings of the module. That should work 🙂
First Thx for sharing Tim.
Is it possible to make the cut between the different snowfalls a little bit smoother? You know what i mean?
Thx,
Max
Hi Max,
You could play with the code and see, but I don’t know off hand.
Asking for a friend: Does this works with an Elementor site?
Yeah it should work just fine!
Is there a way to apply it to the dark background of a Primary Menu Bar? I only seem to see a setting for background color, no option for CSS input? Thanks.
Hi Tim,
We don’t have snow here in Nigeria but I would like to know if I can have something else falling in place of the snow flakes. Like green Christmas trees?
For sure! Just replace the url for the ‘background-image’ in the code with the file path to your own image 🙂
An oldie but a goodie, and thank you Tim.
This year it added a nice touch of winter to a restaurant located in not-so-cold Chiang Mai, Thailand.
That’s great! I’m glad it was useful for you 🙂
Thanks Tim … that worked great on my site …. been implementing everything I’m learning from you and Josh getting my web design freelancer business going … thanks very much … rob
That’s awesome, Rob! I’m glad to hear it! 🙂
This is sooo good! Thank you very much!
You’re welcome! 🙂